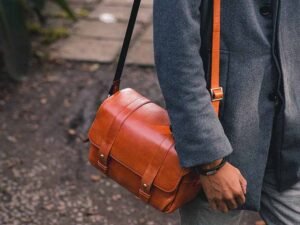
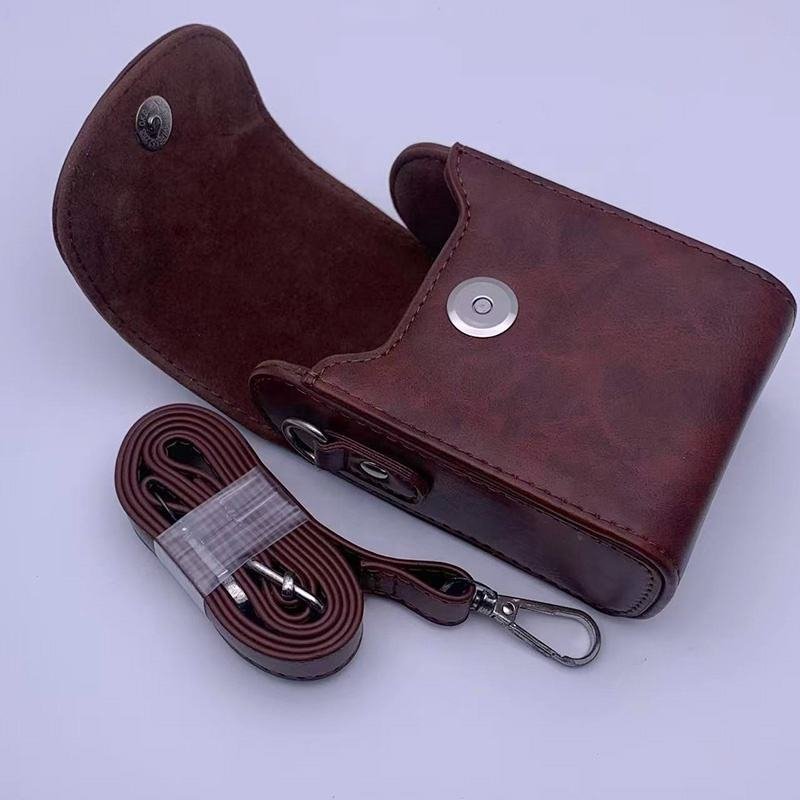
A leather camera bag can look excellent when it leaves the production line and still fail quickly in daily use. Edge damage often appears before the main leather surface wears out. Shoulder straps bend around the body, handles carry concentrated loads, flaps are opened repeatedly, and lower corners rub against floors, walls, car seats, and outdoor surfaces. When edge preparation is weak, paint may crack, layered leather may separate, and exposed fibers may absorb sweat, moisture, and dirt.
The most durable edge finish depends on the leather, bag structure, edge thickness, flexing frequency, and use environment. Edge paint works well on many chrome-tanned and layered leather components. Burnishing suits dense vegetable-tanned leather. Folded edges protect soft leather by hiding the cut section, while piping reinforces exposed seams and corners. No single technique is suitable for every part of a camera bag.
Consider two camera bags made with the same leather and hardware. One uses correctly leveled edges, compatible primer, controlled paint layers, and full curing. The other receives a thick coating over uneven leather without proper adhesion testing. Both may look similar on approval day, but after several months, one remains clean while the other begins to split around the strap and peel at the corners. Edge durability is decided long before the bag reaches the market.
What Is Leather Edge Finishing?
Leather edge finishing is the treatment of exposed leather cross-sections after cutting, skiving, bonding, folding, or sewing. Its purpose is to create a clean appearance while improving resistance to abrasion, moisture, dirt, fiber separation, and repeated bending. Edge finishing may include leveling, sanding, sealing, priming, painting, burnishing, folding, binding, or piping.
A cut leather edge exposes the internal fiber structure. The condition of those fibers varies greatly. Some vegetable-tanned leathers have dense fibers that can be compressed and polished. Soft chrome-tanned leather may have loose fibers that remain fuzzy after sanding. Pull-up leather may contain oils and waxes that reduce coating adhesion. Split leather may show a porous cross-section that requires more filling and sealing.
Camera bags place higher demands on edge construction than many small leather products. The bag may carry several kilograms of equipment, travel through changing climates, and remain in frequent contact with clothing and skin. For custom projects, edge treatment should be selected during material development rather than left as a final cosmetic decision.
Edge Functions
A finished edge performs several jobs at the same time.
- It covers exposed leather fibers and bonded layers.
- It reduces direct abrasion along straps, flaps, and panel openings.
- It limits the entry of moisture, sweat, dust, and hand oils.
- It creates a consistent color line around the product.
- It softens sharp cut edges that may feel uncomfortable against the body.
- It helps layered parts appear as one unified component.
- It supports the visual positioning of the camera bag.
Edge finish cannot repair weak construction. If the leather layers are poorly bonded, the edge may open underneath the paint. If the strap is too thin for the intended load, a smooth finish will not prevent stretching. Edge work must support the construction rather than hide production problems.
For product development, four questions should be answered before a finish is approved:
- Which leather and backing materials are exposed at the edge?
- How often will the component bend, rub, or carry weight?
- Does the design require a natural, clean, soft, or structured appearance?
- Can the chosen process remain consistent during bulk production?
Leather Structure
Leather type has a direct influence on edge performance. Tannage, fiber density, oil content, surface finish, and thickness all affect sanding, coating penetration, drying, and adhesion.
| Leather Condition | Edge Behavior | Main Production Concern | Suitable Direction |
|---|---|---|---|
| Firm vegetable-tanned leather | Dense fibers, good compression | Darkening during burnishing | Burnished or painted edge |
| Smooth chrome-tanned leather | Moderate fiber density | Primer compatibility | Painted or folded edge |
| Soft milled leather | Loose, flexible cross-section | Fuzzing and paint movement | Folded or bound edge |
| Pull-up leather | High oil and wax content | Weak paint adhesion | Tested paint system or controlled raw edge |
| Suede or nubuck | Open, fibrous edge | Difficult surface sealing | Folding, binding, or edge coating |
| Split leather | Porous and absorbent | High coating consumption | Filler, primer, and paint |
| Laminated leather part | Multiple visible layers | Stepped or separated edge | Leveling, sealing, and flexible paint |
Material approval should include an edge sample rather than only a flat leather swatch. A surface sample can show color and grain, but it does not reveal how the cut edge behaves after sanding, folding, or coating.
For example, two black chrome-tanned leathers may look nearly identical on the grain side. One may produce a compact edge with two or three coating layers, while the other may remain porous and require additional filler. The second material can increase labor, drying time, coating consumption, and defect risk even when its purchase price is lower.
Edge Thickness
Edge thickness affects both appearance and mechanical performance. A thin single-layer flap edge behaves differently from a laminated shoulder strap made from face leather, reinforcement, foam, and backing leather.
Common camera bag edge conditions may include:
| Component | Common Finished Thickness | Main Requirement |
|---|---|---|
| Decorative leather tab | 1.2–2.0 mm | Clean, controlled profile |
| Flap edge | 1.8–3.0 mm | Smooth handling and shape retention |
| Zipper opening | 1.5–2.5 mm | Flexibility and low bulk |
| Carry handle | 3.0–6.0 mm | Comfort, bonding, and load resistance |
| Shoulder strap | 3.0–5.5 mm | Repeated flexing and abrasion resistance |
| Strap anchor | 3.5–7.0 mm | Layer stability and load transfer |
| Piped body seam | Project-specific | Seam protection and shape definition |
These figures are development references rather than fixed rules. Final thickness depends on leather selection, reinforcement, bag size, expected payload, and construction method.
A thick edge does not automatically mean a stronger edge. Excessive thickness can produce a stiff handle, bulky corners, poor folding, and heavy paint buildup. A thin edge may look refined but can expose reinforcement lines or lose shape. The aim is to create enough material for structural performance without making the edge visually heavy.
Layered parts should be checked for thickness consistency at several points. A shoulder strap that measures 4.0 mm at one end and 5.2 mm near the center may show uneven rounding and irregular paint width. For premium production, factories should control skiving, reinforcement placement, adhesive amount, and pressing pressure before edge work begins.
Wear Zones
Camera bag edges face several different forms of wear. Each area should be reviewed according to movement, contact, load, and environmental exposure.
| Bag Area | Main Stress | Possible Failure | Recommended Focus |
|---|---|---|---|
| Shoulder strap sides | Bending and clothing friction | Hairline cracks, peeling | Flexible coating and bend testing |
| Carry handle | Hand oils and repeated pulling | Layer opening, discoloration | Strong bonding and sweat resistance |
| Bottom corners | Floor contact and impact | Scuffing, coating loss | Piping or reinforced edge |
| Front flap | Frequent opening | Polishing, edge dirt | Smooth sealed surface |
| Zipper opening | Repeated flexing | Waves, splitting | Thin folded or flexible painted edge |
| Side gusset | Compression and expansion | Paint stress marks | Flexible coating system |
| Strap anchor | Concentrated load | Delamination | Reinforcement and adhesion control |
| Internal divider | Light contact | Fiber fuzzing | Simple sealing or binding |
A good specification does not treat all edges equally. The shoulder strap may need a flexible finish, while the bottom panel may need stronger abrasion protection. The flap can prioritize appearance, while internal partitions may only require smoothness and fiber control.
During sample review, edge performance should be checked under movement rather than only on a flat table. Bend the strap, open the flap repeatedly, compress the gusset, and inspect the corners under strong side lighting. Small cracks often appear first where the edge changes direction or where thickness is uneven.
Raw Edges
Raw edges may suit rugged, heritage, handmade, or outdoor-inspired camera bags. The method exposes the natural cross-section instead of covering it with paint or folded leather. A successful raw edge still requires accurate cutting and material selection.
Suitable raw edges generally have:
- Dense internal fibers
- A clean die-cut or knife-cut line
- Limited surface fuzzing
- Controlled thickness
- Consistent edge color
- A design language that accepts natural darkening
- Enough leather strength to resist fiber separation
Raw edges are less suitable when the leather has a pale cross-section, loose fibers, visible backing layers, heavy coating, or high oil migration. A rough edge caused by weak cutting should not be presented as a natural design feature.
Brands should also consider color aging. Natural vegetable-tanned edges may darken through handling and exposure. Pull-up leather edges may change tone when bent. Such changes can support a heritage appearance but may conflict with a highly controlled fashion product.
When a raw edge is selected, the approved sample should define acceptable fiber texture, color variation, bevel width, and surface treatment. Without clear limits, bulk production can vary from clean and intentional to rough and unfinished.
Which Edge Finishing Techniques Are Used?
Leather camera bags commonly use painted edges, burnished edges, folded edges, piping, and binding. Each technique creates a different balance of appearance, flexibility, durability, labor cost, and production difficulty. A single bag can use several methods according to the function of each component.
The best method is selected after reviewing leather compatibility, component thickness, stress level, curve radius, repair expectations, target appearance, and order volume. A modern structured camera bag may use painted handle edges, piped body seams, folded zipper openings, and bound internal dividers.
| Technique | Best Application | Appearance | Main Strength | Main Risk |
|---|---|---|---|---|
| Edge paint | Straps, handles, tabs, flaps | Clean and controlled | Wide color choice | Cracking or peeling |
| Burnishing | Firm leather straps and details | Natural and handcrafted | No thick surface film | Limited leather compatibility |
| Folded edge | Soft leather flaps and openings | Smooth and refined | Cut edge remains hidden | Difficult skiving and folding |
| Piping | Body seams and corners | Structured and defined | Protects exposed seams | Extra bulk |
| Binding | Openings and internal panels | Functional and neat | Covers mixed materials | Wrinkling on curves |
Edge Painting
Edge painting places a flexible colored coating over the prepared leather cross-section. It is widely used for camera bag straps, handles, flap edges, zipper pulls, and layered leather components.
A controlled edge-paint process normally includes:
- Accurate cutting and bonding
- Edge leveling
- Initial sanding
- Dust removal
- Primer or base application
- Drying
- Light sanding
- Color coating
- Additional coating where required
- Final curing and inspection
The number of layers depends on leather porosity, edge thickness, coating viscosity, color, and required profile. A dense edge may achieve good coverage with fewer applications. A porous split edge may need a filler or base layer before color coating.
For many custom camera bag developments, the following control ranges can be used as starting points:
| Process Item | Development Reference |
|---|---|
| Initial sanding | Approximately 240–400 grit |
| Intermediate sanding | Approximately 400–800 grit |
| Number of coating applications | Commonly 2–5 controlled layers |
| Drying between layers | Based on coating system and workshop conditions |
| Final curing | Often 24–72 hours before stress evaluation |
| Edge profile | Flat, slightly rounded, or fully rounded |
| Color tolerance | Matched against approved sample or color standard |
Drying time should not be shortened only to speed production. A surface may feel dry while lower layers remain soft. Packing or bending too early can cause sticking, pressure marks, deformation, or later cracking.
Customers should request edge testing on the actual leather instead of approving color on a plastic strip or paper card. Edge paint can look different after drying because the leather absorbs part of the coating. Dark leather can influence bright colors, and porous edges may produce an uneven tone.
High-risk materials include:
- Oily pull-up leather
- Waxed leather
- Waterproof-treated leather
- Very soft milled leather
- Highly absorbent split leather
- Leather laminated with synthetic backing
- Components containing foam near the edge
For such materials, SzoneierLeather can prepare edge trials using alternative primers, coating viscosities, sanding sequences, and curing conditions before confirming the production process.
Burnishing
Burnishing smooths and compresses the exposed leather fibers through moisture, friction, pressure, heat, wax, or a burnishing compound. The method works especially well with firm vegetable-tanned leather.
A well-burnished edge should feel compact and smooth without loose fibers. The surface may remain natural, become darker through polishing, or receive wax and color treatment.
The process may include:
- Clean cutting
- Edge beveling
- Controlled moisture or compound application
- Rubbing with wood, canvas, or a machine wheel
- Fine sanding where needed
- Wax application
- Final polishing
Burnishing offers several advantages:
- Natural leather character remains visible
- No thick coating film is required
- Small wear marks can blend into the patina
- Suitable edges can be polished again during repair
- The finish works well with heritage-style products
However, burnishing is highly dependent on leather structure. Soft chrome-tanned leather often bends away from the tool and produces fuzzy fibers. Suede and heavily milled leather may not compact sufficiently. Adding more wax cannot correct an unsuitable fiber structure.
A brand developing a heritage camera strap should approve more than the color. The specification should include:
- Edge roundness
- Bevel size
- Final gloss level
- Degree of darkening
- Wax feel
- Acceptable natural variation
- Whether machine marks are allowed
A heavily polished edge can appear almost sealed, while a lightly burnished edge retains a softer handmade character. Both can be correct when defined clearly.
Folded Edges
Folded construction hides the raw edge by thinning the leather near the perimeter and wrapping the grain surface around the cut section. The folded area is bonded, pressed, and often stitched.
The method is commonly used for:
- Flap perimeters
- Pocket openings
- Zipper openings
- Shoulder pads
- Soft carry handles
- Premium body panels
- Leather-covered internal structures
Skiving control is critical. Leather left too thick produces bulky folds and difficult corners. Leather skived too thin may weaken, stretch, or show adhesive through the surface.
A folded edge usually requires decisions on:
| Detail | Development Question |
|---|---|
| Skiving width | How much leather must fold around the edge? |
| Remaining thickness | Can the fold bend without weakening? |
| Adhesive type | Will it bond with the selected leather finish? |
| Corner treatment | Will the leather be notched, stretched, or overlapped? |
| Stitch position | Is stitching decorative or load-bearing? |
| Fold width | Can production hold the approved width consistently? |
Curves and corners create the greatest difficulty. Tight curves can wrinkle on the inside of the fold. External corners may become thick when material overlaps. Skilled pattern adjustment and controlled skiving are needed to prevent lumps.
Folded edges feel soft and can suit luxury camera bags, yet they require more material and labor than simple edge painting. Production cost should be evaluated together with appearance and service life.
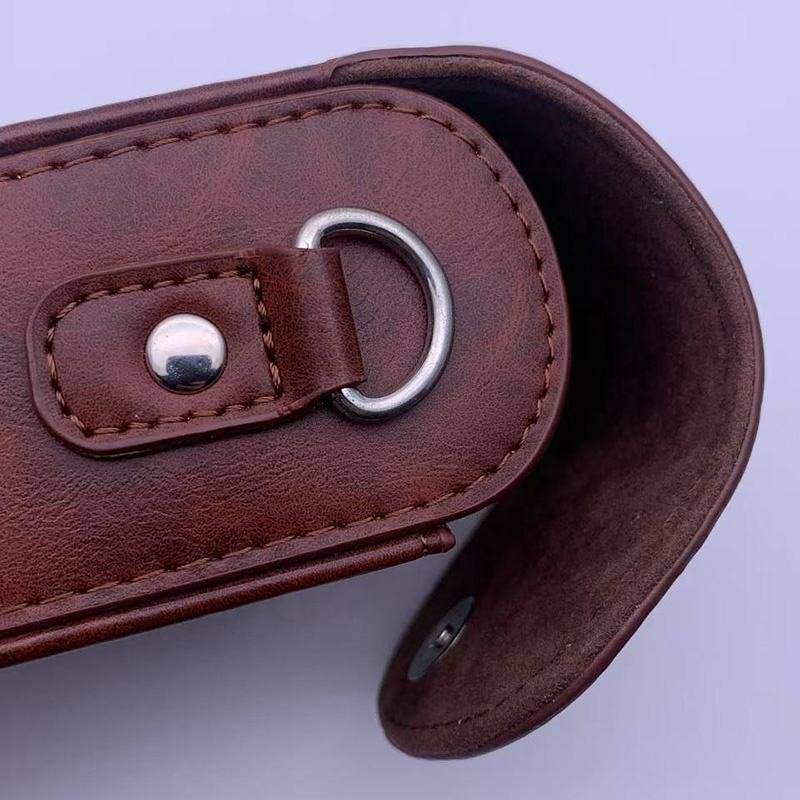
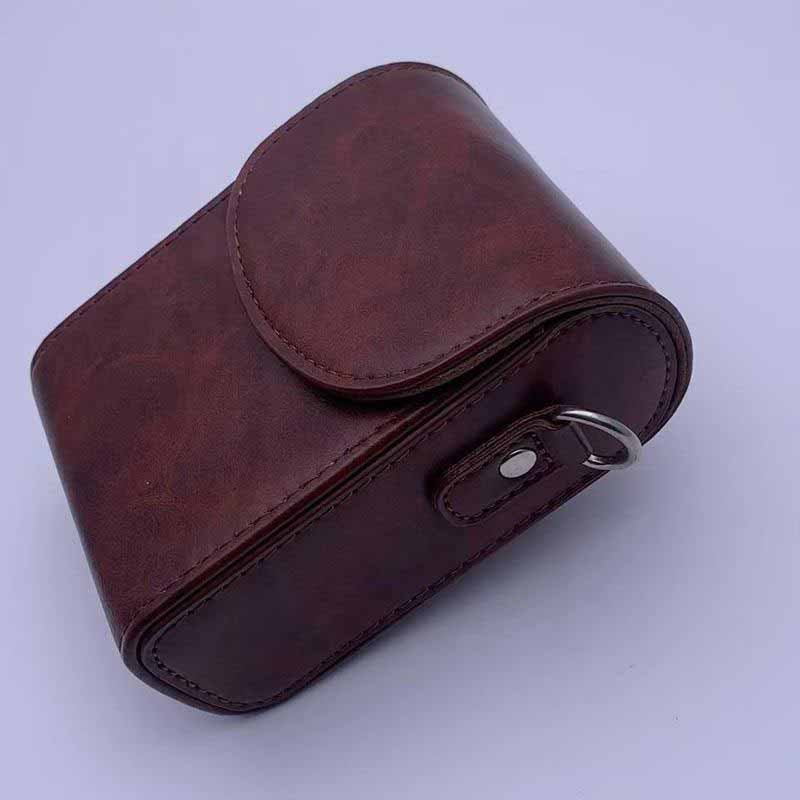
Leather Piping
Piping is made by wrapping a narrow strip of leather or synthetic material around a cord, foam core, or shaped filler. The covered strip is inserted into a seam and sewn between the body panels.
Piping provides three main benefits:
- It protects exposed panel seams.
- It defines the shape of a structured bag.
- It creates a replaceable contact point around corners.
Camera bags often use piping around the front panel, back panel, side gusset, or lid. Lower corners receive particular value because the raised piping contacts surfaces before the main body leather.
Piping development should control:
- Filler diameter
- Leather strip width
- Strip thickness
- Skiving consistency
- Stitching distance
- Seam allowance
- Corner tension
- Joint position
- Color matching
- Surface hardness
A piping core that is too large can make the bag appear heavy and can interfere with zipper or flap movement. A small soft core may flatten quickly and provide little protection. When leather is wrapped around tight corners, the outside layer must stretch evenly without cracking.
The piping joint should be placed in a less visible area whenever possible. Uneven overlap can create a hard lump, while a loose joint may separate during use. For structured camera bags, the joint position and finishing method should be included in sample approval photographs.
Premium Appearance
Premium edge work is defined by consistency, not by the most expensive technique. A clean burnished edge may suit a heritage camera bag better than glossy paint. A narrow folded edge may look refined on soft leather, while piping can create the controlled shape expected from a professional equipment bag.
Visual direction should guide the choice:
| Product Style | Suitable Edge Direction |
|---|---|
| Heritage camera bag | Burnished leather and controlled raw details |
| Modern minimalist bag | Matte or satin painted edges |
| Soft luxury bag | Fine folded edges |
| Outdoor travel bag | Piping and abrasion-resistant coating |
| Structured professional bag | Piped body with painted straps |
| Fashion camera bag | Contrasting edge paint |
| Vintage-inspired bag | Waxed burnishing and natural color variation |
Customers should inspect edge quality from several angles and under side lighting. Direct front lighting can hide waves, pits, and uneven coating.
Key approval points include:
- Consistent edge width
- No visible layer separation
- No pinholes or exposed fibers
- No paint overflow onto the leather surface
- Smooth corners without coating lumps
- Stable color from one component to another
- No tackiness after curing
- No cracking during controlled bending
- No sharp areas against the hand or body
- Neat piping joints
- Even folded widths
- Clean transitions at stitching and hardware
A premium camera bag should also maintain edge quality under load. Straps and handles need to be tested with weight because the edge profile changes when the leather stretches. A finish that looks perfect while unloaded may show cracks or separation when the bag carries a camera body, lenses, batteries, and accessories.
For custom production, SzoneierLeather develops edge finishing together with leather selection, reinforcement, pattern structure, stitching, and hardware placement. Early edge trials can reduce later sample revisions and help establish a production method that remains stable from the approved sample to the final order.
Which Technique Suits Each Leather?
The correct edge finish depends on leather tannage, fiber density, softness, oil content, thickness, backing material, and intended movement. Firm vegetable-tanned leather often supports burnishing, while chrome-tanned leather commonly needs edge paint or folding. Soft, oily, or heavily milled leather requires extra adhesion trials because a finish that works on one leather may fail on another with a similar surface appearance.
Leather selection and edge treatment should be developed together. Choosing the leather first and deciding the edge process only after sample assembly often leads to additional coating layers, uneven corners, or late changes in construction.
A factory should cut and finish test strips from the same leather lot intended for production. Surface swatches alone cannot reveal edge porosity, oil migration, fiber looseness, coating absorption, or bonding behavior.
| Leather Type | Edge Condition | Recommended Method | Main Risk |
|---|---|---|---|
| Vegetable-tanned leather | Dense and firm | Burnishing or edge paint | Uneven darkening |
| Chrome-tanned leather | Soft to medium density | Edge paint or folding | Fuzzing and coating movement |
| Pull-up leather | Oily and waxy | Tested coating, folding, or raw edge | Weak adhesion |
| Milled leather | Soft and flexible | Folding or flexible edge paint | Cracking during bending |
| Suede or nubuck | Open fiber structure | Binding, folding, or special coating | Rough exposed edge |
| Split leather | Porous cross-section | Filler, primer, and paint | High coating absorption |
| Bonded layered parts | Multiple materials | Leveling and flexible paint | Visible separation lines |
Vegetable-Tanned Leather
Vegetable-tanned leather is often selected for heritage camera bags, rigid straps, closure tabs, handle wraps, and structured accessories. Its relatively compact fiber structure allows the edge to be beveled, moistened, compressed, waxed, and polished.
Burnishing usually works best when the leather has enough firmness to hold its edge profile. Soft vegetable-tanned leather may still require paint or folding, especially around narrow curves.
Important production controls include:
- Cutting direction and blade sharpness
- Edge bevel width
- Moisture quantity during burnishing
- Pressure and speed of polishing
- Wax or compound amount
- Final edge color
- Gloss level
- Natural color variation
Excessive moisture can swell the edge and make the profile uneven. Too much friction can create dark or burnt areas. Heavy wax may produce an attractive shine at first but leave a sticky surface in warm conditions.
For painted vegetable-tanned edges, absorption should be checked before bulk production. Highly absorbent leather may pull liquid from the coating, creating a dry or uneven surface. A sealing or base layer can reduce absorption and improve color consistency.
Brands using natural vegetable-tanned leather should expect some edge darkening over time. Hand oils, sunlight, friction, and moisture gradually change the tone. Such aging often supports a heritage appearance, but approval samples should still define acceptable starting color and finishing quality.
Chrome-Tanned Leather
Chrome-tanned leather is widely used in camera bags because it can offer softness, color consistency, water resistance, flexibility, and a broad range of surface finishes. Edge painting and folded construction are the most common choices.
The internal fibers of chrome-tanned leather may be looser than those of firm vegetable-tanned leather. Sanding alone may not create a compact edge. A filler or primer is often needed to seal the fibers before color coating.
Chrome-tanned leather should be reviewed for:
- Fiber looseness after cutting
- Edge color compared with the grain surface
- Surface coating near the edge
- Stretch during sanding
- Primer absorption
- Paint adhesion
- Flexibility after curing
Very soft chrome-tanned leather can deform when pressure is applied during sanding. A factory may need to support the part with a rigid guide or finish several bonded layers together.
Folded edges can provide a cleaner result on soft leather because the grain surface covers the cut section. The fold also avoids a thick painted line on components that need a soft hand feel.
For structured parts, chrome-tanned leather may be laminated to microfiber, board, foam, or reinforcement fabric. Every layer must be bonded evenly before finishing. Paint cannot hold a poorly bonded stack together under repeated flexing.
Oily and Pull-Up Leather
Pull-up leather contains oils and waxes that move when the leather is bent or stretched. The shifting finish creates lighter and darker areas, giving the material a natural, aged appearance. The same oil content can make edge coating difficult.
Common risks include:
- Paint separating from the edge
- Primer remaining soft
- Color changing around the coating line
- Oil migrating into light-colored paint
- Edge paint lifting during bending
- Weak bonding between laminated layers
A standard paint formula should not be approved without adhesion testing. The factory may need to compare several primers, reduce surface oil, adjust sanding depth, or choose a more compatible finish.
For some pull-up leathers, a controlled raw edge or lightly sealed edge may age better than a heavy painted coating. Folding can also work when the leather is thin enough to skive and turn without creating bulk.
A development test should include small strips finished with different systems. Each strip can be bent, rubbed, warmed, and stored for several days. Immediate adhesion is not enough. Oil migration may take time to appear.
| Pull-Up Leather Test | What to Check |
|---|---|
| Initial adhesion | Paint does not lift when lightly scratched |
| Bend test | No separation along repeated curves |
| Warm storage | Surface remains dry and stable |
| White cloth rub | No excessive color or oil transfer |
| Layer bonding | Leather and reinforcement remain joined |
| Edge appearance | No dark halo or oil stain around paint |
Soft and Milled Leather
Soft milled leather is valued for comfort, natural grain, and a relaxed appearance. It is often used for shoulder pads, flap panels, soft body sections, and fashion-led camera bags.
Its edge can be difficult to control because the leather moves under pressure. Loose fibers may rise during sanding, and a rigid coating can crack when the part bends.
Suitable directions include:
- Folded edges for flaps and openings
- Binding for internal sections
- Flexible paint for layered straps
- Piping around body panels
- Thin coating systems for soft components
Painted edges should remain flexible after curing. A hard, thick coating may look smooth on a flat sample but split when the leather folds around the shoulder or compresses inside packaging.
Skiving must also be controlled carefully. Soft leather can stretch under the skiving blade, producing irregular thickness. Operators should check the remaining thickness at several points rather than judging only by appearance.
For folded edges, the adhesive should remain flexible. A hard adhesive line can be felt through the leather and may create a visible ridge. Pressing pressure should be sufficient to secure the fold without flattening the grain.
Layered Edges
Shoulder straps, carry handles, closure tabs, and attachment points are commonly made from several materials. A layered part may include face leather, reinforcement fabric, foam, board, and backing leather.
Before painting, the full stack should appear as one even edge. A visible step between layers usually becomes more obvious after color is applied.
Layered edges require control over:
- Material alignment
- Adhesive coverage
- Pressing pressure
- Reinforcement position
- Edge trimming
- Final thickness
- Sanding depth
- Coating flexibility
The strongest material should not always reach the outer edge. Some reinforcement fabrics can wick paint or create a visible line. A reinforcement layer may need to stop slightly inside the perimeter, depending on construction.
A laminated strap should be allowed to stabilize after bonding before final trimming. Cutting too soon can cause layers to shift. The edge may appear even at first and develop a step later as adhesive moisture leaves the structure.
For production approval, the edge should be inspected under magnification or strong side lighting. Fine separation lines, pinholes, and reinforcement shadows can be difficult to see under normal overhead lighting.
How Are Camera Bag Edges Finished?
Leather camera bag edges are finished through a controlled sequence of cutting, bonding, leveling, sanding, sealing, coating, drying, polishing, and inspection. Every step affects the next one. Clean paint cannot compensate for an uneven cut, and proper sanding cannot correct weak bonding. Stable results depend on accurate preparation, thin controlled layers, sufficient drying, and testing on the final construction.
The process should be documented for each major component. A handle edge may use a different sanding sequence and coating formula from a flap or zipper opening.
Cutting and Leveling
Accurate cutting is the foundation of a clean edge. Dull knives, damaged dies, or excessive cutting pressure can crush fibers and create irregular lines.
Leather parts may be cut with steel dies, CNC knives, laser systems, or manual tools. The method should suit the leather finish and production quantity.
Important cutting checks include:
- No torn fibers
- No jagged sections
- No compressed corners
- No heat damage
- Consistent part dimensions
- Clean holes and slots
- Correct grain direction
- Matching left and right components
Laser cutting can create dark or hardened edges on some leathers. Such edges may need additional sanding, and the heat-affected surface can influence coating adhesion. Laser suitability should be confirmed before bulk use.
After bonding, layered components are trimmed and leveled. A common sequence is coarse leveling followed by finer sanding.
| Edge Condition | Recommended Correction |
|---|---|
| Small layer offset | Sand until layers form one plane |
| Heavy adhesive line | Remove residue before coating |
| Loose fibers | Trim and seal |
| Deep knife mark | Recut or reject the part |
| Uneven corner | Reshape using a template |
| Reinforcement exposure | Adjust pattern or layer position |
Leveling should not remove too much leather. Excessive sanding can change the part width, expose reinforcement, or weaken the edge near stitching.
Edge Preparation
Preparation creates a stable surface for the chosen finish. Painted edges often require dust removal, fiber sealing, and primer application. Burnished edges may require beveling, moisture, compound, and polishing.
A painted edge should be free from:
- Sanding dust
- Excess adhesive
- Wax contamination
- Hand oil
- Loose fibers
- Water spots
- Surface coating residue
- Pencil or marker lines
Compressed air can remove dust, but air pressure should not drive particles into wet adhesive or damage soft leather. A clean cloth or controlled brush may be safer for delicate materials.
Primer improves adhesion and helps regulate absorption. It should be applied evenly without flooding the edge. Heavy primer can remain soft under later layers, while insufficient primer may allow fibers to reappear.
Some edges require filler before primer. Filler is useful for porous leather, visible layer gaps, or coarse backing materials. It should level the surface rather than create a thick artificial shell.
A simple preparation approval sample can compare:
- Paint without primer
- Standard primer plus paint
- Filler, primer, and paint
- Adhesion promoter plus paint
The comparison shows whether extra steps actually improve performance. More layers do not always mean better quality.
Paint Application
Edge paint may be applied manually, by roller, with a pen-type applicator, through a machine wheel, or with automated equipment. The method depends on component shape, production volume, edge width, and required consistency.
Manual application gives good control around corners and short runs. Machine application improves speed and uniformity on straight straps or larger orders.
A controlled coating layer should cover the edge without dripping onto the grain surface. Several thin applications usually provide better drying and flexibility than one heavy application.
Key process variables include:
| Variable | Effect on Quality |
|---|---|
| Paint viscosity | Controls flow and coverage |
| Applicator speed | Affects thickness and smoothness |
| Edge absorption | Influences color and layer count |
| Workshop temperature | Changes drying speed |
| Humidity | Affects curing and surface formation |
| Layer thickness | Influences flexibility and cracking |
| Drying interval | Prevents trapped moisture |
| Edge orientation | Reduces runs and paint buildup |
Bright colors often require extra preparation over dark leather. White, yellow, red, and pastel coatings may show the underlying edge color unless a suitable base is applied.
Color matching should be approved after full drying. Wet paint often appears darker or glossier than the cured surface. Inspection under controlled lighting reduces disagreement between sample approval and bulk production.
Sanding Between Coats
Intermediate sanding removes surface irregularities and helps the next layer form a smoother profile. It can correct small ridges, pinholes, raised fibers, and applicator marks.
Sanding should be light and even. Aggressive sanding may cut through the coating and expose leather, creating color differences after the next application.
A common development sequence may use:
- 240–400 grit for initial edge leveling
- 400–600 grit after base or filler
- 600–800 grit between color layers
- Finer abrasive for a smooth final profile where required
Exact grit depends on leather hardness and coating system. Numbers should be treated as working references, not rigid production rules.
Operators should pay special attention to:
- Corners
- Strap ends
- Stitching transitions
- Hardware openings
- Curved flap edges
- Piping joints
Dust must be removed before the next coat. Trapped particles create bumps and weak spots.
Sanding also controls edge shape. A flat modern edge requires different hand pressure from a rounded luxury profile. The approved sample should define whether the edge is flat, lightly domed, or fully rounded.
Corners and Curves
Corners are among the most difficult areas to finish because coating tends to collect at changes in direction. Tight curves may also expose uneven sanding or stretching.
Common corner defects include:
- Paint lumps
- Thin coverage at the outer radius
- Cracks at sharp bends
- Uneven roundness
- Visible layer steps
- Fold wrinkles
- Piping distortion
Patterns should avoid unnecessarily sharp corners where possible. A slightly larger radius can improve cutting, sanding, painting, and wear resistance without changing the overall design.
For painted corners, applicator speed should remain controlled. Extra paint should not be added merely because the area is difficult to reach. A thick corner deposit cures more slowly and may become brittle.
Folded corners require accurate notching or controlled stretching. Too many notches can weaken the fold; too few can create wrinkles.
Piped corners need balanced tension. Pulling too tightly can flatten the filler, while loose application creates waves.
Corner approval should include enlarged photographs and physical handling. Photographs alone may hide hard lumps or sharp edges.
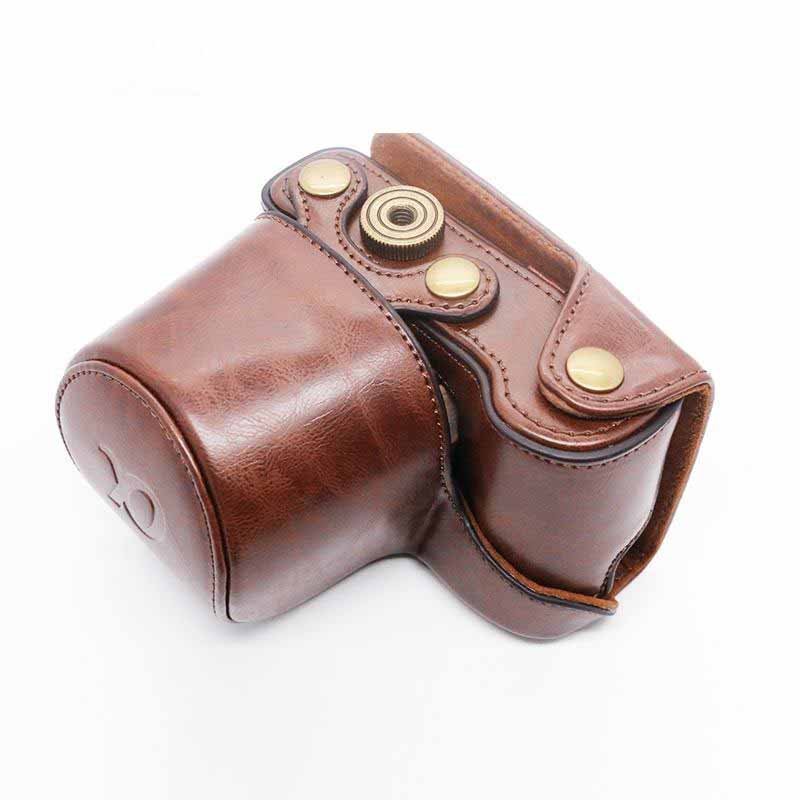
Straps and Handles
Straps and handles require special attention because they carry weight and bend frequently. Edge finish must remain smooth without limiting flexibility.
Before finishing, the construction should be checked for:
- Correct reinforcement length
- Even padding
- Balanced thickness
- Strong layer bonding
- Smooth transitions at anchor points
- No exposed fabric
- Consistent width
- Proper stitch distance
Painted strap edges should be tested under repeated bending. A simple development check can involve bending the strap around a cylinder with a diameter similar to the curve formed during use.
The edge should be inspected for:
- Hairline cracks
- Whitening
- Peeling
- Layer separation
- Surface stickiness
- Color transfer
- Permanent deformation
Carry handles also face sweat and hand oils. Light-colored edge paint should be checked for staining, while dark coatings should be checked for transfer onto clothing or hands.
The transition between the handle and its anchor is a frequent failure point. A sharp thickness change concentrates stress and may crack the coating. Gradual skiving and smooth reinforcement transitions reduce the risk.
Curing and Process Control
Curing allows water, solvents, or reactive components in the coating system to leave or stabilize. An edge that feels dry on the surface may still be soft underneath.
Depending on the coating system, leather, layer count, and workshop conditions, final curing may require 24–72 hours before full evaluation. Some systems may need a different period, so supplier instructions and factory trials should guide production.
During curing, parts should be stored without:
- Edge-to-edge contact
- Heavy stacking
- Tight folding
- Plastic pressure marks
- Excessive heat
- Dust exposure
- Direct sunlight
Premature assembly can damage the coating. A freshly painted strap folded into a small bag may stick to itself or develop pressure marks.
Production records should include:
| Record | Purpose |
|---|---|
| Leather lot number | Tracks material variation |
| Paint batch | Controls color and formulation |
| Primer type | Confirms adhesion system |
| Layer count | Maintains edge profile |
| Drying interval | Prevents rushed production |
| Workshop conditions | Explains curing variation |
| Inspection result | Identifies repeated defects |
| Rework quantity | Measures process stability |
Bulk production should be checked at the beginning, middle, and end of the order. Leather behavior can vary between hides, and coating viscosity can change during the working day.
For custom camera bag orders, SzoneierLeather can develop separate edge standards for straps, handles, flaps, bottom corners, zipper openings, and internal parts. The approved process can include edge color, profile, gloss level, layer count, curing time, and inspection requirements. Such control gives customers a clearer basis for approving samples and evaluating bulk production.
How Is Edge Quality Evaluated?
Leather camera bag edge quality is evaluated through visual inspection, touch inspection, bending, rubbing, adhesion checks, load simulation, and comparison with the approved sample. A good edge should remain smooth, flexible, firmly bonded, evenly colored, and free from sharp points, exposed fibers, paint overflow, cracking, or peeling. Inspection should focus on high-stress areas rather than judging only the easiest straight edges.
A finished camera bag can pass a quick appearance check and still develop edge problems after regular use. For that reason, inspection should cover the relationship between leather, adhesive, reinforcement, stitching, coating, and component movement.
The approved sample should become the production reference for:
- Edge color
- Edge thickness
- Surface smoothness
- Gloss level
- Profile shape
- Fold width
- Piping diameter
- Corner appearance
- Flexibility
- Acceptable natural variation
Physical samples are more useful than photographs alone. Lighting, camera exposure, image compression, and screen settings can hide small cracks or make normal leather variation appear more severe.
Edge Cracking
Edge paint cracks when the coating cannot move with the leather underneath it. The problem often appears on shoulder straps, handle bends, flap hinges, zipper openings, and soft gussets.
Common causes include:
- Coating layers are too thick.
- The selected paint is too rigid.
- Drying time between layers is too short.
- Lower layers remain soft while the surface cures.
- The leather is highly flexible or stretchy.
- The edge contains an abrupt thickness change.
- Reinforcement ends too close to a bending point.
- The component is folded or packed before full curing.
- Primer and topcoat have different flexibility.
- The edge is bent beyond the radius used during development.
Cracking may appear as fine hairlines, larger open splits, or white stress marks. Hairline cracks often begin at corners or near stitching holes because these areas have concentrated movement.
| Crack Pattern | Likely Cause | Recommended Correction |
|---|---|---|
| Fine lines along the full strap | Coating too hard or too thick | Use a more flexible system and thinner layers |
| Crack at one anchor point | Abrupt reinforcement or thickness change | Improve skiving and reinforcement transition |
| Crack only at corners | Paint buildup or sharp radius | Reduce coating accumulation and enlarge radius |
| White lines without opening | Surface stress or pigment movement | Adjust coating flexibility and curing |
| Deep split exposing leather | Poor adhesion or excessive movement | Rework preparation and test another system |
| Cracks after packaging | Premature folding or pressure | Increase curing time and change packing method |
A practical inspection should bend the component in the same way it will move during use. A shoulder strap should be curved around a rounded form. A flap should be opened and closed repeatedly. A handle should be pulled upward under load.
The test should not be limited to one movement. Edge coatings can survive the first few bends and begin to crack after repeated cycles.
For project development, a brand may define internal bend checks such as:
- 100 cycles for early sample screening
- 500 cycles for process comparison
- 1,000 or more cycles for high-flex components
- Inspection after 24 hours to identify delayed cracking
These numbers are project-control references rather than universal standards. The suitable target depends on leather thickness, bag position, expected retail price, and use frequency.
Edge Peeling
Peeling occurs when the coating separates from the leather edge or when bonded leather layers separate underneath the coating. The surface may lift in flakes, strips, or small bubbles.
Peeling is usually linked to adhesion rather than flexibility alone.
Main causes include:
- Oil, wax, dust, or adhesive contamination
- Incompatible primer
- Insufficient sanding
- Over-polished edge surface
- Paint applied over loose fibers
- Weak bonding between leather layers
- Excessive moisture trapped under the coating
- Oil migration from pull-up leather
- Heavy coating applied in one pass
- Heat exposure before full curing
A simple fingernail scratch test can identify very weak adhesion, but it should not be the only method. Some coatings resist light scratching and still peel after bending or rubbing.
Adhesion should be checked in several ways:
- Light scratch across a hidden section
- Controlled bending at the intended radius
- Dry cloth rubbing
- Damp cloth rubbing
- Tape pull on a prepared test strip
- Inspection after warm storage
- Inspection after loaded movement
When the paint peels but the leather layers remain bonded, the problem is mainly within the coating system. When the entire edge opens into separate layers, the failure may come from adhesive coverage, pressing pressure, reinforcement placement, or unstable materials.
| Failure Area | What It Usually Indicates |
|---|---|
| Paint lifts from clean leather | Primer or surface preparation problem |
| Paint lifts with loose fibers attached | Weak leather edge structure |
| Layers open under intact paint | Bonding failure |
| Peeling appears after warming | Oil migration or incomplete curing |
| Peeling starts at stitch holes | Stress concentration or paint overflow |
| Small bubbles form under paint | Trapped moisture, air, or contamination |
For oily leather, testing should continue for several days because migration may not appear immediately. A test strip that looks stable on the first day may develop a dark line, soft coating, or reduced adhesion later.
Flexibility Testing
Flexibility testing checks whether the edge can move repeatedly without cracking, peeling, whitening, becoming sticky, or separating from the leather.
Different camera bag components need different test movements.
| Component | Suggested Test Movement | Main Inspection Point |
|---|---|---|
| Shoulder strap | Repeated bending around a rounded form | Cracks and whitening |
| Carry handle | Pulling and flexing under load | Layer separation |
| Front flap | Repeated opening and closing | Hinge-area cracking |
| Side gusset | Compression and expansion | Coating movement |
| Zipper opening | Repeated zipper operation | Edge waves and peeling |
| Strap anchor | Loaded pulling | Delamination and stitch stress |
| Shoulder pad | Curving against a body-shaped form | Surface hardness and comfort |
The bend radius should reflect actual use. Bending a thick strap sharply in half can create an unrealistic failure, while testing only a gentle curve may miss real problems.
The factory and customer should agree on:
- Bend radius
- Number of cycles
- Test speed
- Whether weight is applied
- Inspection timing
- Acceptable surface change
- Rejection conditions
A finish does not need to remain visually untouched after severe testing, but it should not develop structural failure during normal use. Minor polishing may be acceptable on a heritage design. Open cracks and peeling are generally unacceptable.
For handles and straps, testing under weight is important. A component may bend differently when carrying a loaded camera bag. Reinforcement stretches, leather layers move, and the edge coating is placed under greater tension.
A sample load test may use the intended working load plus a safety margin agreed during product development. The actual target should be based on bag size, strap structure, hardware strength, and intended equipment capacity.
Abrasion and Rub Testing
Abrasion testing checks how the edge responds to repeated contact with clothing, hands, floors, tables, and equipment.
Bottom corners, strap edges, flap edges, piping, and handle surfaces should receive the most attention.
Early development checks may include:
- Dry cotton cloth rubbing
- Damp cloth rubbing
- Rubbing against woven fabric
- Controlled contact with a rough surface
- Corner contact simulation
- Repeated hand friction
- Color-transfer inspection using white cloth
The purpose is not only to check whether paint wears away. Testing should also identify:
- Excessive color transfer
- Sticky coating
- Gloss change
- Surface roughness
- Edge whitening
- Fiber exposure
- Paint softening
- Piping flattening
- Fold lifting
| Test Result | Possible Meaning |
|---|---|
| Color transfers to white cloth | Pigment or coating is not fully stable |
| Surface becomes sticky | Incomplete curing or heat sensitivity |
| Edge becomes glossy | Friction polishing |
| Fibers appear after light rubbing | Insufficient sealing |
| Paint wears at corners first | Weak abrasion resistance or poor coverage |
| Fold begins to lift | Adhesive or skiving problem |
| Piping becomes flat | Core is too soft or too small |
Rub testing should compare finished samples from more than one leather section. Natural leather varies across a hide. Shoulder, belly, and central areas can have different fiber structures, affecting edge performance.
For bulk inspection, inspectors should examine both visible and hidden areas. A hidden strap end can reveal coating thickness, while the main visible edge shows color and surface consistency.
Visual Defects
Visual inspection should be performed under clear lighting and from several angles. Strong side lighting is particularly useful because it reveals waves, dents, pinholes, raised fibers, and uneven coating thickness.
Common edge defects include:
- Exposed leather fibers
- Visible reinforcement
- Uneven edge width
- Paint overflow
- Color mismatch
- Pinholes
- Bubbles
- Sagging paint
- Thick corner buildup
- Sanding scratches
- Sharp points
- Uneven gloss
- Fold wrinkles
- Loose folded sections
- Piping waves
- Piping joint lumps
- Visible layer separation
- Adhesive stains
A useful inspection method is to divide defects into three levels.
| Defect Level | Meaning | Example |
|---|---|---|
| Critical | May affect safety or structure | Strap layer opening near an anchor |
| Major | Clearly affects appearance or durability | Cracked paint, peeling, exposed fibers |
| Minor | Small cosmetic variation | Slight gloss difference in a hidden area |
The acceptance level should reflect product position and selling price. A premium leather camera bag normally requires tighter visual control than a rugged utility product with intentionally natural edges.
However, natural leather variation should not be confused with poor workmanship. Grain changes, small color variations, and slight natural marks may be acceptable when they do not weaken the edge or disrupt the approved appearance.
Production Inspection
Edge quality should be checked during production, not only after the full order is completed.
A practical inspection plan may include:
- First-piece approval after setup
- Inspection after the first coating layer
- Inspection after final coating and curing
- Random checks during assembly
- Inspection before packing
- Final shipment inspection
First-piece approval is especially important when:
- A new leather lot is introduced.
- Paint color changes.
- Primer changes.
- Workshop temperature or humidity changes significantly.
- A new operator begins the process.
- Component thickness changes.
- Production moves to another line.
| Production Stage | Main Check |
|---|---|
| After cutting | Clean lines and correct dimensions |
| After bonding | No layer movement or adhesive gaps |
| After leveling | Smooth and consistent edge plane |
| After primer | Even absorption and fiber control |
| After color coating | Coverage, color, and surface profile |
| After curing | Flexibility, adhesion, and tackiness |
| After assembly | No damage from sewing or hardware fitting |
| Before packing | No pressure marks or edge contact |
Sampling frequency can be defined according to order size, product risk, production history, and customer requirements. High-risk areas such as straps and handles may need a higher inspection rate than simple decorative tabs.
Production records should track defect type and location. When several defects appear in the same area, the factory should correct the process rather than continue reworking finished parts.
Rework Limits
Not every edge defect should be repaired. Some defects can be corrected cleanly, while others indicate a deeper construction problem.
Suitable rework may include:
- Light sanding of a small surface ridge
- Cleaning minor paint overflow
- Adding a controlled coating layer
- Polishing a slightly rough burnished edge
- Replacing a damaged piping section before final assembly
Parts should usually be replaced when they show:
- Deep cracks
- Weak layer bonding
- Exposed reinforcement caused by over-sanding
- Major shape distortion
- Repeated paint peeling
- Damaged grain surface
- Excessive coating buildup
- Weak folded corners
- Severe color contamination
Repeated sanding and repainting can change the edge profile. A repaired edge may become wider, harder, or darker than the approved sample. Rework quantity should therefore be monitored as a production-quality indicator.
Edge Specifications
A clear product specification reduces disagreement during sample approval and bulk inspection. Statements such as “high-quality painted edge” are too general for production control.
An edge specification should include:
- Leather name and thickness
- Component name
- Edge method
- Edge color reference
- Primer or sealing requirement
- Profile shape
- Gloss level
- Expected layer count
- Fold width
- Piping diameter
- Acceptable natural variation
- Bend-test requirement
- Rub-test requirement
- Rejection defects
- Approved sample reference
An example specification for a shoulder strap could read:
| Item | Example Requirement |
|---|---|
| Component | Adjustable shoulder strap |
| Construction | Face leather, reinforcement, backing leather |
| Finished thickness | 4.0–4.8 mm |
| Edge method | Flexible painted edge |
| Edge profile | Slightly rounded |
| Color | Matched to approved black sample |
| Surface | Smooth satin finish |
| Curing | Fully cured before folding and packing |
| Bend check | No open cracks or peeling after agreed cycles |
| Rub check | No visible color transfer to dry white cloth |
| Rejection | Exposed fibers, tackiness, delamination, heavy corner buildup |
Specifications should be realistic for the selected leather. Natural materials cannot always produce the same absolute uniformity as molded plastic or coated synthetic material. The goal is controlled variation within an agreed range.
Finish Selection
The best finish should be chosen according to the bag’s use, leather, design direction, and stress map.
| Product Requirement | Recommended Direction |
|---|---|
| Clean modern appearance | Painted edges |
| Heritage leather character | Burnished edges |
| Soft luxury hand feel | Folded edges |
| Strong corner protection | Piping |
| Mixed leather and textile layers | Binding or painted construction |
| Oily pull-up leather | Tested coating, folding, or controlled raw edge |
| High-flex shoulder strap | Flexible paint or folded edge |
| Structured body panels | Piping with selected painted details |
| Minimal production variation | Process suited to stable machine control |
| Easy future repair | Burnishing or replaceable piped construction |
Customers should avoid choosing edge treatment only from a product photograph. A technique may look attractive but be unsuitable for the selected leather or price structure.
The decision should consider:
- How the bag will be carried
- Estimated equipment weight
- Climate and moisture exposure
- Leather softness
- Desired appearance
- Order quantity
- Repair expectations
- Packaging method
- Production consistency
- Target retail position
A camera bag designed for street photography may need a soft shoulder strap, quiet opening, and flexible edges. A professional travel bag may require stronger piping, reinforced corners, and abrasion-resistant painted components. A heritage camera case may accept natural edge darkening as part of its character.
Custom Development
SzoneierLeather supports edge finishing as part of the complete camera bag development process rather than treating it as a last production step.
With more than 18 years of leather goods research and manufacturing experience, SzoneierLeather works with different leather structures, bag shapes, hardware systems, linings, reinforcements, and packaging requirements.
For a new project, customers can provide:
- Product drawings
- Reference photographs
- Existing samples
- Target dimensions
- Camera capacity
- Preferred leather
- Logo artwork
- Color requirements
- Target order quantity
- Packaging expectations
- Required test standards
- Target market
The development team can then review which edges should be painted, burnished, folded, piped, bound, or left natural. Separate methods can be used for straps, handles, flaps, zipper openings, bottom corners, internal dividers, and decorative parts.
A well-developed edge finish protects more than appearance. It supports long-term product value, reduces early complaints, improves consistency across production, and helps a camera bag maintain a refined look after repeated carrying and travel.
Send SzoneierLeather your camera bag concept, dimensions, reference images, leather preference, and estimated order quantity. Our team can evaluate the structure, recommend suitable edge treatments, develop samples, and prepare a custom manufacturing quotation for your project.