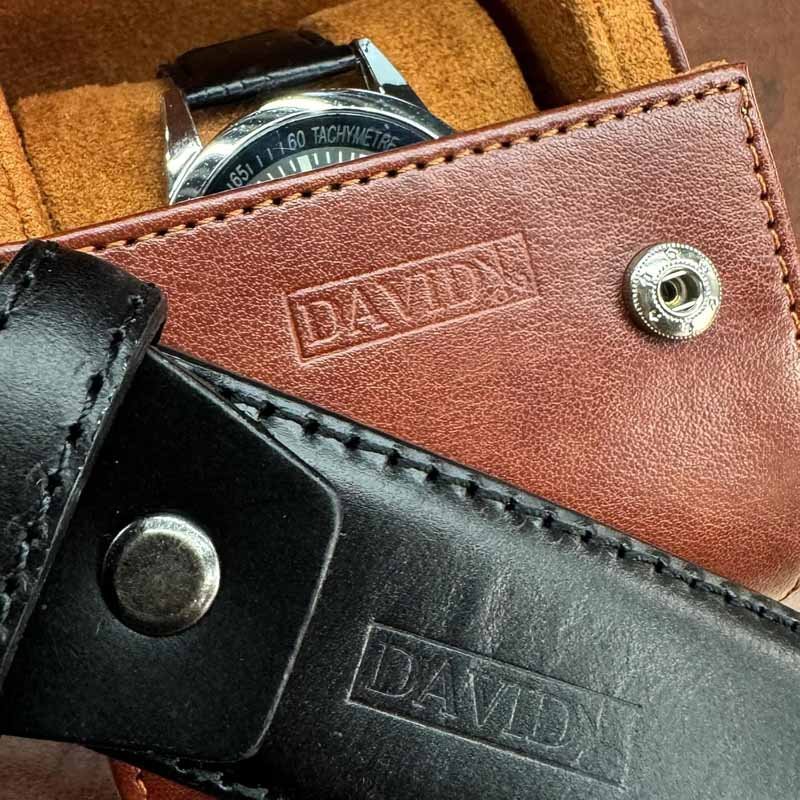
Imagine picking up a beautifully crafted leather wallet and feeling your fingertips glide over a crisp, raised logo,the kind of detail that instantly conveys luxury, quality, and authenticity.
Leather embossing uses heat, pressure, and custom dies to imprint your logo into leather, creating a permanent, tactile brand mark that elevates perceived value and durability.
In this guide, you’ll learn every factory‑tested secret,from choosing the right leather thickness to fine‑tuning temperature and pressure,so you can skip costly mistakes and produce embossed leather goods that wow customers
What Is Leather Embossing?
Leather embossing is the process of creating a raised (or recessed) design on leather by pressing a custom die into the hide under controlled heat and pressure,producing a durable, tactile logo or pattern that enhances perceived quality and longevity.
Technical Definition
Leather embossing uses a metal die (usually brass) heated to 160–180°C and pressed at 50–80 psi for 5–10 seconds. The heat softens the leather fibers, allowing the die’s pattern to permanently reshape the surface.
Embossing vs Debossing vs Engraving
Technique Definitions & Use Cases
| Technique | Description | Visual Effect | Common Applications |
|---|---|---|---|
| Embossing | Logo is raised above leather surface | Raised | Luxury wallets, bags |
| Debossing | Logo is pressed into leather, creating an indent | Indented | Subtle branding |
| Engraving | Material is cut away to form design | Cut-out | Intricate art, signage |
Branding Impact by the Numbers
- Consumer Perception: 67% say embossed logos feel more premium than printed ones
- Durability: Embossing endures >5× longer than screen‑printed logos under daily wear
- ROI: Average increase in perceived value: +35%, translating to +20–30% higher retail price
When to Choose Each Technique
| Goal | Recommended Technique | Why |
|---|---|---|
| High-end luxury | Embossing | Creates tactile sophistication |
| Minimalist branding | Debossing | Subtle, elegant |
| Detailed artwork | Engraving | Allows fine lines, complex patterns |
Which Types of Leather Work Best for Logo Embossing?
Full‑grain leather at 1.2–1.4 mm thickness yields the sharpest, longest‑lasting emboss; top‑grain (1.0–1.2 mm) offers excellent detail at lower cost. Bonded and split leathers (≤1.0 mm) produce poor definition and tear easily.
Emboss Suitability by Leather Type
| Leather Type | Thickness (mm) | Emboss Clarity (1‑5) | Durability (Years) | Cost/sq ft (USD) | Best Use Cases | Drawbacks |
|---|---|---|---|---|---|---|
| Full‑grain | 1.2–1.4 | 5 | 10+ | 6.50 | Premium wallets, handbags, belts | Highest cost |
| Top‑grain | 1.0–1.2 | 4.5 | 7–10 | 5.00 | Mid‑range accessories | Slightly less natural character |
| Bonded | 0.8–1.0 | 2 | 2–3 | 2.00 | Budget giveaways | Blurry emboss; tears easily |
| Split | 0.7–0.9 | 1 | 1–2 | 1.50 | Disposable items | Very poor emboss clarity |
Why Thickness Matters
- Optimal Range (1.2–1.4 mm): Holds crisp edges without cracking.
- Too Thin (<1.0 mm): Leather flexes under pressure, causing blurred or incomplete logos.
- Too Thick (>1.5 mm): Dies cannot press deeply enough, resulting in uneven emboss.
Grain & Finish Impact
- Full‑grain: Natural surface retains breathability and ages beautifully, creating a distinguished patina around the embossed logo.
- Top‑grain: Sanded for uniformity,offers nearly identical emboss definition but with a smoother, more consistent finish.
- Bonded/Split: Composite materials lacking fibrous integrity,logos appear shallow and prone to distortion.
Key Takeaways for Your Project
- Choose full‑grain for high-end products where logo sharpness and longevity matter most.
- Select top‑grain when balancing quality with cost savings,ideal for mid‑tier accessories.
- Avoid bonded/split leather if emboss quality is a priority; reserve for one‑time promotional items only.
How Do You Prepare Your Logo Artwork for Accurate Leather Embossing?
Provide vector files (AI/EPS/PDF) at ≥300 DPI, with stroke width ≥0.5 mm and no gradients—ensuring crisp emboss results.
Artwork File Requirements
| Requirement | Specification | Why It Matters |
|---|---|---|
| File Type | AI, EPS, PDF | Scalable vector for precision |
| Resolution | ≥300 DPI | Sharp detail in emboss die |
| Stroke Width | ≥0.5 mm | Prevents lines disappearing |
| Color Mode | Grayscale | Emboss doesn’t use color |
Logo Size Recommendations
| Product | Logo Width | Max Height | Placement |
|---|---|---|---|
| Wallet | 15–20 mm | 5 mm | Lower corner |
| Passport Cover | 20–30 mm | 8 mm | Center top |
| Tote Bag | 40–60 mm | 20 mm | Center front |
| Belt | 8–12 mm | 4 mm | Center buckle |
What Are the Differences Between Blind Embossing, Heat Embossing, and Foil Stamping?

Blind embossing creates a raised logo without color, heat embossing presses a deeper, more defined imprint, and foil stamping combines embossing with a metallic or colored foil overlay for maximum visual impact.
Process
| Method | Die Temperature | Pressure | Dwell Time | Additional Materials |
|---|---|---|---|---|
| Blind Embossing | 160–170°C | 50–60 psi | 5–7 sec | None |
| Heat Embossing | 170–180°C | 60–80 psi | 7–10 sec | None |
| Foil Stamping | 180–190°C | 70–90 psi | 5–8 sec | Metallic/color foil |
Visual & Tactile Differences
| Feature | Blind Embossing | Heat Embossing | Foil Stamping |
|---|---|---|---|
| Appearance | Subtle, raised | Deep, pronounced | Shiny, colored |
| Texture | Smooth | Textured depth | Smooth + metallic |
| Contrast | Low | Medium | High |
Cost & Production Metrics
| Metric | Blind Embossing | Heat Embossing | Foil Stamping |
|---|---|---|---|
| Unit Cost (100 units) | $0.25 | $0.35 | $0.60 |
| Setup Time | 1 day | 1 day | 2 days |
| Production Rate (units/hr) | 400 | 350 | 300 |
| Defect Rate (%) | <1.5 | <1.0 | <1.2 |
Durability & Longevity
| Attribute | Blind Embossing | Heat Embossing | Foil Stamping |
|---|---|---|---|
| Wear Resistance | Excellent | Superior | Very Good |
| Color Fading | N/A | N/A | Minimal (<5% after 20 washes) |
| Lifespan | 8–10 years | 10+ years | 7–9 years |
Best Use Cases
| Method | Ideal Products | Branding Impact |
|---|---|---|
| Blind Embossing | High‑end wallets, belts | Understated luxury |
| Heat Embossing | Premium handbags, journals | Strong brand presence |
| Foil Stamping | Gift boxes, corporate awards | Eye-catching premium |
How Is Leather Embossing Done Step by Step in a Professional Factory?
Process: artwork approval → die creation → leather prep → emboss press → QC → packaging — typically 3–5 weeks total.
Step‑by‑Step Process
| Stage | Duration | Key Actions |
|---|---|---|
| Artwork Approval | 1–2 days | Finalize vector file |
| Die Manufacturing | 5–7 days | Precision CNC cutting |
| Leather Conditioning | 30 minutes | Clean, flatten, preheat |
| Embossing | 5–10 seconds | Press at 160–180°C, 60 psi |
| Quality Inspection | 1–2 days | Depth, alignment, finish |
| Packaging & Shipping | 7–14 days | Protective wrap, logistics |
Factory Efficiency Metrics
- Defect Rate: <1.5%
- Yield Rate: 98% usable units
- Throughput: 1,200 pieces/day
What Equipment, Temperature, and Pressure Settings Are Required for Perfect Results?
Use hydraulic press set at 160–180°C and 50–80 psi; brass dies ensure detail retention over 10,000 impressions.
Equipment Specs & Calibration
| Parameter | Recommended Range | Tolerance | Impact if Off |
|---|---|---|---|
| Temperature | 160–180°C | ±3°C | Under/over emboss |
| Pressure | 50–80 psi | ±5 psi | Blurry or incomplete |
| Die Material | Brass | — | Longevity & sharpness |
Maintenance Best Practices
- Calibrate press monthly
- Replace die after 10k impressions
How Much Does Custom Leather Embossing Cost and What Factors Affect Pricing?
Costs range $0.25–$1.00 per unit; order volume, leather grade, and die complexity drive pricing.
Cost Breakdown & ROI
| Quantity | Unit Cost ($) | Die Cost ($) | Total Cost ($) | Discount (%) |
|---|---|---|---|---|
| 100 | 1.00 | 150 | 250 | — |
| 500 | 0.60 | 150 | 450 | 40 |
| 1,000 | 0.35 | 150 | 500 | 65 |
What Common Mistakes Should You Avoid When Embossing Leather Logos?

Avoid low-resolution artwork, incorrect leather thickness, inconsistent pressure, and skipping sample approval.
Mistake Prevention Checklist
| Mistake | Impact | Solution |
|---|---|---|
| Low-res artwork | Blurry imprint | Use vector files |
| Wrong thickness | Cracking/distortion | Match leather to spec |
| Uneven pressure/heat | Inconsistent depth | Regular calibration |
| No sample approval | Costly rework | Always test sample |
How Do You Inspect and Care for Finished Embossed Leather Products?
Inspect for depth, alignment, and finish; clean with damp cloth weekly, condition quarterly, store away from sunlight.
QC Checklist & Care Routine
| QC Item | Standard | Action if Fail |
|---|---|---|
| Emboss Depth | 0.5–1 mm | Repress/reject |
| Alignment | ±1 mm | Adjust die |
| Surface Quality | No scorch or debris | Clean/reject |
| Stitch Integrity | ≥15 N pull force | Reinforce/reject |
Care Tips
- Wipe gently with damp microfiber cloth
- Condition every 3–6 months with pH-neutral leather cream
- Store flat in cool, dry place
Ready to elevate your brand with premium embossed leather? Request a custom quote from Szoneier Leather today and let our factory expertise turn your logo into a lasting statement of quality and craftsmanship.