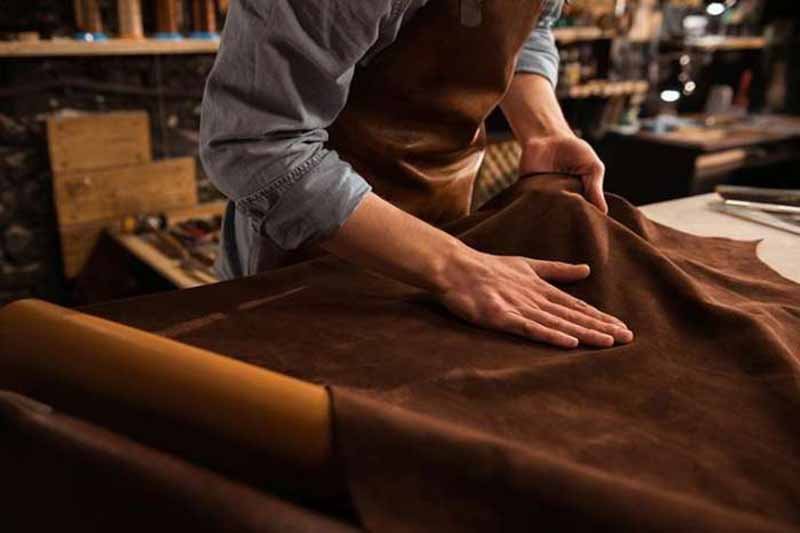
Leather is often described as a “living material.” It doesn’t breathe or heal like skin, but it reacts—to moisture, heat, friction, neglect, and care. When leather looks dry, stiff, dull, or cracked, the issue is rarely age alone. More often, it’s dehydration caused by environment, use, or improper maintenance. This is where conditioning comes in—but also where many people go wrong.
At home, leather conditioning is surrounded by confusion. Some believe any oil will do. Others avoid conditioning altogether out of fear of damage. Many turn to DIY solutions—olive oil, coconut oil, Vaseline—without understanding how leather structure actually works. The result? Darkened surfaces, weakened fibers, sticky finishes, and shortened product life.
To condition leather at home safely, use a leather-specific conditioner or a controlled alternative that replenishes moisture without clogging pores or softening structure. Leather should be clean, dry, and tested before conditioning. Apply sparingly, allow absorption, and avoid household oils or petroleum products that can permanently damage leather over time.
At Szoneier Leather, with over 18 years of experience developing and manufacturing leather bags, wallets, belts, straps, and accessories for global brands, we’ve seen every result—good and bad. Two identical leather wallets can age completely differently depending on how they’re conditioned at home. One retains flexibility and grain definition. The other darkens unevenly, smells oily, and loses strength. Same leather. Different care decisions. This guide exists to help you make the right ones.
What Is Leather Conditioning
Leather conditioning is the controlled process of restoring flexibility and moisture balance to leather by replenishing oils lost through use, environment, and aging. Proper conditioning helps prevent dryness, cracking, and stiffness while preserving leather strength and structure. Conditioning is not surface oiling—it must be compatible with leather type, finish, and construction.
Leather conditioning is often misunderstood because its effects are subtle when done correctly—and dramatic when done wrong. Many people expect immediate softness or shine, but true conditioning works inside the fiber structure, not just on the surface.
From a material science perspective, leather is a network of collagen fibers stabilized during tanning. These fibers rely on internal oils to remain flexible. Over time, daily use, friction, air circulation, heat, and low humidity cause these oils to migrate out. Conditioning replaces a portion of this lost flexibility—but only when done in a controlled way.
At Szoneier Leather, conditioning behavior is considered during product development. Different leathers are finished with different oil contents at the factory stage, which directly affects how—and whether—conditioning should be done later at home.
What does leather conditioning do at a structural level
Leather conditioning works below the surface.
It helps:
- Restore flexibility between collagen fibers
- Reduce internal friction when leather bends
- Slow down fiber breakage at stress points
- Maintain even grain appearance
What it does not do:
- Repair cracked or torn fibers
- Reverse water or heat damage
- Strengthen leather beyond its original limits
This is why conditioning is preventive, not curative. Once fibers are broken, no conditioner can rebuild them.
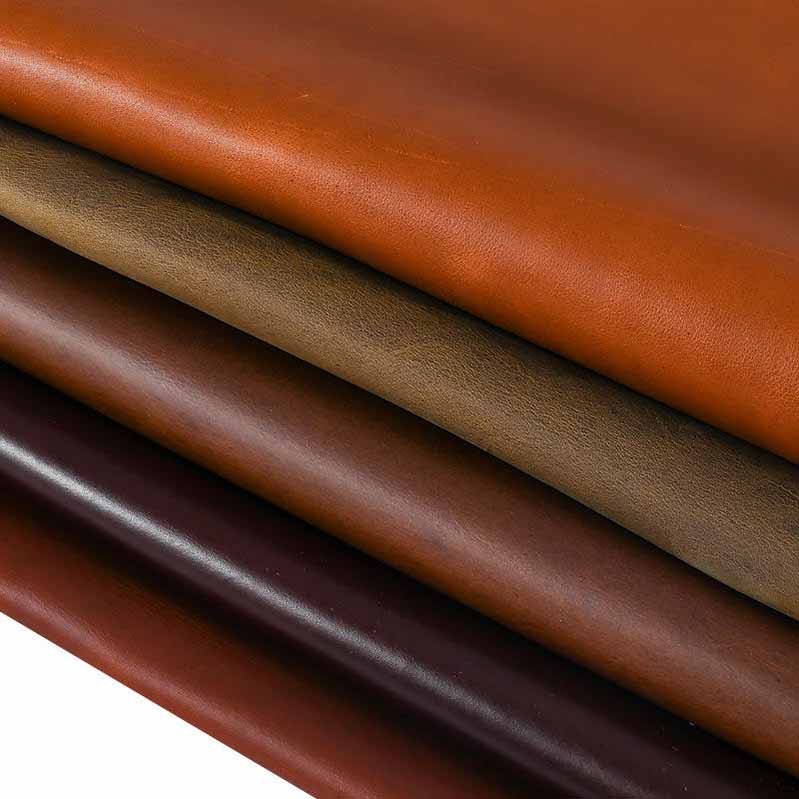
What types of leather benefit most from conditioning
Conditioning needs vary by leather type:
Leathers that typically benefit:
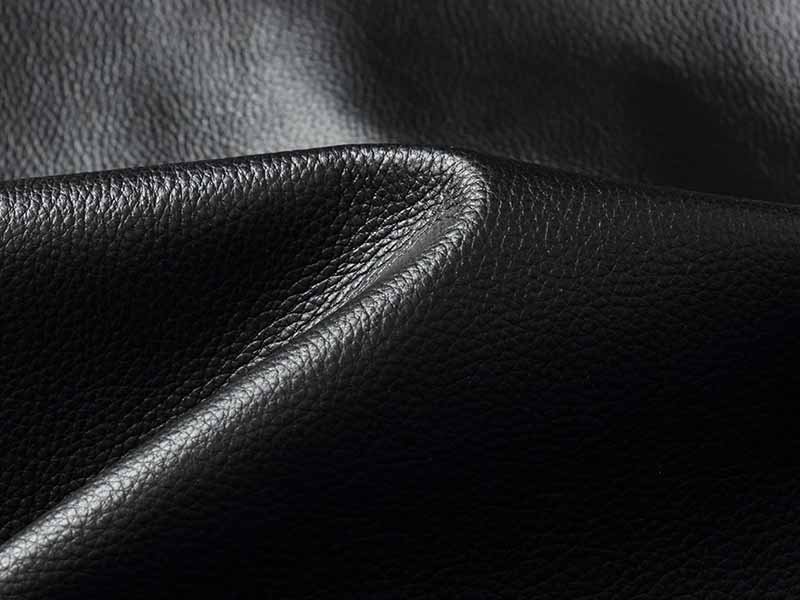
- Full-grain leather (natural surface, open fibers)
- Top-grain leather (lightly finished)
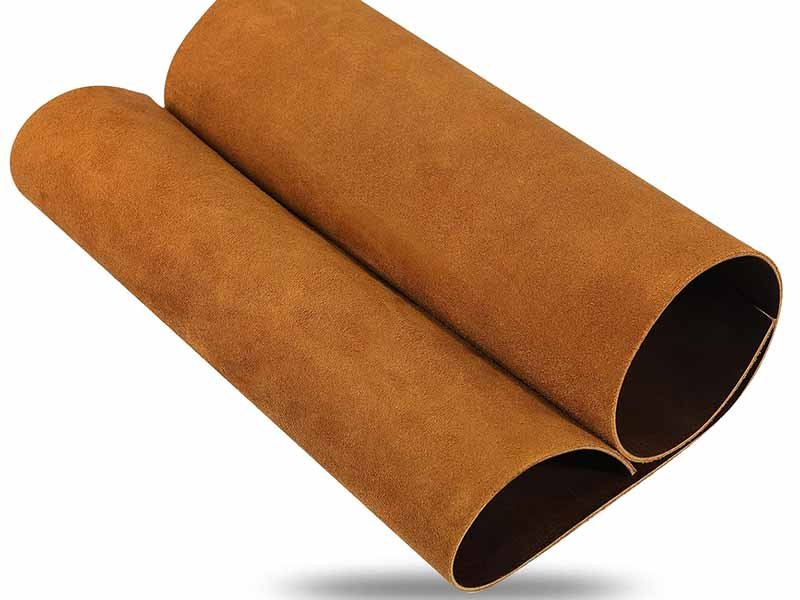
- Vegetable-tanned leather (higher oil loss over time)
Leathers that require caution:
- Suede and nubuck (risk of texture change)
- Patent leather (sealed surface)
- Heavily coated or corrected leather (limited absorption)
At Szoneier, these differences are managed during material selection and finishing. Home conditioning must respect the same distinctions to avoid surface damage or uneven darkening.
Is leather conditioning the same as oiling leather
No—and this is one of the most critical misunderstandings.
Oiling leather means introducing raw oils directly into the fiber network. Conditioning uses emulsified, stabilized formulations that distribute evenly and limit penetration depth.
Key differences:
| Conditioning | Oiling |
|---|---|
| Controlled absorption | Uncontrolled saturation |
| Balanced moisture | Risk of over-softening |
| Stable over time | Oxidizes and degrades |
| Designed for leather | Often harmful long-term |
Most household oils darken leather, attract dust, and weaken structure over time—even if they look effective at first.
Is leather conditioning always necessary
No. Conditioning should be condition-based, not routine-based.
Leather may not need conditioning if:
- It remains flexible
- The surface shows no dryness or dullness
- It is stored in a stable environment
Over-conditioning is a documented cause of premature leather failure. In Szoneier’s after-sales inspections, leather that was over-treated often lost structural firmness faster than leather that was lightly maintained.
Sometimes, the best conditioning decision is to do nothing.
How leather conditioning fits into the full leather care lifecycle
Leather care consists of four stages:
- Manufacturing balance (factory oiling & finishing)
- Use and environmental exposure
- Selective conditioning when needed
- Proper storage and observation
Conditioning is only one part of the lifecycle—not a cure-all. When combined with correct storage and handling, it helps leather goods age naturally rather than deteriorate prematurely.
Why Condition Leather at Home
Conditioning leather at home helps replace moisture lost through daily use, indoor environments, and storage, preventing dryness, stiffness, and cracking. When done correctly, home conditioning extends leather lifespan, preserves flexibility, and reduces the need for costly repairs or professional treatment.
Many people assume leather conditioning is about keeping items looking “nice.” In reality, it’s about preventing internal damage before it becomes visible.
Leather does not fail suddenly. It gradually loses moisture and flexibility as oils migrate out of the fiber network. This process happens whether leather is used daily or stored away. Home conditioning allows owners to intervene at the early stage, when damage is still reversible.
From Szoneier Leather’s long-term manufacturing and quality data, leather products that received controlled, minimal conditioning at home consistently outperformed those that were either over-treated or never treated at all.
Why conditioning matters for leather longevity
Leather longevity depends on fiber flexibility. When fibers dry out, they become brittle. Once that brittleness sets in, cracks form—especially at stress points such as folds, edges, handles, belts, and strap holes.
Conditioning:
- Maintains fiber elasticity
- Reduces internal friction during movement
- Slows crack formation
Without conditioning, even premium leather will eventually fail under normal use. Conditioning does not make leather immortal—but it significantly delays structural breakdown.
How environment affects leather moisture loss
Most leather damage is caused not by use, but by environment.
Common moisture-draining conditions include:
- Heated indoor air
- Air conditioning
- Low-humidity climates
- Constant airflow
Leather stored in climate-controlled homes often dries faster than leather used outdoors. At Szoneier, export testing shows that leather goods in dry regions lose measurable flexibility sooner—even when rarely used.
Home conditioning compensates for this invisible environmental stress.
Do bags, wallets, and belts need different care
Yes—because leather thickness and movement differ.
| Product Type | Stress Level | Conditioning Need |
|---|---|---|
| Bags | Moderate | Occasional |
| Wallets | High (folding) | Regular |
| Belts & straps | Very high (bending) | More frequent |
Thin, frequently flexed leather loses moisture faster. Conditioning schedules should reflect how leather is used, not just how it looks.
Why home conditioning is safer than waiting for damage
Waiting until leather looks cracked or feels stiff is often too late. At that point, fiber damage has already occurred.
Home conditioning allows:
- Early correction
- Minimal product use
- Lower risk of oversaturation
In contrast, emergency treatments often involve heavy applications, which increase the risk of darkening and structure loss.
Preventive care is always safer than repair.
Why professional manufacturing still relies on user care
Even the best manufacturing cannot eliminate the need for home care.
At Szoneier Leather:
- Leather is balanced during tanning
- Finishes are optimized for durability
- Thickness and reinforcement are engineered
However, once a product leaves the factory, environment and use become unpredictable. Home conditioning completes the care cycle by adapting to real-world conditions the factory cannot control.
Which Leather Conditioners Work Best
The best leather conditioners are products specifically formulated for leather, offering balanced moisture restoration without clogging pores or weakening fiber structure. Choose conditioners that match your leather type and avoid household oils or petroleum products. If you don’t have commercial conditioner, only limited, controlled alternatives should be used with caution.
When users ask which conditioners work best, they usually want:
Effective moisture balance
No surface darkening
No residue buildup
Long-term fiber protection
Compatibility with their leather type
From a manufacturing standpoint, leather doesn’t accept all oils or fats equally. Conditioning is not “more is better,” but “compatible, balanced, and controlled.” At Szoneier Leather, material engineers test conditioners alongside specific leather types to ensure absorption depth matches fiber structure—this same logic applies at home.
What Makes a Good Leather Conditioner
A high-quality leather conditioner should:
- Penetrate evenly
- Maintain moisture balance
- Evaporate excess solvent
- Avoid blocking pores
- Be stable over time
Good conditioners use emulsified oils and waxes that mimic natural leather fats. They replenish what leather lost during use and environment exposure without over-saturating.
Top Commercial Leather Conditioners
| Conditioner Type | Best For | Notes |
|---|---|---|
| Leather balms with beeswax | Full-grain & top-grain leather | Good moisture + surface protection |
| Neatsfoot oil-based conditioners | Heavy leather (belts, boots) | Use sparingly; overuse can soften |
| Silicone-free leather creams | Bags & wallets | Maintains flexibility, no shine |
| pH-balanced leather lotions | All general leather | Mild, safe choice |
Look for clear labeling:
- Leather safe, pH-balanced, non-acidic, no petroleum distillates Avoid products marked for vinyl or synthetic leather only—they don’t benefit real leather.
Note: Specific brand names vary by region and season, so focus on formulation quality rather than brand prestige.
What Can I Use if I Don’t Have Leather Conditioner?
Many users ask this exact question. The safest temporary alternatives are not oils—but mild, controlled moisturizers that preserve leather balance without saturating fibers.
Better alternatives (use with caution):
- Leather cream with minimal oil content
- Leather wipes formulated for maintenance
- Distilled water mist (very light, for humidity adjustment)
Important: These are temporary and limited—not long-term solutions.
Which Ingredients to Avoid in Leather Conditioners
Using the wrong ingredients is the #1 cause of conditioning damage. Avoid:
Vegetable oils – oxidize, become sticky
Mineral oil / petroleum jelly – blocks pores
Silicone-heavy formulas – create artificial shine, weaken leather
Alcohol-based solutions – dry fibers
Beeswax-only pastes – surface film, poor penetration
Even “natural” kitchen oils (olive, coconut, almond) should not be used. They oxidize and degrade, a major cause of permanent darkening and structural weakening.
Which Conditioner Works Best for Each Leather Type
Different leathers accept treatments differently. The table below summarizes general best matches:
| Leather Type | Recommended Conditioner | Why |
|---|---|---|
| Full-grain | Neutral pH cream or balm | Deep fibers benefit from balanced penetration |
| Top-grain | Silicone-free lotion | Smooth surface without shine |
| Vegetable-tanned | Light cream | Too heavy oils can darken |
| Suede / Nubuck | Specialized suede condition spray | Preserves texture |
| Patent / Coated | Minimal maintenance wipes | Avoids film build-up |
Always tailor conditioner to leather type.
How to Choose Leather Conditioner When Buying Online
When shopping online, choose products with:
Clear formulation details
Leather-specific language
Positive reviews for your intended use
No petroleum derivatives
pH balance confirmation
Review questions to ask:
- Does it penetrate or coat?
- Is it silicone-free?
- Is it tested for real leather?
These signals matter more than price or packaging.
How to Prepare Leather for Conditioning
To prepare leather for conditioning, remove dust and surface oils, ensure the leather is completely dry, identify the leather type and finish, and test the conditioner on a hidden area. Proper preparation prevents blotching, darkening, residue buildup, and weakened leather fibers. Never condition dirty, damp, or heat-dried leather.
Most conditioning “failures” happen before the conditioner is even applied. Uneven darkening, sticky surfaces, blotchy absorption, and softened structure usually come from one of three preparation mistakes: wrong leather type assumptions, hidden dirt/oil on the surface, or moisture still inside the leather and lining.
At Szoneier Leather, preparation is treated as a controlled step in finishing and post-treatment. The same logic applies at home: if leather is not clean, dry, and understood, conditioning becomes unpredictable.
Think of preparation as risk management. It makes conditioning safer, more consistent, and more repeatable.
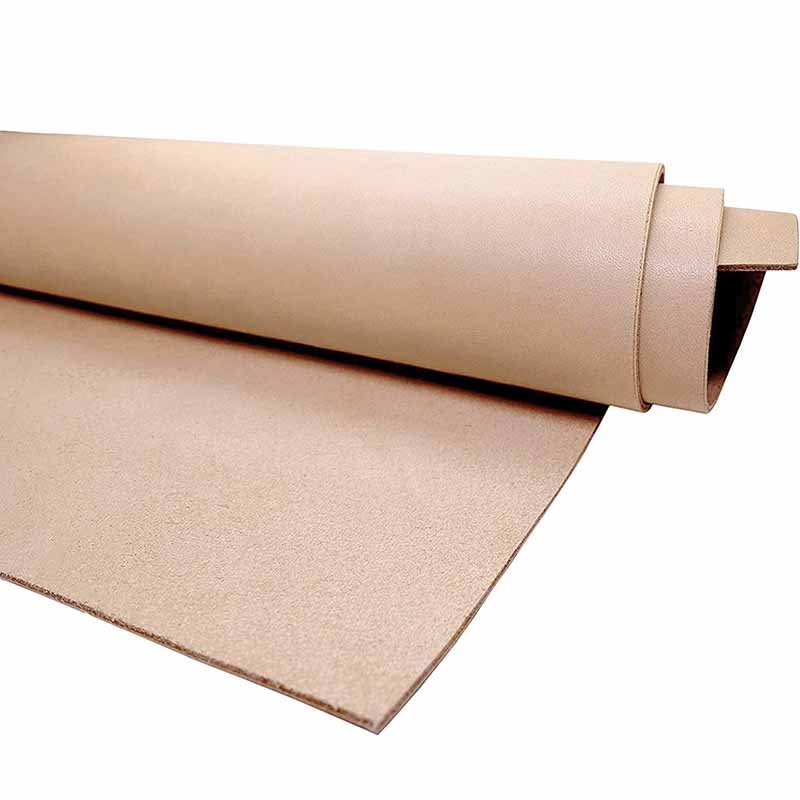
How to identify leather type and finish first
Before any cleaning or product use, confirm what you’re treating. Different finishes react differently to conditioners.
Quick identification cues:
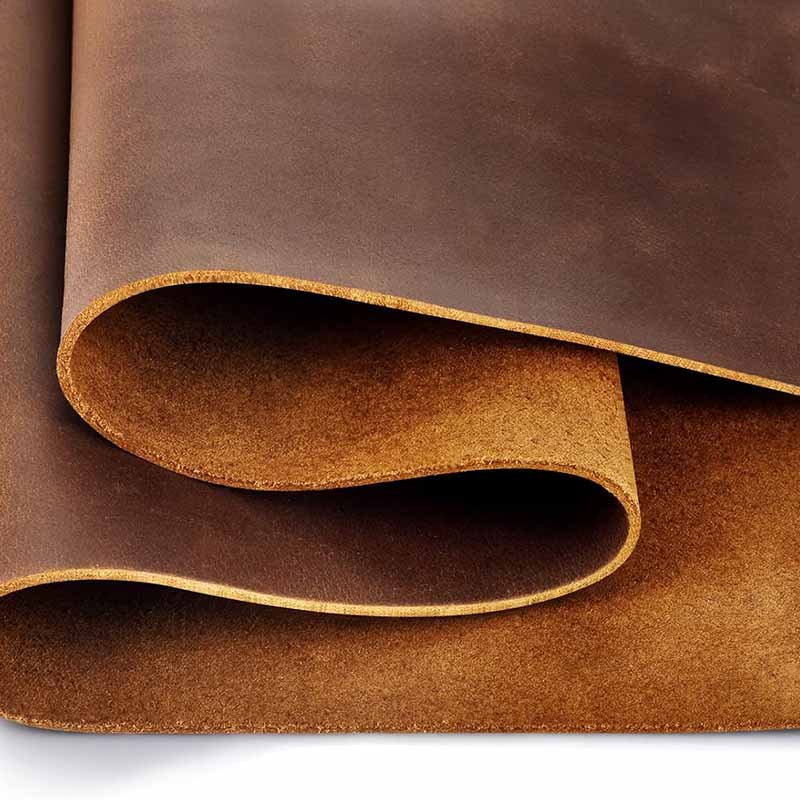
- Full-grain / natural finish: visible pores, natural grain variation, absorbs water drop slowly
- Top-grain with light finish: smoother surface, still flexible, mild absorption
- Coated/corrected leather: very uniform surface, water beads quickly, low absorption
- Suede/nubuck: fuzzy texture, easily darkens with moisture
- Patent leather: glossy sealed surface, conditioning is minimal and specialized
If you can’t confidently identify the type, treat it as sensitive: do minimal cleaning, always patch test, and avoid heavy products.
How to remove dust and surface debris safely
Dust looks harmless, but it becomes abrasive when you rub conditioner in—like sanding the surface.
Safe dust removal:
- Use a dry microfiber cloth
- For seams and corners, use a soft brush (very gentle)
- Wipe in the direction of grain, not aggressively back-and-forth
Avoid:
- Paper towels (too abrasive)
- Rough sponges
- Household dusting sprays (often contain silicone or solvents)
Dust removal is the simplest step, but it prevents most surface scratching during conditioning.
How to clean body oils and light grime before conditioning
High-touch areas (handles, wallet edges, belt holes) collect skin oils, sweat, and dirt that block absorption and cause patchy results.
Safe light cleaning method:
- Slightly damp microfiber cloth (water only or leather-safe cleaner)
- Wipe gently, then immediately dry with another clean cloth
- Let it air rest 30–60 minutes before any next step
Do not:
- Use alcohol wipes
- Use vinegar mixtures
- Use dish soap These strip oils aggressively and can weaken leather fibers.
A key rule: conditioning should never be used to “mask dirt.” Clean first, condition second.
Why complete drying matters (and how to confirm it)
Conditioner applied to damp leather often causes:
- blotchy darkening
- sticky finish
- trapped moisture (odor or mold later)
How to confirm leather is dry:
- Touch test: surface feels room-temperature and not cool/damp
- Smell test: no musty or “wet closet” odor
- Time rule: after any damp wipe, let leather rest at least 1–2 hours (longer in humid weather)
Avoid heat drying (hair dryer, heater, direct sun). Fast drying makes leather stiff and can weaken adhesives used in bag construction.
How to patch test conditioner the right way
Patch testing is non-negotiable—especially for light colors and natural finishes.
Patch test steps:
- Pick a hidden spot (inside flap, bottom edge, interior leather trim)
- Apply a tiny amount of conditioner
- Wait 12–24 hours
- Check for:
- color change (darkening, uneven tone)
- residue (greasy feel)
- texture change (softening, tackiness)
If any of these appear, stop. Try a different product or reduce amount.
This is the same compatibility logic used in factory finishing trials—scaled down for home use.
What tools you should prepare before conditioning
Good tools reduce risk and help even application.
Recommended:
- 2–3 clean microfiber cloths (separate for cleaning, applying, buffing)
- Soft detailing brush for seams
- Nitrile gloves (optional, prevents transferring skin oils)
- Clean table surface + good lighting
Avoid:
- Colored cloths (dye transfer risk)
- Textured rags or towels
- Anything scented or treated with fabric softener
Tool cleanliness matters. Conditioner spreads whatever is on your cloth—good or bad.
What mistakes during preparation cause blotches and damage
Most common prep mistakes:
- Conditioning without removing skin oils
- Applying product while leather is still damp
- Skipping patch test
- Using household cleaners or alcohol
- Rubbing too hard (creating friction gloss)
These errors are the root cause of “my leather got darker” complaints. In Szoneier’s after-sales evaluations, uneven darkening is more often linked to preparation failure than conditioner quality.
What to Do by Leather Type
| Leather Type | Prep Level | Key Caution |
|---|---|---|
| Full-grain | Standard | Patch test for darkening |
| Veg-tan | High | Darkens easily; use minimal product |
| Coated leather | Low | Often needs less conditioning |
| Suede/nubuck | Specialized | Avoid creams; use suede-safe products |
| Patent leather | Minimal | Conditioning is not typical |
How to Condition Leather at Home
To condition leather at home, clean and fully dry the leather first, identify its type, patch test the conditioner, apply a small amount evenly with a soft cloth, allow it to absorb naturally, and wipe off any excess. Conditioning should be light, controlled, and based on leather condition—not habit—to avoid darkening or weakening the leather.
Many people think conditioning leather is a quick wipe-on task. In reality, proper conditioning is a slow, controlled process designed to rebalance moisture inside leather fibers—not coat the surface.
From a manufacturing standpoint, leather finishing at the factory uses measured oil content, timed absorption, and resting periods. Home conditioning follows the same principles—just on a smaller scale.
At Szoneier Leather, long-term product testing shows that leather conditioned lightly and correctly ages far better than leather that is either over-treated or treated too aggressively.
Step 1 — Make sure the leather is ready for conditioning
Before applying anything, confirm:
- Leather is clean (no dust, oils, or residue)
- Leather is completely dry
- Leather type is understood (full-grain, top-grain, veg-tan, etc.)
- Patch test has been completed
Conditioning dirty or damp leather is the fastest way to cause blotches, sticky finishes, or uneven darkening.
If the leather still feels flexible and healthy, conditioning may not be needed yet.
Step 2 — How much leather conditioner to use
This is where most people make mistakes.
Correct amount:
- Start with a coin-sized amount for small items (wallets, belts)
- Slightly more for large panels (bags, jackets)
- Leather should never look wet or glossy
Leather absorbs slowly. Excess conditioner:
- Sits on the surface
- Attracts dust
- Softens structure too much
Rule of thumb:
You can always add more, but you can’t remove what’s already absorbed.
Step 3 — How to apply conditioner correctly
Application technique matters as much as product choice.
Best method:
- Use a clean, soft microfiber cloth
- Apply in light circular motions
- Move evenly across panels
- Focus on stress areas (folds, edges, handles)
Avoid:
- Pressing hard
- Repeated rubbing in one spot
- Pouring conditioner directly onto leather
The goal is even distribution, not deep saturation.
Step 4 — How long to let conditioner absorb
After application:
- Let leather rest 15–30 minutes
- Do not touch or stack items
- Keep away from sunlight and heat
During absorption:
- Leather fibers rebalance moisture
- Excess solvent evaporates
- Surface sheen should fade naturally
If leather still looks greasy after 30 minutes, too much product was applied.
Step 5 — How to remove excess conditioner safely
Excess conditioner weakens leather over time.
How to remove it:
- Use a separate clean cloth
- Lightly wipe the surface
- Do not scrub or polish aggressively
The leather should feel:
- Smooth
- Dry to the touch
- Flexible, not soft or oily
At Szoneier, leather that retains a dry-touch finish after conditioning shows better long-term durability than leather left “shiny.”
Step 6 — How to let leather rest after conditioning
Conditioning is not finished when wiping stops.
Post-conditioning rest:
- Let leather sit 12–24 hours
- Store in a breathable space
- Avoid immediate use or storage compression
This resting period allows internal oils to stabilize. Skipping it increases the risk of imprint marks and uneven aging.
How can I moisturize my leather naturally (without oils)
Many users want “natural” care without products. The safest natural method is environmental balance, not DIY oils.
Safe natural moisture support:
- Maintain moderate indoor humidity (40–55%)
- Avoid heaters, vents, and direct sun
- Allow leather to rest in breathable storage
In many cases, improving storage conditions restores leather flexibility without applying any conditioner at all.
From Szoneier’s internal testing, leather stored in stable environments often outperforms leather treated with random DIY substances.
How often should leather be conditioned at home
Frequency depends on use, environment, and leather thickness.
| Item | Typical Frequency |
|---|---|
| Leather bags | 1–2× per year |
| Wallets | 2–3× per year |
| Belts & straps | 2–4× per year |
| Stored leather | Only if dryness appears |
Conditioning on a schedule without need leads to over-softening and premature wear.
What Mistakes to Avoid When Conditioning Leather
Common mistakes when conditioning leather include using household oils or Vaseline, over-conditioning, skipping patch tests, applying conditioner to dirty or damp leather, using too much product, and conditioning on a fixed schedule instead of based on leather condition. These errors often cause darkening, residue buildup, loss of structure, and irreversible damage.
Almost no one sets out to damage their leather. Problems arise when people try to “improve” leather without understanding how it behaves at a fiber level. Many popular online tips feel logical—but contradict how leather is tanned, finished, and engineered.
From Szoneier Leather’s after-sales evaluations, a large portion of premature leather aging cases are linked not to wear—but to incorrect home conditioning habits.
Understanding what not to do is often more important than knowing what to do.
Using household oils, Vaseline, or petroleum products
This is the most damaging and most common mistake.
Why it’s harmful:
- Household oils oxidize and turn rancid
- Vaseline blocks leather pores permanently
- Petroleum products soften fiber structure excessively
- Residue attracts dirt and dust
What to do instead:
- Use leather-specific conditioners only
- If unsure, do nothing rather than experiment
In Szoneier’s material testing, leather exposed to petroleum products lost tensile strength faster and became sticky over time—damage that cannot be reversed.
Over-conditioning leather too frequently
More is not better.
Why it’s harmful:
- Oversaturation weakens collagen fibers
- Leather loses shape and firmness
- Stitching and structure fail sooner
What to do instead:
- Condition only when leather shows dryness
- Focus on high-stress areas, not entire surface
- Reduce frequency rather than amount if unsure
In manufacturing terms, leather has a “saturation limit.” Exceeding it causes long-term instability.
Skipping patch tests before full application
Even safe conditioners can react unpredictably with certain leathers.
Why it’s harmful:
- Causes uneven darkening
- Alters texture or finish
- Leaves greasy patches
What to do instead:
- Always patch test on a hidden area
- Wait 12–24 hours before full use
Professional finishing labs never apply new formulations without compatibility testing. Home care deserves the same discipline.
Conditioning leather while it is dirty or damp
Conditioning does not clean leather—it locks in whatever is already there.
Why it’s harmful:
- Traps dirt and skin oils inside fibers
- Causes blotchy absorption
- Leads to odor or mold later
What to do instead:
- Clean lightly and dry completely first
- Let leather rest before conditioning
In Szoneier’s inspections, blotching complaints often trace back to this single mistake.
Using too much conditioner at once
Heavy application creates surface problems and internal imbalance.
Why it’s harmful:
- Leaves greasy or shiny finish
- Attracts dust
- Softens leather excessively
What to do instead:
- Apply a small amount
- Allow absorption
- Add more only if needed
Controlled application mirrors how leather oils are added during factory finishing.
Conditioning all leather the same way
Not all leather behaves alike.
Why it’s harmful:
- Suede and nubuck lose texture
- Coated leather doesn’t absorb properly
- Veg-tan darkens easily
What to do instead:
- Adjust method by leather type
- Use specialized products where required
At Szoneier, leather conditioning compatibility is evaluated by finish, thickness, and end use—not one-size-fits-all.
Conditioning on a fixed schedule instead of by condition
Routine-based care causes unnecessary treatment.
Why it’s harmful:
- Leads to over-conditioning
- Masks early warning signs
- Increases long-term wear
What to do instead:
- Condition only when leather feels dry or stiff
- Observe changes over time
Leather care should be responsive, not automatic.
Trying to fix damage with more conditioner
Conditioner is not a repair tool.
Why it’s harmful:
- Deep cracks cannot be healed
- Extra oil worsens weakened fibers
- Darkening increases
What to do instead:
- Stop treatment
- Seek professional restoration if needed
Knowing when to stop prevents further damage.
How to Maintain Conditioned Leather Long-Term
To maintain conditioned leather long-term, store it in a stable environment, inspect it regularly, condition only when dryness appears, and avoid unnecessary treatments. Long-term leather care focuses on environment control, light maintenance, and early detection of issues rather than frequent product application.
Once leather has been properly conditioned, the goal shifts from treatment to preservation. Many owners mistakenly believe maintenance means continuous product use. In reality, the most durable leather goods are those that experience long periods of rest in stable conditions, interrupted only by minimal, intentional care.
From Szoneier Leather’s long-term durability testing and customer feedback across multiple markets, leather products maintained with low-frequency, condition-based care retained better structure, grain definition, and tensile strength than those treated on a routine schedule.
Long-term maintenance is about preventing stress, not constantly correcting it.
How to store leather after conditioning
Proper storage is the foundation of long-term maintenance.
Best storage practices:
- Store leather in a cool, dry, ventilated space
- Use breathable dust bags (cotton or non-woven fabric)
- Avoid plastic covers or airtight containers
- Keep items away from direct sunlight and heat sources
After conditioning, allow leather to rest 12–24 hours before storage so internal oils stabilize. Compressing or stacking leather too soon increases the risk of imprint marks and uneven aging.
At Szoneier, sample storage follows the same logic—leather is always allowed to “settle” before long-term rest.
How often to inspect conditioned leather
Inspection frequency should reflect environmental risk rather than usage alone.
Recommended inspection intervals:
- Humid or tropical climates: every 4–6 weeks
- Temperate climates: every 2–3 months
- Dry or cold climates: every 2–3 months
What to check:
- Surface feel (dry vs oily)
- Flexibility at folds and edges
- Odor (musty or stale smells)
- Hardware contact points
- Shape retention
Early detection allows simple corrections instead of heavy treatment.
When to re-condition leather—and when not to
Re-conditioning should be need-based, not routine-based.
Condition leather again only if:
- It feels stiff when flexed
- The surface looks dull or chalky
- Creases appear sharper than before
Do not re-condition if:
- Leather feels soft and flexible
- Surface still has a natural sheen
- No dryness is visible
Over-conditioning is one of the fastest ways to shorten leather lifespan. In Szoneier’s after-sales inspections, leather that was “well cared for” too frequently often showed early fiber fatigue.
How environment affects long-term leather maintenance
Environment plays a larger role than most people realize.
Risk factors:
- Heated indoor air (dries leather)
- Air conditioning (reduces humidity)
- High humidity (mold risk)
- Constant airflow (accelerated moisture loss)
Best practice:
- Maintain indoor humidity around 40–55%
- Avoid storing leather near vents or radiators
- Rotate storage position occasionally to reduce pressure stress
Stable environments reduce the need for future conditioning.
How to maintain leather shape and structure over time
Structural care is often overlooked.
For bags and accessories:
- Use light internal support to prevent collapse
- Avoid hanging items by straps long-term
- Do not stack heavy objects on leather goods
Leather fibers weaken faster under constant tension than under intermittent use. Allowing leather to rest in its natural shape preserves internal integrity.
At Szoneier, bag construction is engineered for use—not suspension. Storage habits should reflect this.
How to clean conditioned leather without stripping moisture
Cleaning frequency should be minimal.
Safe maintenance cleaning:
- Dry microfiber wipe for dust
- Very light damp wipe only when needed
- Immediate drying after any moisture contact
Avoid:
- Alcohol-based wipes
- Harsh cleaners
- Frequent deep cleaning
Conditioned leather already has balanced oils. Aggressive cleaning removes them unnecessarily.
Seasonal maintenance tips for conditioned leather
Seasonal changes affect leather more than time alone.
- Winter (dry air): monitor stiffness, avoid heaters
- Summer (humidity): increase airflow, reduce conditioning
- Seasonal transitions: inspect, reshape, but don’t treat automatically
Adapting care to seasons prevents overreaction and over-treatment.
Conclusion
Conditioning leather at home doesn’t require complicated products or risky DIY solutions. It requires understanding when to act, when to wait, and when to do nothing at all.
At Szoneier Leather, with over 18 years of experience in leather R&D, material sourcing, product design, sampling, and OEM/ODM manufacturing, we design leather goods that are meant to age well—with proper care.
If you are:
- A brand developing leather bags, wallets, belts, or accessories
- A buyer seeking a reliable OEM / private label leather manufacturer
- Looking for leather products engineered for durability and long-term performance
Contact Szoneier Leather to discuss materials, finishes, and designs that support both everyday use and long-term care.
Better leather care begins with better leather design. And better design starts with the right factory.