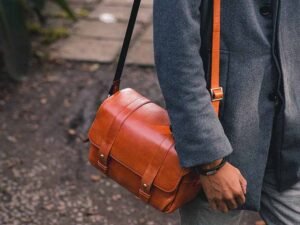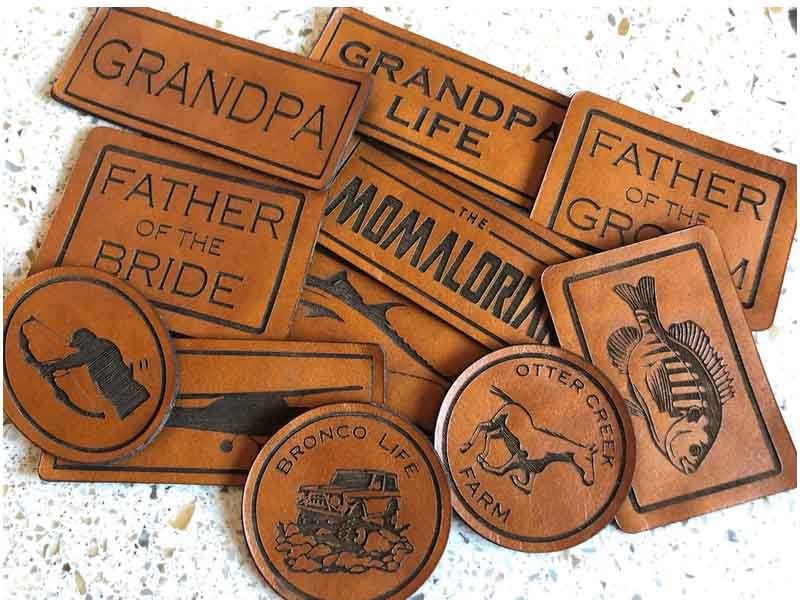
From personalized initials on a wallet to intricate botanical patterns on a journal cover, engraving transforms leather into an enduring work of art. Unlike embossing—where pressure raises or depresses the surface—engraving cuts or vaporizes material to create sharp, deep lines that stand the test of time. But achieving crisp, consistent results takes more than artistic flair: you need to understand leather types, preparation methods, tool choices, optimal settings, finishing techniques, and troubleshooting strategies.
Leather engraving removes or alters the top layers of leather—either mechanically with swivel knives and stamps or via focused laser energy—to produce precise lines and textures. Ideal leather for engraving is vegetable-tanned, medium weight (2–3 mm), and properly cased. Key factors include selecting the right method (hand vs. laser), mastering depth control, and finishing with dyes and sealants to preserve contrast and prevent wear.
What Is Leather Engraving and How Does It Differ from Embossing?
Leather engraving physically removes or alters the hide’s surface—either by cutting with swivel knives and stamps or by vaporizing with lasers—to carve deep, crisp lines and textures. In contrast, embossing (or debossing) uses matched dies and heat-plus-pressure to impress shallow, uniform patterns without material removal. Engraving yields sharper relief (up to 1–2 mm deep) and finer detail suited for intricate artwork, whereas embossing produces consistent, repeatable impressions ideal for logos and textures.
Leather surface decoration splits into two primary techniques, each offering distinct aesthetics, tactile qualities, and production considerations: engraving and embossing/debossing. Understanding their differences ensures you choose the right method for your design, budget, and production volume.
Defining Leather Engraving
Material Removal vs Surface Alteration
- Hand Engraving: Swivel knives slice into cased leather, guided by the craftsman’s hand, creating grooves and channels. Metal stamps or chisels further texture these cuts.
- Laser Engraving: A computer-controlled CO₂ or fiber laser vaporizes or chars the top layers, achieving highly precise lines, gradients, and even grayscale shading.
Depth and Detail
- Engraving typically penetrates 0.5–2 mm, allowing for pronounced shadows and highlights. This depth gives patterns a sculptural quality—great for botanical motifs, portraits, or detailed map work.
Artisan vs Automated
- Hand techniques require skilled artisans and are best for small runs or bespoke pieces. Laser systems excel in repeatability and scalability, handling batch sizes from tens to thousands with consistent fidelity.
Understanding Embossing & Debossing
Impression Without Removal
- Embossing: A female die (concave) presses the leather upward, raising the design on the face.
- Debossing: A male die (convex) presses into the surface, creating a recessed pattern.
Shallow Relief
- Offers relief depths of 0.2–0.5 mm, producing subtle texture and a sophisticated, low-profile look—ideal for logos, brand names, or simple repeats.
Molded Consistency
- Dies can be made of brass, steel, or silicone for flexible materials; they ensure identical patterns across large volumes with minimal per-piece labor.
Key Differences in Application
| Feature | Engraving | Embossing/Debossing |
|---|---|---|
| Material Change | Removes or alters leather surface | No material removed—surface displaced |
| Relief Depth | 0.5–2 mm | 0.2–0.5 mm |
| Detail & Complexity | Extremely fine lines, shading, sculptural | Simpler shapes, uniform textures |
| Equipment & Skill | Swivel knives, stamps, lasers; artisan skill or laser programming | Presses and dies; minimal operator skill |
| Production Volume | Best for small to medium (hand) or large (laser) runs | Ideal for high-volume consistency |
| Cost Drivers | Tool cost (blades, stamps, lasers) + labor | Die creation + press time |
When to Choose Each Technique
Engraving is your go-to for:
- Intricate Artwork: Portraiture, fine patterns, tonal gradients.
- Customization: Individual initials, custom maps, single-run bespoke items.
- Depth & Contrast: Designs that need pronounced shadows and tactile engagement.
Embossing/Debossing excels for:
- Branding Consistency: Logos, repeated motifs, alphanumeric codes.
- High-Volume Production: Fast cycle times, low per-piece labor.
- Subtle Elegance: Luxury goods where underplayed texture adds sophistication.
Hybrid Approaches
Modern workshops often combine methods: for example, laser-engraved backgrounds paired with embossed logos. This hybrid technique leverages engraving’s detail and embossing’s consistency to create multi-dimensional effects.
What Is the Difference Between Etching and Engraving?
- Etching typically uses chemical or laser treatments to discolor or texture the surface without deep material removal.
- Engraving physically carves or burns away leather, leaving permanent depth and shadow.
Etching suits subtle shading (watermarks, tone-on-tone graphics); engraving creates high-contrast lines ideal for logos, monograms, and detailed scenes.
What Is the Best Format for Engraving?
Design preparation is crucial:
- Vector Formats (SVG, EPS, AI): Preferred for laser and CNC engraving—paths translate directly to tool movement.
- High-Contrast Bitmaps (PNG, BMP): Usable for raster engraving, but require careful thresholding to avoid jagged edges.
- Line Thickness: Minimum line width depends on method:
- Hand Engraving: ≥1 mm for tool clearance.
- Laser (CO₂): ≥0.2 mm, but 0.5 mm ensures reliability.
- Rotary Tool: ≥0.8 mm to accommodate bit diameter.
Using native vector artwork with properly scaled strokes and closed paths delivers the most accurate and predictable engraving outcomes.
Which Types of Leather Are Best for Engraving?

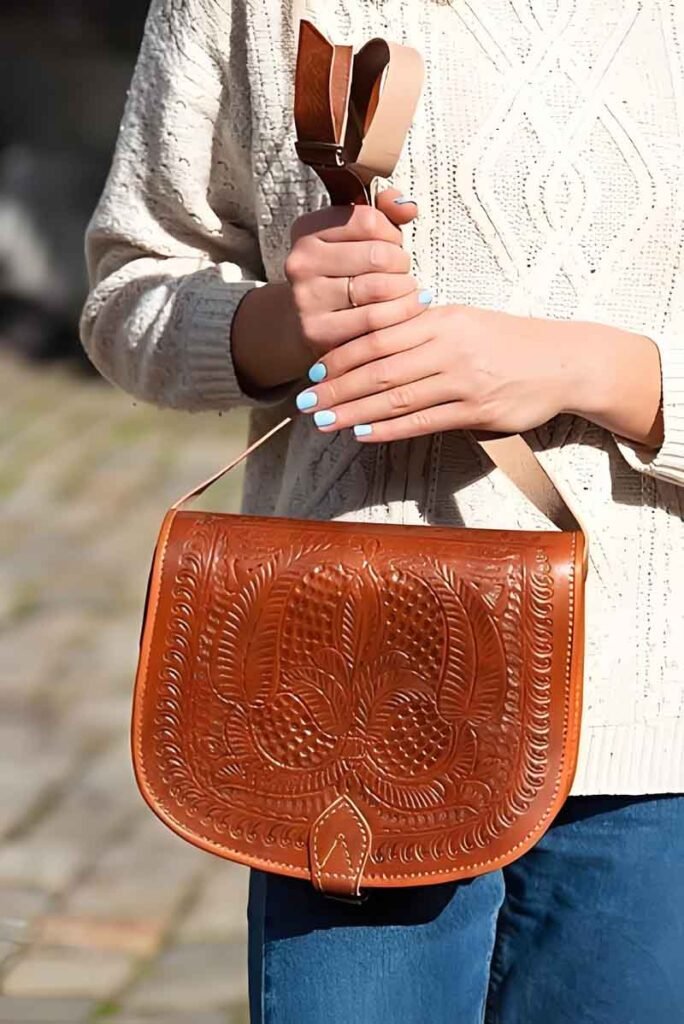
Vegetable-tanned leather (2–3 mm thick) offers a firm, open grain that accepts clean cuts and deep engraving, producing crisp lines and rich contrast when dyed. Chrome-tanned hides engrave less predictably due to surface coatings, while bonded leather, suede, and high-nap finishes lack the structural integrity or smoothness needed for precise detail. For optimal results, choose smooth-grain veg-tan hide cased to 40–60 % moisture content.
Engraving performance hinges on leather’s tannage, thickness, grain, and moisture. Below, we explore common hide types and why vegetable-tanned leather stands out for engraving.
Vegetable-Tanned Leather (Veg-Tan)
Tannage & Fiber Structure:
- Processed with natural tannins from tree bark over weeks, veg-tan leather retains an open, fibrous structure.
- This porosity allows swivel knives and stamps to cut cleanly without slipping.
Ideal Thickness:2–3 mm (5–7 oz) balances flexibility and support. Thinner hides may tear; thicker hides resist deep carving.
Grain Surface:
- A smooth, relatively uniform grain shows off fine lines and textures.
- When dyed or antiqued, engraved recesses hold pigment, enhancing contrast.
Casing & Moisture Control:
- Veg-tan leather must be “cased” (evenly moistened) to ~50 % relative moisture.
- Proper casing swells fibers for crisp cuts; under-cased hides resist blade entry, over-cased hides tear or gum up tools.
Chrome-Tanned Leather
Tannage & Surface Coatings: Chrome salts yield soft, supple hides ideal for garments, but often include surface finishes (pigment layers, top coats).
Engraving Challenges:
- Coatings can melt, smear, or char under laser heat, producing uneven lines or discoloration.
- Hand engraving may plow through top coats, exposing inconsistent base layers.
Use Cases: Better suited to debossing (impressions) or light, decorative cuts rather than deep engraving.
Bonded Leather & Reconstituted Hides
Composition: Made from shredded leather fragments bonded with polyurethane or latex binders.
Limitations:
- Lacks grain integrity—cuts often catch binder areas, leading to crumbly edges and inconsistent depth.
- Finish layers may delaminate or tear under tool pressure.
Recommendation: Avoid for precision engraving; use for low-detail decorative applications if necessary.
Suede, Nubuck & High-Nap Finishes
Texture:
- Suede and nubuck have a brushed nap that obscures fine lines.
- Engraving yields fuzzy, low-contrast results.
Structural Weakness: The lack of a firm grain surface means blades can slip or skid, and laser energy scatters in fibers, reducing clarity.
Application: Best for laser etching patterns that rely on surface discoloration rather than deep cuts.
Exotic Hides (Ostrich, Python, etc.)
Grain Irregularity: Natural quills (ostrich) and scale patterns (python) create pronounced texture, disrupting uniform engraving.
Detail Loss: Smaller details vanish among grain peaks and valleys.
Alternative Approach:Embossing or debossing may yield more consistent branding on exotic textures.
Key Takeaways:
- Choose Veg-Tan: For the sharpest, deepest, and most consistent engraving, select vegetable-tanned, 2–3 mm hides with fine grain.
- Case Correctly: Achieve uniform moisture content to optimize blade interaction.
- Avoid High-Nap or Bonded Leathers: These materials compromise detail clarity and tool performance.
How Do You Prepare Your Leather for Engraving?
Proper preparation ensures crisp, consistent engraving. Start by cleaning the hide with isopropyl alcohol to remove oils and dirt. Condition briefly if overly dry, then case by misting until the leather darkens and feels tacky (about 40–60 % moisture). Transfer your design using tracing paper or direct vector import (for laser), and secure the leather firmly in a stitching pony, vise, or on a laser bed with low-tack tape to prevent movement during engraving.
Cleaning and Surface Prep
- Remove Surface Oils and Residues
- Wipe the leather’s grain side with a lint-free cloth dampened in 70 % isopropyl alcohol.
- This eliminates manufacturing finishes, hand oils, and dust, allowing tools or laser beams to interact directly with the hide.
- Inspect for Defects
- Lay the hide flat under even lighting.
- Mark any scars, wrinkles, or blemishes and plan engraving paths around them to avoid unpredictable cuts.
Conditioning (If Needed)
- Dryness Check: Pinch the leather—if it feels stiff or cracks, apply a light coat of leather conditioner.
- Avoid Over-Oiling: Too much conditioner leaves a slick surface, causing swivel knives to skid or laser beams to reflect unevenly.
- Test Spot: Always condition a small area, let it absorb for 24 hours, and verify surface grip before full preparation.
Casing: Achieving Optimal Moisture
- Even Misting:
- Use a fine spray bottle of distilled water.
- Mist the surface until it darkens uniformly, but avoid pooling.
- Rest Period:
- Let the leather stand 10–15 minutes to absorb moisture and reach linkage equilibrium.
- The surface should feel slightly tacky, not wet.
- Blot Excess:
- Gently dab with a dry cloth to remove beads of water.
- Over-moist casing leads to fiber swelling and tear-out; under-moist casing results in blade chatter and shallow engraving.
Pattern Transfer Techniques
- Hand Engraving:
- Tracing: Place tracing paper over a printed vector design; use a stylus or ballpoint pen (no ink) to score the pattern.
- Transfer: Lay the tracing back onto the cased leather and retrace lines firmly to leave a light indentation.
- Laser Engraving:
- Vector Import: Load SVG, AI, or DXF files into your laser software.
- Registration Marks: For non-digital beds, apply low-tack masking tape and mark reference points on the tape to align the design.
Securing the Leather
Hand Tools:
- Mount the leather in a stitching pony or bench vise at a comfortable angle, ensuring the engraved area is flat and stable.
- Use rubber-backed clamps to avoid marring the surface.
Laser Beds:
- Cover corners with low-tack masking tape to keep edges from lifting.
- For larger hides, use vacuum tables to hold the leather uniformly without distortions.
Final Checklist Before Engraving
- Moisture Test: Leather returns to natural color when pressed lightly—if not, adjust casing.
- Edge Security: Clamps hold edges; ensure no loose areas that could shift mid-engrave.
- Tool Calibration:
- Hand Tools: Swivel knife blade is sharp and set to correct depth.
- Laser: Focus height and bed level are verified; air assist and exhaust systems are operational.
What Tools and Techniques Are Used for Leather Engraving?
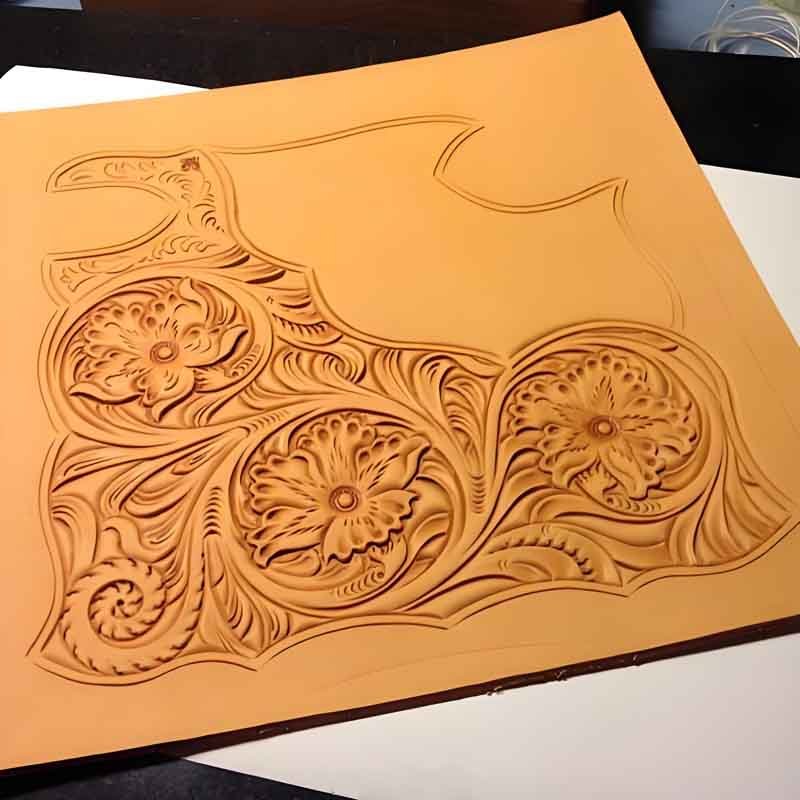
Leather engraving can be done by hand—using swivel knives for carving and precision steel stamps for texture—or by machine with laser engravers (CO₂ or fiber) for high-resolution, repeatable detail, and rotary tools (e.g. Dremel® with carbide or diamond bits) for versatile, low-cost prototyping. Hand tools offer organic depth and character; lasers provide speed and uniformity (300–600 DPI); rotary methods excel in small-batch or mixed-material applications.
Handheld Swivel Knives & Precision Stamps
Swivel Knives:
- Function: A pivoting blade mounted in a wooden handle that cuts clean, flowing lines in cased vegetable-tanned leather.
- Control: Depth is regulated by hand pressure; ideal for organic curves, lettering, and line art.
- Technique Tips:
- Blade Sharpness: Change blades after 3–5 projects to avoid ragged edges.
- Angle: Maintain a consistent 30° blade tilt to control cut width.
- Practice: Use scrap leather to develop muscle memory before working on final pieces.
Precision Stamps:
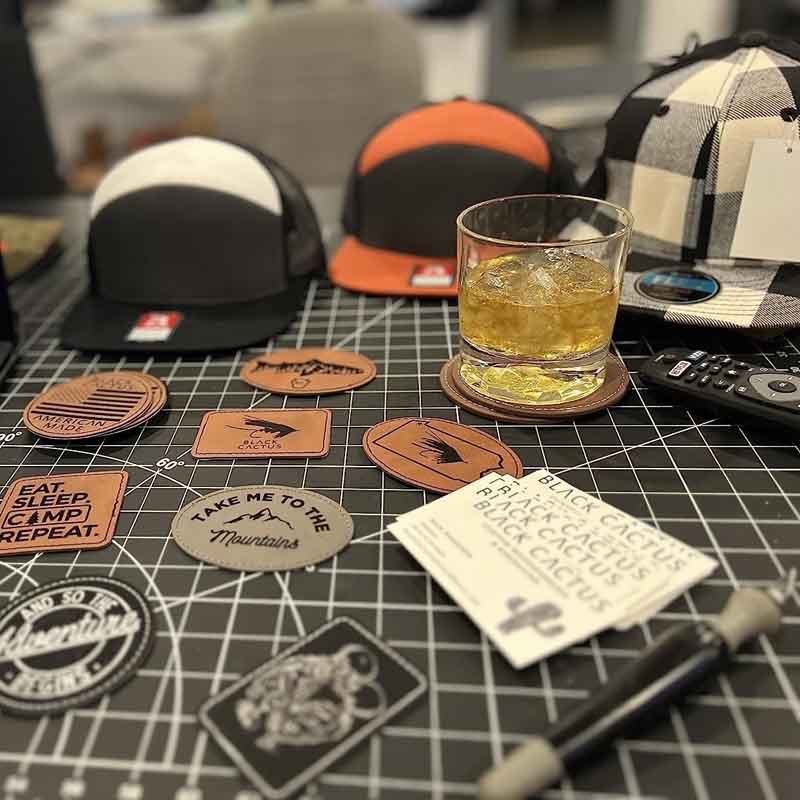
- Types: Steel or carbide stamps in various shapes—dots, crosses, florals, geometric textures.
- Use: Strike with a rawhide mallet to indent patterns; great for borders, backgrounds, and fills.
- Depth Control: Consistent mallet force ensures uniform impression depth (0.5–1 mm); uneven strikes lead to variable relief.
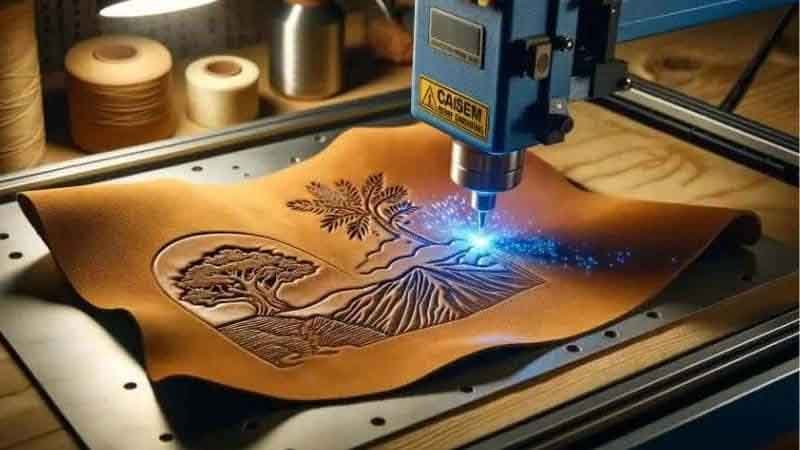
Laser Engraving
Laser Types:
- CO₂ Lasers (30–120 W): Best for natural leathers—cleanly vaporize fibers, allowing up to 2 mm depth.
- Fiber Lasers: More effective on synthetic (PU) leathers, cutting through top coatings without char.
Advantages:
- Repeatability: Identical results across hundreds of units.
- Resolution: Up to 600 DPI for fine shading, grayscale, and photographic detail.
- Speed: Engrave a 100 × 100 mm area in under a minute at standard settings.
Best Settings for Engraving Leather:
| Parameter | Vegetable-Tanned Leather | PU/Vegan Leather |
|---|---|---|
| Power | 20–35% | 15–25% |
| Speed | 300–600 mm/s | 400–700 mm/s |
| Frequency | 5–10 kHz | 10–15 kHz |
| DPI | 300–600 | 300–500 |
Considerations:
- Test each hide batch for variations in thickness and finish.
- Use air assist to clear smoke and maintain clean beam focus.
Rotary Tool Methods
Rotary Engraving (e.g., Dremel®):
- Bits: Carbide or diamond-coated bits (0.5–3 mm) for lines and surface removal.
- Speed Control: 10,000–25,000 RPM; slower speeds for deeper cuts, faster for surface texturing.
- Applications: Prototyping, mixed-material projects where laser is impractical.
Pros & Cons:
- Pros: Low initial investment, versatile bit selection, immediate tactile feedback.
- Cons: Dust generation, operator fatigue, less consistency than laser.
Choosing the Best Method of Engraving
- Hand Engraving: Best for one-off artisanal work, deep relief, and organic patterns.
- Laser Engraving: Ideal for medium-to-high volume, precise reproduction, and intricate shading.
- Rotary Tools: Suited to small batches, complex geometries, or when a laser system isn’t available.
How Do You Finish and Protect Engraved Leather Projects?
After engraving, apply a contrasting antiquing wash (diluted dye) to fill grooves, then wipe away excess to highlight detail. Seal the surface with a thin acrylic or wax-based topcoat, protecting against moisture and wear. Burnish edges with gum tragacanth for a polished look. Regular dust removal and monthly conditioning preserve crisp lines and prevent drying or cracking in both engraved channels and surrounding areas.
Engraved leather is only as enduring as its finishing and care. A thoughtful finishing process not only enhances visual impact but also seals and fortifies the carved areas against dirt, moisture, and abrasion. Below are the essential steps and best practices to finish and protect your engraved creations.
Antiquing & Dye Contrast Techniques
Antiquing Wash:
- Mix the Wash: Combine leather dye (spirit- or water-based) with a reducer or clear alcohol in a 1:1 to 1:3 ratio until semi-transparent.
- Application: Use a soft brush or wool dauber to flood the engraved area. Work quickly to ensure even coverage.
- Blot & Reveal: Within 30–60 seconds, wipe the surface with a clean cloth, removing dye from raised areas while leaving pigment in the recesses—accentuating depth and line work.
Layered Dye for Depth: For multi-tonal effects, apply a darker antiquing wash first, then lightly mist a second, lighter dye over raised sections. This creates dimensional shading.
Key Tips:
- Test First: Always try on a scrap piece to adjust wipe times and contrast.
- Edge Protection: Mask non-engraved areas to prevent overspray or accidental wash splatter.
Sealing with Topcoats & Sealants
Acrylic Topcoats:
- Spray-On or Brush-On: Opt for a light, even mist of clear acrylic finish. Two thin coats are preferable to one heavy coat—heavy build-up can obscure fine detail.
- Protection: Seals engraved cuts from moisture and oils, preventing pigment bleed and surface scuffs.
Wax-Based Finishes:
- Beeswax or Carnauba Wax: Rub sparingly onto the entire surface, then buff with a soft cloth. Wax adds a warm sheen and additional moisture barrier.
- Reapplication: Recommended every 6–12 months, depending on usage.
Solvent vs. Water-Based:
- Water-Based Sealants dry clearer and have lower VOCs.
- Solvent-Based Coatings often yield harder, more durable finishes but require proper ventilation.
Edge Burnishing & Binding
Edge Burnishing:
- Bevel Edges: Use an edge beveler to round off sharp corners, which helps prevent chipping.
- Moisten & Rub: Apply gum tragacanth or water along edges, then rub briskly with a wooden or bone burnisher until edges turn smooth and slightly glossy.
- Edge Paint (Optional): Finish with a matching or contrasting edge paint for visual consistency and extra sealing.
Binding & Sewn Edges: For sewn projects, consider bias binding or leather piping to protect raw edges and complement engraving.
Maintenance to Preserve Detail
Regular Dusting: Use a soft-bristled brush or compressed air to remove debris from engraved channels—dust build-up can dull contrast over time.
Monthly Conditioning:
- Apply a pH-balanced leather conditioner to the non-engraved areas to keep the hide supple. Avoid heavy oils directly in engraved grooves to prevent clogging.
UV & Moisture Protection:
- Store leather goods out of direct sunlight to prevent fading and drying.
- For items exposed to the elements—belts, journals—apply a UV-protectant spray or add a water-repellent topcoat.
Long-Term Preservation
Storage: Keep engraved pieces flat or gently stuffed in breathable dust bags to avoid creases across engraved sections.
Repairs & Touch-Ups:
- Re-anthiquing: Over time, you may reapply a light antiquing wash to recessed lines to maintain contrast.
- Re-Coating: Periodically refresh the topcoat after 1–2 years of heavy use to preserve the protective layer.
What Common Challenges Arise and How Do You Troubleshoot Them?

Common engraving issues include uneven cuts from inconsistent casing or dull blades, burn marks from excessive laser power or slow speed, and depth control problems leading to over- or under-cutting. Troubleshoot by standardizing moisture content, regularly sharpening tools, running parameter grid tests on scrap leather, using proper air assist, and documenting ideal settings. Recognize disadvantages—time-intensive handwork, equipment costs, and potential hide wastage—and mitigate them through training, batch testing, and process optimization.
1. Uneven Cuts and Line Inconsistencies
Causes:
- Inconsistent Casing: Leather that’s too wet tears; too dry chafes or causes blade chatter.
- Dull Swivel Knife Blades: Loss of sharp edge leads to ragged or torn grooves.
- Variable Hand Pressure: Inexperienced artisans may press too hard or too lightly.
Solutions:
- Standardize Casing Process: Use a spray bottle and timer—mist for 5 seconds per square foot, rest 10 minutes, blot superficially.
- Blade Maintenance: Replace swivel knife blades after 3–5 projects; strop blades between sessions.
- Practice and Guides: Employ guide rails or light pencil guides on hide to help maintain consistent hand motion, especially for straight or mirrored cuts.
- Training: Conduct regular skill workshops to calibrate cutting depth and pressure among artisans.
2. Burning, Charring, and Smoke Residue
Causes:
- Excessive Laser Power or Slow Speed: Over-concentration of energy vaporizers fibers beyond intended depth.
- Poor Ventilation or No Air Assist: Smoke lingers, charring adjacent areas, and fouls optics.
Solutions:
- Parameter Grid Testing: Run a matrix of power vs. speed settings on a leather scrap from the same batch to identify the threshold between clean engraving and burning.
- Optimize Air Assist: Use 10–15 PSI air pressure directed at the engraving zone to clear debris and cool the surface.
- DPI and Passes: For deeper engraving, use multiple light passes instead of single heavy passes; this reduces localized overheating.
- Laser Maintenance: Clean lens and mirrors before each job; accumulated residue can scatter energy and create hotspots.
3. Depth Control and Over-Engraving
Causes:
- No Depth Gauge: Reliance on visual cues can lead to inconsistent depths.
- Batch Variability: Thickness fluctuations between hides or within a single hide.
Solutions:
- Depth Markers on Tools: For hand engraving, adjust collars or use blades with depth stops.
- Laser Focus Calibration: Verify the focal height with a feeler gauge; small deviations (±0.5 mm) cause big depth changes.
- Test Cuts: Before each run, engrave a small square on scrap to confirm depth, then adjust power/speed by ±5–10% as needed.
- Batch Segmentation: Group hides by thickness or grain finish; process each group with its own optimized settings.
4. Disadvantages of Engraving to Anticipate
- Time-Intensive Handwork: Crafting by hand is laborious—limit hand engraving to bespoke orders or small batches.
- Equipment Investment: Laser systems and high-precision rotary tools require significant upfront capital and ongoing maintenance.
- Material Waste: Mistakes can render hide sections unusable—always reserve extra hide and practice on scraps.
- Surface Damage: Over-aggressive engraving can weaken leather around cuts, leading to premature cracking.
5. Troubleshooting Workflow & Best Practices
- Document SOPs: Create written procedures for casing, tool settings, and finishing. Include “golden sample” images for reference.
- Parameter Logs: Maintain a digital log of power, speed, DPI, and pass count for each hide type and thickness.
- Quality Checkpoints: Inspect a test panel every hour for consistency in depth and clarity.
- Continuous Improvement: Hold weekly reviews to discuss common defects and update SOPs accordingly.
- Cross-Training: Rotate artisans through hand and laser engraving roles to build holistic understanding and empathy for each method’s challenges. 图片6
Ready to Elevate Your Leather Line with Precision Engraving?
At Szoneier Leather, our 18+ years of R&D and manufacturing excellence mean we can partner on every phase of your engraved leather project:
- Tool & Method Consultation: Hand, rotary, or laser engraving strategies
- Material Selection: Sourcing optimal vegetable-tanned hides and eco-friendly alternatives
- Parameter Optimization: Customized laser settings, tooling depths, and casing protocols
- Full-Service Production: Pattern layout, engraving, finishing, and QA under one roof
Contact us to discuss your custom engraving needs, request sample swatches, or arrange a factory tour.Let’s craft leather pieces that bear your brand’s signature with precision, depth, and enduring quality.