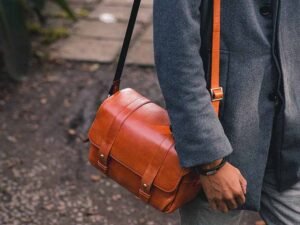
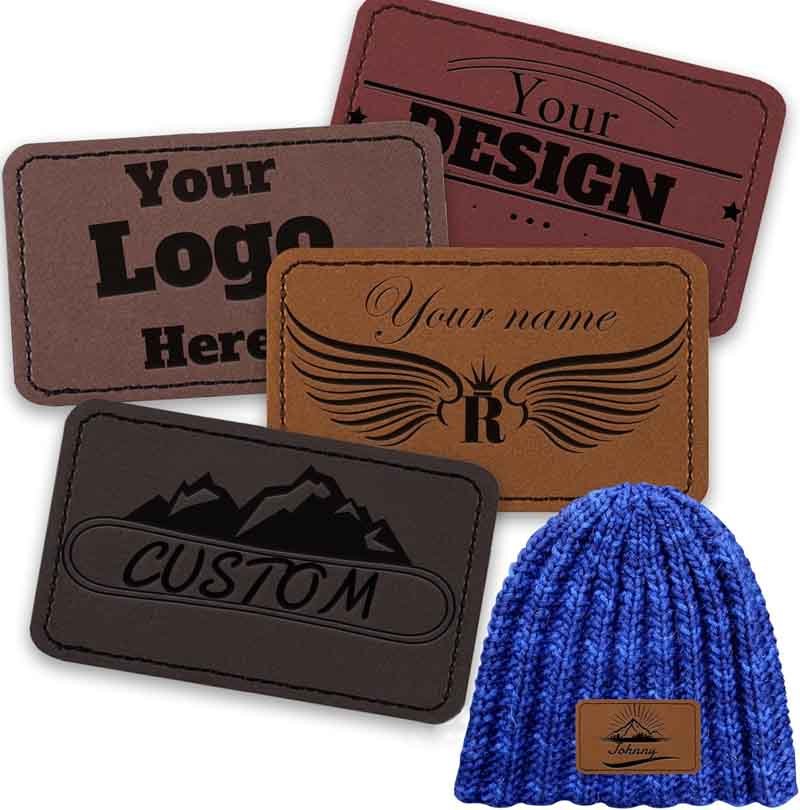
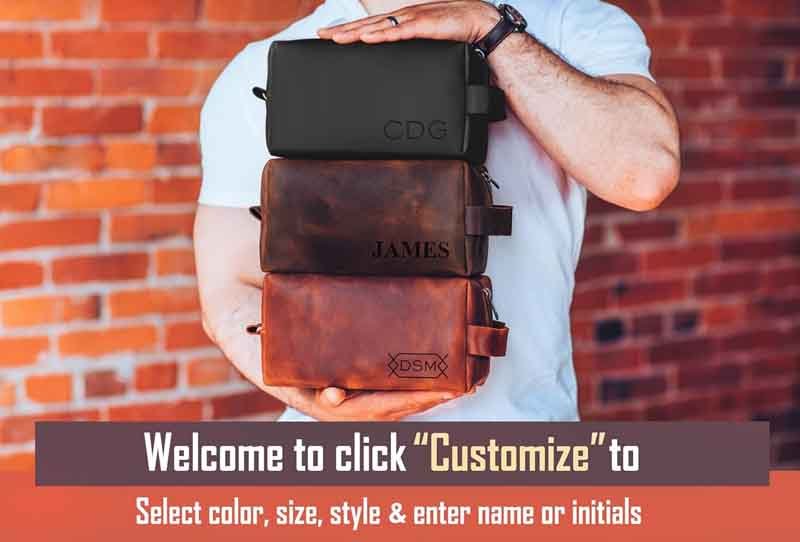
Personalizing leather transforms a simple accessory into a signature statement—whether it’s a monogrammed wallet, a debossed briefcase, or a foil-stamped handbag. In today’s competitive market, brands and customers alike crave one-of-a-kind details that tell a story and reinforce brand identity. From traditional embossing to cutting-edge laser etching, the techniques available can be overwhelming. Yet choosing the right method for each product style ensures both aesthetic appeal and lasting quality.
To personalize leather effectively, select a technique—embossing, engraving, foil stamping, painting—that suits your product’s style and leather type. Match full-grain hides with deep debossing for premium briefcases; use laser engraving on vegetable-tanned leather for fine detail on wallets; apply foil stamping on smooth top-grain straps for logo highlights. Proper tool selection, precise design placement, and post-finish conditioning guarantee crisp, durable personalization.
Ready to dive into the “how”? Let’s explore.
What Does Leather Personalization Mean for Different Product Styles?
Leather personalization tailors surface treatments—embossing, engraving, printing, or painting—to each product style’s form and use. For structured goods like briefcases, deep debossing and edge creasing reinforce shape and brand prestige. Small accessories, such as keychains or cardholders, benefit from laser engraving for fine detail. Straps and belts often use foil stamping or screen printing for color accents. Each technique enhances functionality, aesthetics, and brand storytelling.
Leather personalization encompasses a spectrum of techniques, each aligned with the product’s shape, intended use, and brand positioning. To match method to product, consider:
1. Structured Goods: Briefcases, Leather Boxes, and Folios
Techniques: Debossing, embossing, edge creasing
Rationale:
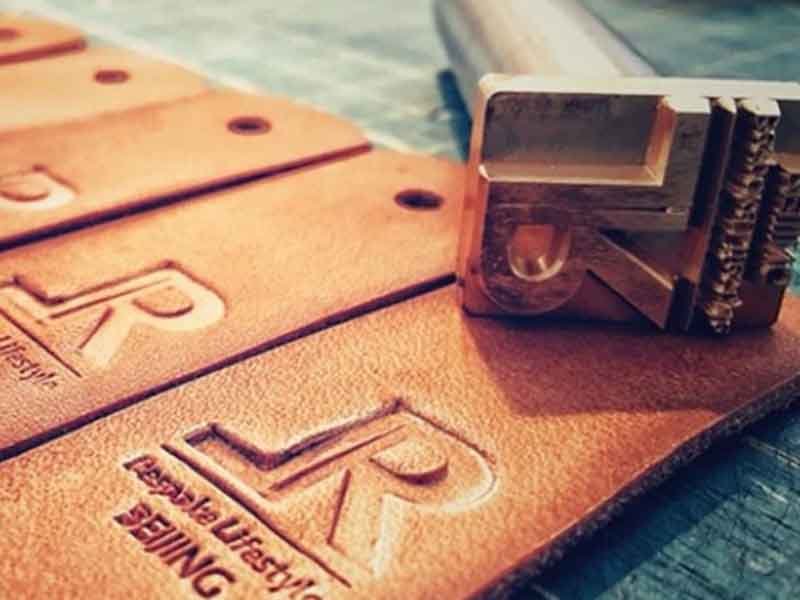
- Deep Debossing: Pressing a metal die into the leather creates a recessed logo or pattern. On thick, full-grain hides, this technique yields permanent, elegant branding that complements high-end briefcases.
- Embossing: Raising the leather pattern adds subtle visual interest—ideal for leather boxes or phone folios that benefit from textured details.
- Edge Creasing: Highlighting the seam lines with a decorative crease serves both aesthetic and structural functions, reinforcing edges of folios or portfolio covers.
2. Small Accessories: Wallets, Keychains, Straps
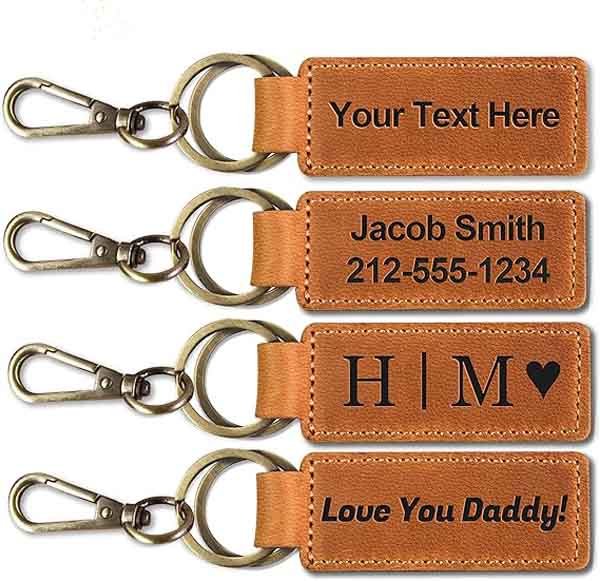
Techniques: Laser engraving, hand stamping, foil stamping
Rationale:
- Laser Engraving: Focused light removes surface material for precise, micro-detail logos or text. Perfect for thin wallets and key fobs where die-based methods could distort or burn.
- Hand Stamping: Using handheld steel stamps and a mallet to imprint characters—earning rustic authenticity for artisan belts or bracelets.
- Foil Stamping: Heat-activated foil adheres to smooth leathers, adding metallic shine on bag straps, zipper pulls, or wristlets.
3. Fashion-Forward Pieces: Tote Bags, Backpacks, Straps
Techniques: Screen printing, hand painting, digital printing
Rationale:
- Screen Printing: Multiple ink layers on coated leather deliver bold color blocks—ideal for logo-centric tote bags.
- Hand Painting: Artisans can craft one-off watercolors or patterns on backpacks—each piece becomes unique.
- Digital Printing: UV-cured inks reproduce photographic imagery on smooth leathers, perfect for limited-edition collaborations.
4. Functional Gear: Tool Bags, Gym Bags, Outdoor Cases
Techniques: Brand embossing with protective top-coats, bonded labels, riveted metal plates
Rationale:
- Embossing + Top-Coat: Deep impressions coated with clear PU protect logos from abrasion on tool rolls.
- Bonded Leather Labels: Securely glued patches add branding without compromising bag flexibility.
- Riveted Plates: Metal nameplates riveted onto heavy-duty straps or cooler bags signal industrial strength and brand credibility.
Which Personalization Techniques Suit Each Leather Product?
Embossing/debossing with heated dies best suits structured items—briefcases and leather boxes—creating permanent, deep impressions. Laser engraving excels on small accessories—wallets, keychains—for fine, contactless detail. Foil stamping adds metallic highlights on straps, belts, and tote logos. Screen printing and digital printing enable multi-color designs on backpacks and fashion totes. Hand painting or airbrushing turns each piece into unique art, ideal for limited-edition bags. Choose your method by balancing leather thickness, texture, and desired visual effect.
Selecting the right personalization method hinges on understanding both the leather product’s form and the unique capabilities of each technique. Below, we explore six primary methods—embossing, debossing, laser engraving, foil stamping, printing, and hand painting—and map them to product categories for optimal performance and aesthetic appeal.
1. Embossing & Debossing for Structured Goods
Process & Equipment:
- Custom metal dies pressed into leather under heat (120–150 °C) and pressure (200–400 N/cm²) for 5–15 seconds.
- Counter-dies support the reverse side, ensuring crisp edges and consistent depth.
Ideal Products:
- Briefcases & Folios: Deep debossing creates a refined, tone-on-tone logo that ages gracefully with patina.
- Leather Boxes & Cases: Raised embossing on lids adds tactile luxury—perfect for gift or presentation boxes.
Material Considerations:
- Use full-grain or heavy top-grain leather (1.4–1.6 mm) to prevent cracking.
- Lightly pigmented or aniline finishes yield the best contrast.
2. Laser Engraving for Fine-Detail Accessories
Process & Equipment:
- CO₂ lasers (30–150 W) ablate surface fibers, exposing underlying layers without contact.
- Parameters (speed, power, pulses) calibrated to leather type and thickness.
Ideal Products:
- Wallets & Cardholders: Serial numbers, micro-logos, or expedition dates engraved with micron-level precision.
- Keychains & Tags: Small footprints allow intricate patterns without bulky dies.
Material Considerations: Vegetable-tanned or lightly pigmented leathers absorb laser energy cleanly; avoid PU-coated hides that can melt.
3. Foil Stamping for Vivid Metallic Accents
Process & Equipment:
- Heat and pressure transfer metallic or matte foils from polyester ribbon onto leather via metal dies.
- Temperatures (80–160 °C) and dwell times (1–5 s) vary by leather finish.
Ideal Products:
- Straps & Belts: Linear logos or monograms stamped along length for subtle shine.
- Tote Bag Fronts: Bold, gleaming brand marks that catch the eye.
Material Considerations: Smooth, semi-aniline leathers ensure foil adhesion; textured grains may yield inconsistent transfer.
4. Screen Printing & Digital Printing for Multi-Color Designs
Process & Equipment:
- Screen Printing: Layered stencil screens deposit plastisol or UV-cured inks.
- Digital Printing: Direct print heads apply pigmented or UV inks with precise color matching.
Ideal Products:
- Fashion Totes & Backpacks: Complex logos, photographic imagery, or full-surface patterns.
- Promotional Bags: Rapid turnarounds for seasonal or event-based campaigns.
Material Considerations: Coated or smooth top-grain leathers promote ink adhesion; protective clear coats extend durability.
5. Hand Painting & Airbrushing for Artisan Pieces
Process & Equipment:
- Artists use acrylic leather paints or dyes, applied with brushes or airbrushes in multiple thin layers.
- Final sealing with flexible top-coats to lock colors and resist abrasion.
Ideal Products:
- Limited-Edition Backpacks & Clutches: One-off artworks—watercolor blends or gradient fades.
- Character Accessories: Hand-painted motifs on straps, patches, or small cases.
Material Considerations: Vegetable-tanned or aniline-dyed leathers accept pigment deeply; ensure proper curing to prevent cracking.
6. Hand Stamping for Rustic, Craftsmanship Appeal
Process & Equipment: Steel stamps (individual letters or symbols) struck with a mallet to indent leather.
Ideal Products:
- Belts & Bracelets: Personalized initials or inspirational words at buckle areas.
- Bracelet Straps: Hand-stamped dates or coordinates for sentimental gifts.
Material Considerations: Thicker leathers (1.2 mm+) avoid over-penetration; practice stamping technique ensures uniform depth.
How Do You Select the Right Leather and Finish for Personalization?
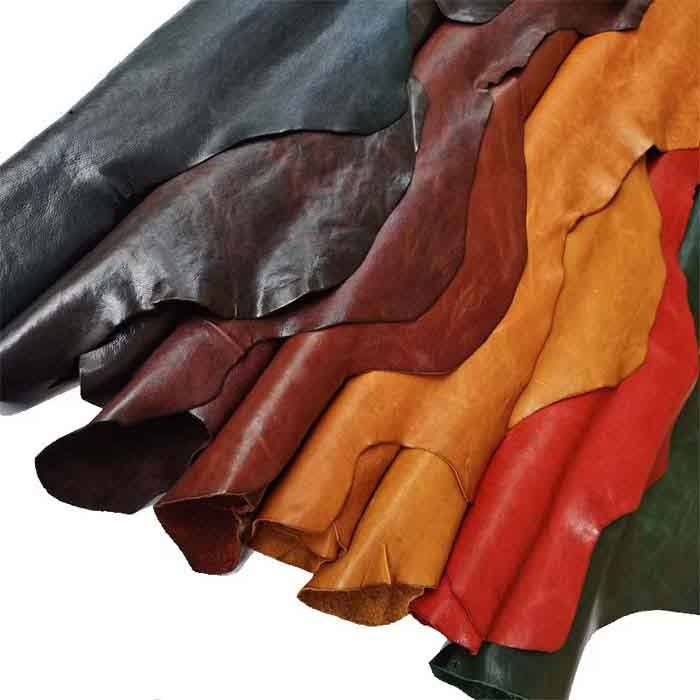
Choose full-grain leather with minimal finish for deep embossing and rich patina; use vegetable-tanned hides with tight grain for laser engraving; select top-grain or corrected-grain leather for durable screen printing or foil stamping; and opt for PU-coated or semi-aniline leathers when vibrant colors and water resistance are paramount. Match thickness (1.2–1.6 mm), surface smoothness, and tanning method to your personalization technique to ensure crisp, lasting results.
Determine the Personalization Method
First, identify your primary technique, since each method demands specific material traits:
- Embossing/Debossing requires a thick, resilient hide (1.4–1.6 mm) that won’t crack when pressed. Full-grain and top-grain leathers stand up to high heat (120–150 °C) and pressure, preserving deep impressions.
- Laser Engraving works best on vegetable-tanned, aniline-dye leathers. The open grain allows the laser to vaporize fibers cleanly, creating high-contrast marks without smudging or melting.
- Foil Stamping needs a smooth, semi-aniline or corrected-grain surface where metallic foils can adhere evenly. The leather’s finish should tolerate 100–140 °C pressing without discoloration.
- Screen/Digital Printing demands a uniform, lightly pigmented finish so inks bond reliably. Corrected-grain or pigmented top-grain leathers allow consistent color reproduction.
- Hand Painting/Airbrushing favors vegetable-tanned or aniline leathers that readily absorb dyes and paints, ensuring vibrant, fade-resistant hues after sealing.
Match Leather Tanning and Finish
1. Full-Grain Leather
- Characteristics: Untouched surface, natural markings, excellent tear strength.
- Best For: Embossing/debossing where patina development enhances contrast.
- Considerations: Higher cost; slight color variation between hides.
2. Top-Grain (Corrected-Grain) Leather
- Characteristics: Sanded and pigmented for uniform appearance.
- Best For: Screen printing, foil stamping, and applications requiring tight color control.
- Considerations: Surface coating must be compatible with chosen inks or foils.
3. Vegetable-Tanned Leather
- Characteristics: Rich burnish potential, responsive to laser, natural patina.
- Best For: Laser engraving, hand painting, and artisan stamping.
- Considerations: Sensitive to moisture; requires conditioning to prevent drying.
4. Chrome-Tanned Leather
- Characteristics: Flexible, colorfast, moisture-resistant.
- Best For: Outdoor or performance bags with printed logos.
- Considerations: Less receptive to deep embossing.
5. PU-Coated or Faux Leather
- Characteristics: Waterproof, uniform color, cruelty-free.
- Best For: Mass-market foil stamping and digital printing.
- Considerations: Not suitable for deep embossing; coatings may flake without proper primer.
Gauge and Thickness Guidelines
- 1.0–1.2 mm: Excellent for wallets, cardholders, and small accessories; supports light embossing and laser.
- 1.2–1.4 mm: Versatile mid-weight for handbags, straps, and mid-sized bags; suitable for foil stamping, embossing, and printing.
- 1.4–1.6 mm+: Heavy-duty hides for briefcases, boxes, and structural products; ideal for deep debossing and embossed logos.
Surface Texture and Grain
Smooth or Semi-Aniline Grain:
- Advantage: Perfect backdrop for crisp embossing, foil, and print.
Pebbled or Nubuck Grain:
- Advantage: Conceals minor scratches; best for laser engraving (surface contrast) but may blur fine print.
Suede/Napped Finishes:
- Advantage: Suede’s nap yields a soft, tactile finish for hand-painted effects, but avoid heavy embossing.
Color Fastness and Patina Development
Aniline Leathers:
- Pros: Show natural variation and age beautifully, enhancing embossed details over time.
- Cons: Susceptible to fading; consider protective top-coats for prints.
Pigmented Leathers:
- Pros: Consistent color; ideal for bold screen prints and coated finishes.
- Cons: Less patina character; pigment layer may mask deep embossing subtly.
Testing and Prototyping
Before full-scale production, conduct sample tests:
- Emboss/Print Swatch: Use the exact hide and finish to verify depth, clarity, and adhesion.
- Laser Sample: Adjust power/speed to minimize scorching while maximizing contrast.
- Foil Transfer: Test multiple foil colours and temperatures to optimize shine and adhesion.
- Paint/Dye Trials: Seal painted panels and flex test to ensure crack resistance.
What Tools and Processes Are Essential for Each Style?
Each personalization style demands specialized equipment and controlled processes: embossing/debossing uses hydraulic or pneumatic heat presses (120–150 °C, 200–400 N/cm²) with custom metal dies; laser engraving requires CO₂ or fiber lasers (30–150 W) with precise airflow; foil stamping employs hot-stamping machines and polyester foil rolls; screen/digital printing needs mesh screens or UV-curable inkjet printers plus curing units; and hand painting relies on leather-specific acrylics, airbrush setups, and flexible sealants for longevity.
1. Embossing & Debossing
Equipment:
- Heat Press: Hydraulic or pneumatic units with adjustable temperature (120–150 °C), pressure (200–400 N/cm²), and dwell time (5–15 s).
- Dies & Counter- Dies: CNC-machined brass or aluminum plates, held in heated platens.
Process Workflow:
- Die Preparation: Clean and preheat dies to target temperature.
- Leather Conditioning: Pre-press leather to remove moisture and smooth surface.
- Alignment: Use registration jig or laser guide to position die precisely over leather panel.
- Press Cycle: Close press for set dwell time; monitor pressure gauge to ensure consistency.
- Cooling & Inspection: Allow leather to cool under light hold to prevent spring-back; inspect depth and clarity.
Consumables: Release papers for sticky finishes, moisture meters for hide prep.
2. Laser Engraving & Cutting
Equipment:
- CO₂ Laser: 10.6 µm wavelength, 30–150 W depending on hide thickness.
- Fiber Laser: 1.06 µm, 20–50 W for synthetic leathers.
- Exhaust System & Air Assist: Removes smoke and debris, preventing scorch marks.
Process Workflow:
- Design Setup: Vector or raster files in CAD software; adjust power/speed settings.
- Sample Calibration: Test on scrap leather to fine-tune power (20–40%) and speed (200–500 mm/s).
- Engraving/Cutting: Secure leather on honeycomb bed; begin engraving, monitoring for consistent contrast.
- Post-Clean: Brush or vacuum away residue; apply light leather conditioner if surface feels dry.
Consumables: Replacement lenses, honeycomb platforms, masking tape for delicate finishes.
3. Foil Stamping
Equipment:
- Foil Stamping Press: Manual or semi-automatic with temperature control (80–160 °C) and variable pressure.
- Metal Dies: Engraved brass or magnesium blocks.
- Foil Rolls: Metallic, matte, or specialty foils in polyester backing.
Process Workflow:
- Foil Loading: Align foil roll under die; tension properly to avoid wrinkles.
- Temperature & Pressure Test: Stamp sample to verify foil transfer without scorching.
- Production Run: Feed leather pieces by hand or conveyor; inspect each for complete adhesion.
Consumables: Foil rolls, release films, silicone mats to protect platens.
4. Screen Printing & Digital Printing
Equipment:
- Screen Printing: Mesh screens (110–200 T), squeegees, flash dryers or conveyor cure ovens.
- Digital Printing: UV-cured inkjet printers with leather-compatible inks.
Process Workflow (Screen):
- Screen Prep: Coat screens with emulsion and expose to create stencil.
- Ink Mixing: Blend UV or solvent-based inks to Pantone matches.
- Printing & Curing: Print ink layer, flash cure (60–80 °C) between overlays, final cure for 2–5 min at 120 °C.
Process Workflow (Digital):
- File RIP & Color Profiling: Calibrate for leather substrate.
- Print Passes: Multiple passes may be needed for opacity.
- UV Curing: Immediate LED curing prevents smearing.
Consumables: Mesh, emulsion, inks, squeegees, UV lamps.
5. Hand Painting & Airbrushing
Equipment:
- Airbrush Systems: Gravity-feed airbrush with 0.2–0.5 mm nozzles, compressor (20–30 psi).
- Brushes & Sponges: Variety of shapes for detail and broad coverage.
Process Workflow:
- Surface Prep: De-oil leather with isopropyl alcohol; apply deglazer for better adhesion.
- Base Coat: Use acrylic leather primer or sealer to ensure uniform absorption.
- Color Application: Build thin layers, allowing 10–15 min drying.
- Sealing: Apply flexible top-coat (matte/gloss) in 2–3 thin coats.
Consumables: Leather acrylic paints, deglazer, sealants, masking stencils.
How Should You Design for Optimal Readability and Aesthetic Impact?
Design for optimal readability by choosing clean, bold typography (minimum 6 mm height), ensuring high contrast between personalization and leather color, and maintaining adequate margins (10–15 mm from edges). Simplify intricate logos for small scales, use negative space to prevent visual clutter, and align text/logos with product lines (e.g., along flap seams or strap centers). Always create physical proofs on your exact leather to validate clarity before full production.
1. Typography & Line Weight
Font Selection:
- Sans-Serif Fonts (e.g., Helvetica, Futura) offer clean lines that emboss and engrave crisply. Their uniform stroke width prevents thin segments from disappearing, especially in debossing or laser etching.
- Serif Fonts lend a classic feel, but fine serifs risk filling in on textured leathers. If used, choose slab-serifs or wide serifs for better reproduction.
Line Weight & Scale:
- Maintain a minimum stroke width of 0.5 mm in die-based embossing to prevent breakage. For laser work, no less than 0.3 mm to avoid burn-through.
- Uppercase text above 6 mm height ensures legibility across production variations; lowercase can appear smaller but should not drop below 4 mm.
2. Placement & Margins
Choosing the Canvas:
- Identify flat, uninterrupted areas—front panels of bags, broad straps, or box lids—where the design won’t warp across seams or folds.
- Avoid recessed or ribbed sections; uneven surfaces distort impressions and prints.
Margin Guidelines: Keep personalization at least 10–15 mm from edges, hardware, and stitch lines to prevent loss of detail. This “clear zone” also protects against wear near stress points.
3. Contrast & Material Interaction
Color Contrast: On dark leathers, use light foils (gold, silver, white) or bleached laser engraving for visibility. Conversely, dark inks and foils on light hides stand out sharply.
Finish Compatibility: Smooth, pigmented top-grain leathers yield crisp foil and prints; aniline or semi-aniline surfaces develop a patina that enhances subtle embossing over time.
Texture Considerations: Grainy leathers (pebbled, nubuck) scatter light, reducing sharpness—reserve for bold, large-scale personalization rather than fine scripts.
4. Simplification & Negative Space
Logo Detail:
- For small logos (<25 mm width), strip away intricate elements—thin outlines, tight lettering—and focus on core shapes or initials.
- Convert full-color logos to single-color line art to maintain clarity in embossing or engraving.
Use of Negative Space: Surround text and icons with ample background, letting the design “breathe.” This prevents optical crowding and ensures the viewer’s eye is drawn to the personalization.
5. Prototyping & Iterative Testing
Digital Mockups: Overlay vector art on high-resolution photos of your leather panels in design software to preview scale and placement.
Physical Proofs:
- Always run small-batch samples—5 to 10 pieces—under final production settings. Examine under various lighting to catch low-contrast or depth issues.
- Adjust die depth, laser settings, or ink opacity based on sample feedback; document these parameters for production consistency.
Case Study: Tote Bag Logo
- Initial Concept: 40 × 40 mm logo centered on tote front.
- Challenge: Embossing on pebbled cowhide yielded incomplete fill in small letter counters.
- Solution: Enlarged letter spacing by 15%, increased margin to 20 mm, switched to foil stamping for sharper edges. Final proof passed quality checks and met client branding standards.
What Quality Control Steps Ensure Consistent Personalization Results?
Quality control for leather personalization requires pre-production proofs, in-process sampling every 50–100 units, and final inspections of depth, alignment, and adhesion. Use digital calipers to verify embossing depth (0.5–1.0 mm), microscopes to check laser clarity, and colorimeters for ink or foil consistency. Document all machine settings and material batches to ensure repeatability. Promptly address deviations with root-cause analysis and adjust processes before continuing production.
1. Pre-Production Validation
Design Validation & Mockups
- Generate digital layouts over high-resolution leather scans to verify scale, placement, and contrast.
- Create physical proofs (5–10 units) using final leather, finish, and personalization settings.
Parameter Documentation
- Record machine settings: press temperature, pressure, dwell time for embossing; laser power, speed, pulses; foil stamping temperature and dwell.
- Log material details: leather batch numbers, tanning method, surface finish, thickness, color lot.
Approval Sign-Off
- Obtain stakeholder sign-off on digital mockups and physical samples—ensuring that the look, feel, and durability meet brand expectations.
2. In-Process Monitoring
Sampling Frequency
- Inspect a random sample every 50–100 pieces (or per production shift) to catch drift early.
Performance Checks
- Embossing Depth: Use digital calipers to measure indent depth; target 0.5–1.0 mm with tolerance ±0.1 mm.
- Laser Clarity: Examine under 5× microscope; confirm line edges are sharp with no scorch halos.
- Foil & Ink Adhesion: Perform rub tests (10× with a damp cloth) to ensure no transfer.
Environmental Control
- Maintain stable temperature (20–25 °C) and humidity (40–60 %) in the production area to prevent leather expansion/contraction that can distort personalization.
3. Final Inspection & Testing
100% Visual Audit
- Check each unit for:
- Alignment & Centering: Use registration grids or guides.
- Consistency of Depth/Color: Compare to approved proof sample.
- Surface Defects: Look for scratches, burn marks, or incomplete transfers.
Functional Durability Tests
- Flex Test: Bend personalized area 50× to simulate real-world use; inspect for cracking or delamination.
- Abrasion Test: Rub with standard leather abrasive pad under load to verify surface resilience.
Documentation & Traceability
- Record inspection results in a batch QC report, linking defects to machine settings, material lots, and operators.
4. Root-Cause Analysis & Continuous Improvement
Defect Classification
- Categorize issues: process (e.g., temperature drift), material (e.g., hide inconsistency), operator (e.g., misalignment).
Corrective Actions
- Adjust machine parameters, replace worn dies or lenses, retrain operators, or quarantine suspect leather lots.
Feedback Loop
- Hold weekly QC reviews, update Standard Operating Procedures (SOPs), and refine proof-of-concept criteria to prevent recurrence.
QC Metrics Dashboard
| Metric | Target | Measurement Tool | Frequency |
|---|---|---|---|
| Embossing Depth | 0.5–1.0 mm ±0.1 mm | Digital calipers | Every 50 units |
| Laser Engraving Line Width | 0.3–0.5 mm | 5× Microscope | Every 50 units |
| Foil/Ink Adhesion | No transfer after 10× rub | Wet rub cloth test | Every 100 units |
| Color Consistency (ΔE) | <2.0 | Colorimeter | Per batch start |
| Flex Test Durability | No cracking after 50 bends | Manual flex test | Final inspection |
How Do You Care for Personalized Leather Products?
Care for personalized leather by gently cleaning with a soft cloth and pH-balanced leather soap, air-drying away from heat, and conditioning with a neutral leather balm every 3–6 months. For embossed, foil-stamped, or printed areas, use a soft brush or cloth to avoid abrasion. Reapply DWR or wax finishes annually on treated surfaces. Store items in breathable dust bags at room temperature, stuffing them to maintain shape and prevent creases.
Ensuring your personalized leather goods look and perform beautifully over time requires a tailored care regimen that respects both the leather’s natural properties and the applied personalization. Below is a comprehensive guide divided into key steps:
1. Routine Cleaning
Dust & Surface Dirt Removal
- Use a soft, dry microfiber cloth to wipe away loose dust and debris daily or after each use.
- For embossed or engraved details, gently brush dust out of crevices with a soft-bristle brush.
Spot Cleaning
- Prepare a mild cleaning solution: mix a few drops of pH-balanced leather soap or saddle soap with distilled water.
- Dip a damp cloth (not wet) into the solution, wring it out thoroughly, and blot stains or marks—do not rub aggressively.
- Wipe away soap residue with a separate damp cloth, then pat dry with a clean towel.
Avoid Harsh Chemicals
- Never use bleach, ammonia, or household detergents.
- Avoid alcohol-based or oil-based cleaners that strip natural oils or leave residues interfering with personalization finishes.
2. Conditioning & Nourishment
Selecting a Conditioner
- Choose a neutral, pH-balanced leather conditioner or balm compatible with your leather type (aniline, semi-aniline, pigmented).
- For vegetable-tanned or aniline leathers, select products free of silicones or heavy dyes to preserve patina.
Application Technique
- Apply conditioner sparingly: a pea-sized amount on a soft cloth.
- Rub gently in circular motions across the leather surface, including personalized areas.
- Allow 10–15 minutes for absorption, then buff lightly with a clean cloth.
Frequency
- Condition every 3 months for daily-use items; every 6 months for occasional accessories.
- More frequent conditioning may be needed in dry climates or after heavy cleaning.
3. Protecting Personalization Finishes
Foil, Embossing, Printing & Painting
- After cleaning and conditioning, apply a clear protective spray (silicone-free, pH-balanced) to shield foil stamps and prints.
- For hand-painted or printed areas, use a flexible acrylic top-coat—light mist sprays to avoid pooling.
Reproofing Coated or Waxed Leather
- DWR Sprays: For DWR-treated leathers, reapply a spray-on water repellent every 6–12 months, then heat-set with a hairdryer on low.
- Wax Refresh: For waxed finishes, gently warm the surface (hairdryer), rub in a thin layer of beeswax or paraffin bar, then buff off excess to renew water beading.
4. Drying & Storage
Drying After Exposure
- If leather gets wet, blot excess moisture—do not wring or twist.
- Air-dry at room temperature, away from direct sunlight or heat sources that can cause cracking.
Long-Term Storage
- Store personalized leather in a breathable cotton dust bag—avoid plastic covers that trap moisture.
- Stuff bags, wallets, and cases with acid-free tissue or unprinted cotton towels to maintain shape and prevent creases, especially in embossed areas.
- Keep in a cool, dry environment (18–22 °C, 40–60% humidity) to deter mold and mildew.
5. Periodic Inspection & Repair
Regular Checks
- Inspect personalized details quarterly: look for cracking in embossing, lifting of foil, or fading of prints.
- Address issues early—minor edge wear can be sealed with a touch of clear leather adhesive or balm.
Professional Restoration
- For extensive wear or damage to personalized surfaces, consult a leather restoration specialist to reapply finishes or perform precision repairs without impacting logos or designs.
Ready to Personalize Your Leather Products?
At Szoneier Leather factory, we offer over 18 years of craftsmanship and state-of-the-art personalization—from custom dies and laser engraving to advanced printing and finishing. Whether you’re launching a private-label bag line or seeking small-batch bespoke accessories, our end-to-end service ensures your branding is flawlessly integrated into every stitch and surface.
Contact us now for design consultations, sample proofs, and competitive OEM/ODM pricing.Transform your leather goods into unforgettable brand ambassadors—precision personalized by Szoneier.