 Skip to content
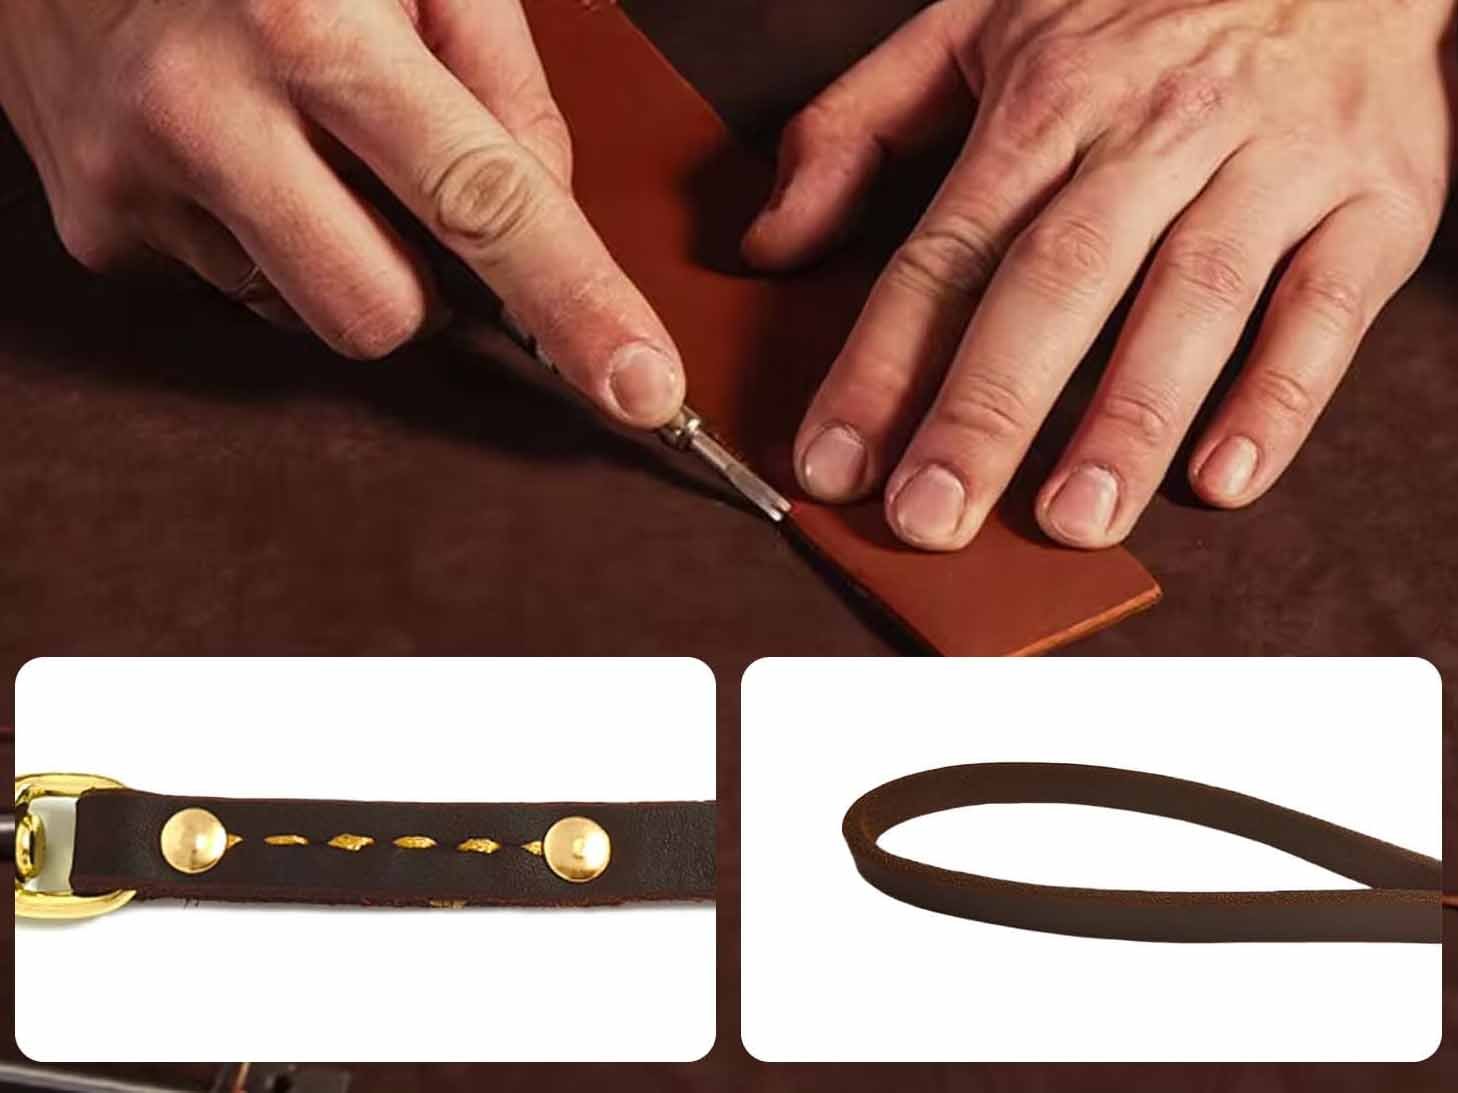
Leather dog leashes remain one of the most trusted, durable, and premium pet accessories in the world. Whether you’re a pet owner who appreciates craftsmanship, a DIY enthusiast exploring leatherwork, or a brand planning to develop a high-end dog gear line, understanding how to make a leather leash is essential. A well-crafted leather leash combines beauty, strength, and longevity—qualities synthetic leashes rarely match. But making a leash that is truly secure, comfortable, and professional requires more than cutting a strip of leather and attaching hardware. It demands knowledge of materials, strap thickness, hardware durability, reinforcement methods, and finishing techniques.
To make a leather dog leash, you need strong full-grain or top-grain leather, durable hardware such as a swivel clip and rivets, and tools for cutting, punching, skiving, and burnishing. Cut a strap of the right thickness, attach hardware securely, reinforce stress points, finish the edges, and condition the leather. Proper materials and techniques ensure the leash is strong, safe, and comfortable for daily use.
Crafting a leather leash is also a meaningful process—each step, from choosing leather to burnishing edges, adds character and functionality. In this guide, you’ll learn exactly how professionals and leather manufacturers (like Szoneier Leather) build long-lasting leashes trusted by dog owners worldwide.
What Materials and Tools Do You Need to Make a Leather Dog Leash?
Creating a premium leather dog leash begins with choosing the right materials and tools. In leather leash manufacturing—whether DIY or full OEM/ODM—the materials determine safety, while the tools determine craftsmanship. Strong leather prevents breakage, and the right hardware withstands pulling force from dogs of different sizes. Meanwhile, proper tools ensure clean cuts, accurate holes, smooth edges, and secure attachment points.
A professional-grade leather dog leash isn’t just a strip of leather with a clip attached—it’s a carefully engineered product designed for strength, comfort, longevity, and aesthetics. Below is an exhaustive breakdown of exactly what you need, why each component matters, and how each affects final performance.
Which Types of Leather Work Best for Dog Leashes?
Choosing leather type is the most crucial material decision because the fiber density, tanning method, and compression of the hide determine tensile strength and stretch resistance.
1. Full-Grain Leather
- Ideal thickness: 8–12 oz (3–5 mm)
- Why it’s best:
- retains natural grain with longest fibers
- highest pull resistance
- ages beautifully and becomes more comfortable over time
- Use case: medium, large, and working breeds
Full-grain vegetable-tanned leather is the gold standard for premium leashes because it can withstand sudden jerks and high pulling tension.
2. Top-Grain Leather
- slightly sanded but still strong
- comfortable and flexible
- good for small dogs or decorative leashes
3. Chrome-Tanned Leather
- moisture-resistant
- more colorful and fashion-friendly
- not as firm as veg-tan for strong pulling
4. Leathers to Avoid
- Bonded leather
- Genuine leather of low grade
- Thin fashion leather
These materials delaminate or tear under tension.
Why Leather Choice Matters for Safety
The stronger the fibers, the more stable the leash during lunging or pulling. High-quality leather also reduces hand burn and improves grip.
What Hardware Is Required (Swivel Hooks, Rivets, Rings)?
Hardware plays a life-critical role in leash safety. Even the strongest leather is worthless if the clip or rivet breaks.
1. Swivel Snap Hook
Material options:
- Solid brass
- Stainless steel
- Heavy-duty zinc alloy
Required functions:
- 360° rotation
- rust-proof
- thick spring mechanism
High-quality swivel hooks prevent twisting, tangling, and accidental detachment.
2. Rivets or Chicago Screws
Used for attaching the clip and securing the handle loop.
- Double-cap rivets → strong + clean appearance
- Copper/Brass rivets → strongest
- Chicago screws → adjustable & repairable
3. D-Rings
For attaching accessories like poop bag holders or keys.
4. Hardware Strength Requirements
Below is a recommended strength chart:
| Dog Size | Recommended Hook Strength | Material |
|---|---|---|
| Small (≤10 kg) | 150–200 lbs | Stainless / Zinc Alloy |
| Medium (10–25 kg) | 200–300 lbs | Brass / Stainless |
| Large (25–45 kg) | 300–500 lbs | Heavy Brass / SS |
| Working Dogs (45 kg+) | 500+ lbs | Premium Stainless Steel |
Hardware failure is the #1 cause of leash accidents—high-grade components are non-negotiable.
What Hand Tools Do You Need for Cutting and Finishing?
To achieve a clean, professional finish, you need the right leatherworking tools. In OEM factories (such as Szoneier Leather), these tools are available in both handmade and machine versions to ensure consistency.
Cutting & Shaping Tools
- Strap cutter:cuts perfectly even straps
- Sharp utility knife:precision trimming
- Cutting mat:protects blades & ensures stability
- Round knife:curved cuts for advanced makers
Hole-Making Tools
- Pricking iron:for stitching holes
- Rotary punch:for rivets or Chicago screws
- Diamond chisels:extra-strong stitch holes
Edge Treatment Tools
- Edge beveler:rounds sharp corners
- Burnishing tool
- Sandpaper block:smooths edges before burnishing
Skiving Tools
- Skiving knife:thins folded ends
- Safety skiver:beginner-friendly
- French edger:deep skive for handle folds
Assembly Tools
- Mallet / Maul:for setting rivets
- Rivet setter:locks hardware in place
- Stitching needles(2pcs):for saddle stitch
- Waxed polyester thread(0.6–1.0 mm)
Finishing Tools
- Gum tragacanth / Tokonole:edge burnishing
- Edge paint / sealant
- Leather conditioner
- Dye + resist finish
Having the proper tools is the difference between a premium leash and a beginner one.
How Thick Should a Leather Dog Leash Be?
Leather thickness determines pull strength, durability, and stretch resistance.
Recommended Thickness by Dog Size
| Dog Size | Leather Thickness (oz) | mm Equivalent | Notes |
|---|---|---|---|
| XS (Toy breeds) | 5–6 oz | 2.0–2.4 mm | lightweight, gentle |
| S (Small dogs) | 6–7 oz | 2.4–2.8 mm | enough for daily walking |
| M (Medium dogs) | 8–9 oz | 3.2–3.6 mm | standard dog leash grade |
| L (Large dogs) | 9–10 oz | 3.6–4.0 mm | higher pull resistance |
| XL (Working dogs) | 10–12 oz | 4.0–5.0 mm | maximum strength |
Why Thickness Matters
- Thicker = stronger
- Thicker = less stretch
- Thicker = more durable under sudden lunging
- Thicker = safer for large breeds
But: thickness must be balanced with flexibility. Overly stiff leather is uncomfortable for handlers and dogs.
How Do You Choose the Right Leather for Strength and Durability?
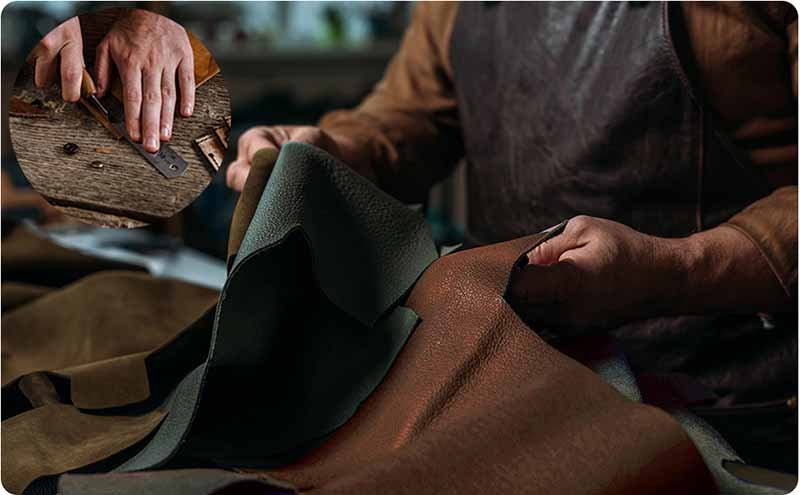
Choosing the right leather is the most important engineering decision when making a dog leash. Unlike belts, wallets, or bags, a leash must withstand sudden pulling force, twisting, constant flexing, rain, sweat, friction, and long-term outdoor use. Poor leather selection can lead to stretching, cracking, tearing—or in worst cases, the leash snapping during a walk. High-quality leather ensures the leash is not only attractive, but structurally reliable, safe, and long-lasting.
A premium leather dog leash performs like a piece of safety equipment. It must have high tensile strength, minimal stretch, dense fibers, and consistent temper. This requires understanding the leather’s grade, tanning process, thickness, moisture behavior, and compression resistance. Below is the most comprehensive guide to selecting the perfect leather for a professional-grade leash.
1. Understanding Leather Grades: Full-Grain vs. Top-Grain vs. Others
Tensile strength refers to the maximum force leather can withstand before tearing. This strength comes from the grain layer, where fibers are densely interwoven.
Full-Grain Leather
- retains entire grain layer
- strongest natural fiber density
- highest tear resistance
- resists stretching
- develops premium patina
Best for: medium dogs, large dogs, working K9, strong pullers
Top-Grain Leather
- sanded/smoothed surface
- slightly reduced fiber density
- good durability
- more flexible
Best for: small dogs, everyday walking, fashion-forward leashes
Split / Genuine Leather
- weak internal fibers
- high stretch
- prone to tearing under force
Never use for dog leashes—unsafe.
Bonded Leather
- made from leather scraps glued together
- extremely weak
Extremely unsafe for leashes.
2. Picking the Right Tanning Method: Veg-Tan vs. Chrome-Tan
Choosing the tanning process affects the leash’s behavior under stress, moisture, and outdoor exposure.
Vegetable-Tanned Leather
- firm temper
- high tensile strength
- ideal for heavy pullers
- excellent edge burnishing
- long lifespan
- naturally ages beautifully
Vegetable-tanned leather is favored by professional dog trainers and premium brands because it balances strength, structure, and handle feel.
Chrome-Tanned Leather
- softer and more flexible
- good for decorative or comfort-focused leashes
- more water-resistant
- better color diversity
Chrome-tanned is not as structurally firm as veg-tan, but it is more comfortable for the handler and suitable for small-to-medium dogs.
Hybrid / Re-tanned Leather
Leather tanned with a chrome base and veg-tan finish provides:
- flexibility + structural firmness
- stable shape
- reduced water absorption
- color vibrancy
Ideal for brands wanting comfort + durability balance.
3. Leather Thickness & Temper: The Most Critical Technical Specs
Recommended Thickness by Dog Size
| Dog Size | Ideal Thickness | mm | Suitable Leather Type |
|---|---|---|---|
| XS / Under 5 kg | 5–6 oz | 2.0–2.4 mm | soft chrome-tan / top-grain |
| Small 5–10 kg | 6–7 oz | 2.4–2.8 mm | top-grain or veg-tan |
| Medium 10–25 kg | 8–9 oz | 3.2–3.6 mm | full-grain veg-tan |
| Large 25–40 kg | 9–10 oz | 3.6–4.0 mm | firm full-grain veg-tan |
| XL Working Dogs 40+ kg | 10–12 oz | 4.0–5.0 mm | extra-firm full-grain |
Temper Considerations
Temper determines firmness and flexibility:
- Firm temper → best for strong pullers
- Medium temper → most comfortable for daily walks
- Soft temper → decorative or light-use leashes
Why Thickness Matters
- thicker leather = stronger and more tear-resistant
- reduces stretch under constant force
- provides better grip for handlers
- increases longevity
- safer for large breeds
Leather that is too thin is unsafe; leather that is too thick becomes stiff and uncomfortable—balance is key.
4. Matching Leather to Dog Breed, Behavior & Climate
Different dogs exert different force levels:
Small Dogs (Chihuahua, Pug, Maltese)
- don’t require extreme tensile resistance
- choose: top-grain or soft veg-tan
Medium Dogs (Beagle, Border Collie, Cocker Spaniel)
- moderate pulling force
- choose: 8–9 oz full-grain veg-tan
Large Dogs (German Shepherd, Husky, Pitbull)
- high pulling force
- choose: 9–10 oz firm full-grain veg-tan
Working Dogs (K9 Units, Service Dogs)
- strongest pull
- choose: 10–12 oz full-grain + reinforced stitching
5. Environmental Considerations)
Dry Climates
- leather may dry and crack
- solution: rich conditioning oils
Humid Climates / Rainy Regions
- chrome-tan leather performs better
- veg-tan requires waterproofing finish
Cold Environments
- very firm leather may stiffen
- choose medium-temper veg-tan or re-tanned leather
Choosing leather based on local climate increases both lifespan and comfort.
Best Leather Choices for Different Needs
| Use Case | Recommended Leather | Tanning | Thickness |
|---|---|---|---|
| Everyday walking | Top-grain / veg-tan | Veg-tan | 7–8 oz |
| Strong pullers | Full-grain | Veg-tan | 9–10 oz |
| Working dogs | Full-grain | Veg-tan | 10–12 oz |
| Fashion-style leash | Chrome-tan | Chrome | 6–7 oz |
| Humid climates | Re-tanned or chrome | Chrome+Veg | 7–9 oz |
How Do You Cut, Split, and Prepare the Leather Strap Correctly?
To prepare a leather dog leash strap correctly, measure the desired length, cut the leather straight, split or skive the ends for folding, bevel and sand the edges, and burnish them for smoothness. Proper cutting and preparation prevent stretching, cracking, bulkiness, and uneven tension, resulting in a safer, stronger, and more professional-quality leash.
Cutting, splitting, and preparing the leather strap is one of the most important phases in crafting a premium dog leash. Even when using top-quality leather, poor strap preparation will result in weak attachment points, uneven tension distribution, uncomfortable edges, and premature wear. A professionally prepared leather strap should be straight, uniform in thickness, smooth at the edges, and structurally reinforced at stress points.
This stage transforms raw leather into a functional, load-bearing component capable of handling pulling forces from small to extra-large dogs. Below is the most detailed, step-by-step guide to cutting and preparing the strap—perfect for DIY leatherworkers and OEM manufacturers alike.
1. Measuring and Layout: Foundation of a Well-Built Leash
The standard leather dog leash length typically ranges:
| Leash Type | Length | Notes |
|---|---|---|
| Short control leash | 2–3 ft | For training & urban walking |
| Standard leash | 4–6 ft | Most common for daily use |
| Long training line | 8–15 ft | For recall training or working dogs |
Measurement Steps
- Add fold-over allowances
- Clip end requires: 6–8 cm (2.5–3 in)
- Handle loop requires: 20–25 cm (8–10 in)
- Use a scratch awl for clean, non-ink marks
- Mark stitching lines and rivet placement early
- Ensure alignment when marking long straps (crooked lines = crooked cuts = structural weakness)
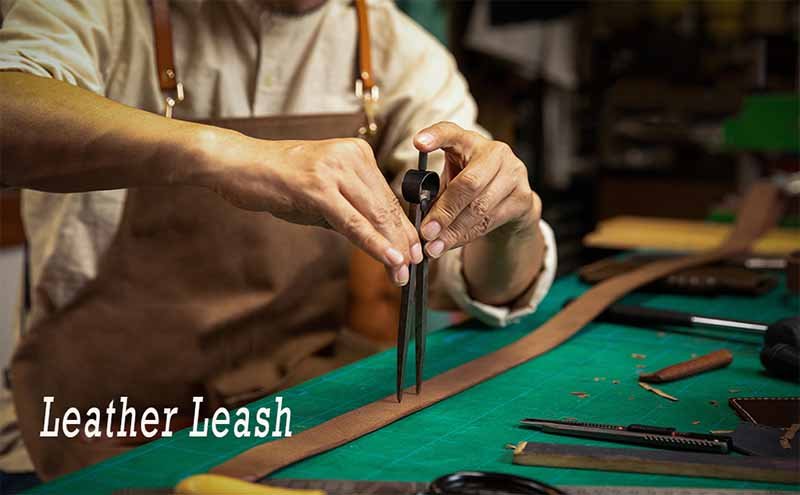
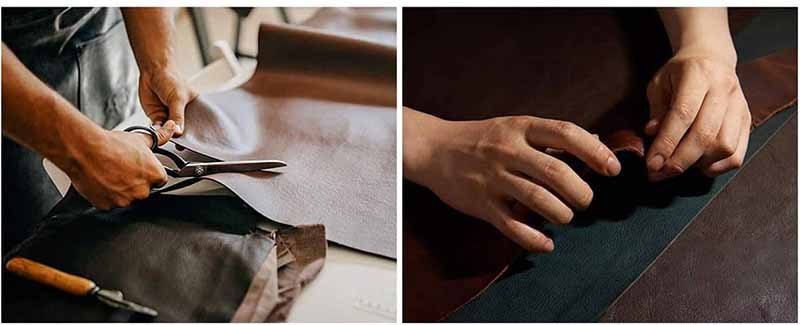
2. Cutting Leather: Achieving Straightness and Consistency
Cutting is more than slicing leather—it is about preserving fiber alignment, which directly affects tensile strength.
Two Cutting Methods
A. Strap Cutter Method
- Adjust blade width to desired strap width
- Pull steadily while keeping pressure downward
- Ensures perfectly parallel edges
- Best for OEM where consistency matters
B. Knife + Steel Ruler Method
- Use a razor-sharp knife (round knife / utility knife)
- Cut in multiple light passes
- Stabilize leather with your non-dominant hand
- Keep blade perpendicular to avoid angled cuts
Common Cutting Errors to Avoid
Cutting in one heavy pass → jagged edges Allowing leather to shift → uneven strap width Using dull blades → tears fibers, weakens strap Freehand cutting → uneven tension distribution
Why Straight Cuts Matter
If the strap width varies even slightly, tension loads become uneven during dog pulling, leading to early stretching and potential failure.
3. Skiving and Splitting: Reducing Bulk for Secure Folds
Skiving (thinning leather) is required where the strap folds:
- around the swivel clip
- on the handle loop
- under stitched/riveted sections
Professional Skiving Steps
- Secure leather on a flat skiving board
- Hold the skiving knife at a low angle (20–30°)
- Remove thin layers gradually
- Check thickness using a caliper
- Avoid cutting too deep—compromises strength
Ideal Skive Thickness
- Reduce thickness by 30–40% in fold areas
- Maintain enough structure to resist pulling
- Ensure folds lie flat without bulging
Why Skiving Matters for Dog Leashes
A thick, unskived fold creates:
- pressure points
- cracking risk
- bulkiness that interferes with the clip
- difficulty inserting and securing rivets
4. Edge Preparation: Beveling, Sanding, Smoothing
Edge beveling enhances both comfort and aesthetics.
Steps:
- Choose beveler size(#2–#3 for 8–10 oz leather)
- Bevel BOTH front and back edges
- Keep beveler angle consistent
- Avoid removing too much material
Benefits:
- eliminates sharp edges that irritate hands
- improves burnishing results
- reduces edge cracking
- gives a professional rounded finish
5. Burnishing: Sealing the Edge for Durability
Burnishing is one of the most visible indicators of craftsmanship.
Burnishing Technique
- Sand edges from 400 → 800 grit
- Apply gum tragacanth / Tokonole / water
- Burnish using:
- wooden slicker
- bone folder
- canvas cloth(creates friction heat)
- Repeat until edge becomes smooth and glossy
Results of Proper Burnishing
- moisture-resistant edge
- reduced fraying
- long-lasting polished appearance
- improved comfort during handling
OEM Pro Tip
Factories often edge paint + burnish for maximum durability and luxury appearance.
6. Hole Punching and Strap Planning
Punching holes is essential for:
- rivets
- stitching
- attaching hardware
Best Practices
- Use a solid surface to absorb mallet impact
- Keep holes aligned with a stitching groover
- Use correct hole size: 1.5–3 mm depending on rivet/stitch size
- Always punch BEFORE folding the strap
Misaligned holes compromise both appearance and load distribution.
7. Mistakes to Avoid During Strap Preparation
MOST COMMON MISTAKES
- Cutting leather too quickly → crooked lines
- Not skiving fold areas → bulky, crack-prone folds
- Using dull bevelers → uneven edges
- Over-sanding → weakens structural fibers
- Not sealing edges → moisture absorption, fraying
- Punching holes too close to edges → tears under tension
- Skiving too thin → breakage risk
SAFETY RULE
A dog leash is safety equipment, not a decorative item—cutting and preparation errors can lead to leash failure during real-world use.
How Do You Attach Hardware and Reinforce the Stress Points?
Hardware installation and stress-point reinforcement are the most safety-critical stages when making a leather dog leash. Even if you use the strongest full-grain leather, the leash will fail if the snap hook detaches, a rivet pops, or a fold cracks. Most leash failures occur not because of the leather itself—but because of weak attachment engineering.
Understanding how to distribute stress and secure hardware is the foundation of a safe, professional-quality leash.
1. Installing the Snap Hook: The Heart of Leash Safety
The swivel snap hook is the primary load-bearing component in a dog leash. Installation steps must be precise:
Step-by-Step Installation
- Skive the strap end Reduce thickness by 30–40% so the fold lies flat without bulk.
- Feed leather through the snap hook eyelet Ensure the strap fits snugly; loose fit creates torque stress.
- Fold back at least 2.5–3 inches (6–8 cm) Shorter folds weaken pull resistance; longer folds distribute stress better.
- Align edges perfectly Misalignment transfers tension unevenly.
- Insert rivets or prepare stitching holes Keep holes centered, equally spaced, and at least 5–6 mm from edges.
- Secure using reinforced rivets or saddle stitching Use 1–3 rivets depending on dog size and strap thickness.
Why It Matters
A poorly installed swivel hook is the #1 cause of leash breakage. Proper installation ensures rotational freedom, prevents twisting, and preserves leather integrity.
2. Using Rivets: Fast, Strong, and Industry-Standard
Rivets provide strong, fast mechanical reinforcement.
Hole Punching Rules
- Use hollow punches or rotary punch
- Holes must be perpendicular to leather
- Keep rivets 6–8 mm from strap edge
- Punch BEFORE folding (for precision)
Setting the Rivet
- Insert the rivet post
- Place cap on top
- Use a rivet setter + mallet
- Strike with controlled force
Choosing the Right Rivet Type
- Double-cap rivets → clean appearance + strong
- Solid brass rivets → strongest for working dogs
- Copper rivets → resist corrosion + strongest shear resistance
Avoid These Mistakes
- Using thin fashion rivets
- Using only 1 rivet for large dogs
- Punching holes too close to the edge
- Rivet post too long → bends and weakens
Proper riveting ensures the connection withstands hundreds of pounds of force.
3. Using Stitching: Distributed Tension for Maximum Strength
Stitching supports tension distribution, reducing stress on any single point.
Best Stitch Types
Saddle Stitch
- Uses two needles crossing each hole
- Each stitch is independent
- Even if one stitch breaks, the line stays intact
- Best thread: waxed polyester 0.6–1.0 mm
Box-X Stitch
- Box + X pattern inside the square
- Large surface area distributes shear force
- Standard in tactical K9 gear
Bar Tack Stitch
- Dense, reinforced zig-zag bundle
- Great for nylon-backed hybrid leashes
Stitch Spacing
- 3–4 mm spacing for 8–10 oz leather
- Too wide → weak
- Too tight → perforation risk
Why Stitching Matters
Stitching strengthens the fold, which is the most stress-exposed part of a leash.
4. Hybrid Reinforcement: Rivets + Stitching
Premium brands and OEM factories(如 Szoneier Leather)
Benefits
- Rivets provide instant mechanical lock
- Stitching provides distributed load absorption
- Combined structure resists:
- longitudinal pull
- shear force
- twisting
- metal-to-leather friction
- long-term fatigue
Ideal Setup
- 2 rivets + 1 box-X stitch pattern
- or 1 rivet + 4–6 saddle stitches
- or triple rivets
Hybrid reinforcement is considered the strongest and safest method for leather dog leashes.
5. Reinforcing the Handle Loop
The handle loop must be comfortable AND structurally sound.
Steps
- Fold leather 20–25 cm to create a proper loop
- Skive underside for flatness
- Add optional padding or internal reinforcement
- Secure with rivets or stitches
- Burnish edges for comfort
Why It Matters
During sudden dog lunging, the handler’s grip area absorbs significant force. A weak handle loop = broken leash + potential injury.
6. Stress Distribution Engineering
Stress points occur at:
- swivel hook fold
- rivet/stitch zones
- handle loop fold
- leather grain direction
Pull Force Distribution
Under strong pulling:
- 50–70% load hits the snap-hook fold
- 20–30% at the handle loop
- 10–20% along the strap body
Tensile Force Chart by Dog Weight
| Dog Weight | Expected Pull Force | Recommended Reinforcement |
|---|---|---|
| 5–10 kg | 80–120 lbs | 1 rivet OR stitching |
| 10–25 kg | 120–200 lbs | 2 rivets + stitching |
| 25–40 kg | 200–350 lbs | 2–3 rivets + box-X stitch |
| 40–55 kg | 350–500 lbs | triple rivets + reinforced fold |
| 55+ kg | 500+ lbs | industrial-grade stitching + copper rivets |
Common Hardware Installation Mistakes
- Using weak hardware Zinc alloy of low density can snap under torque.
- Not skiving fold ends Creates bulky folds → cracking risk.
- Punching holes too close to edge Leather tears easily under torque.
- Using only one rivet for large dogs Potential catastrophic failure.
- Using cotton thread Absorbs moisture, weakens over time.
- Misaligned stitching Loads concentrate unevenly → premature wear.
Avoiding these mistakes ensures the leash remains safe for years.
How Do You Finish, Condition, and Test the Leather Leash?
To finish a leather dog leash, sand and burnish the edges, condition the leather with oils or balms, apply optional dyes or waterproof coatings, and finally perform pull-strength and durability tests. Proper finishing improves comfort, waterproofing, and longevity, while testing ensures the leash can safely withstand real-world stress from small to large dogs.
Finishing, conditioning, and testing are the stages that transform a raw leather strap into a strong, safe, and premium-quality dog leash. These final processes are often underestimated by hobby makers, yet they determine whether the leash performs safely under real-world use. A well-finished leash resists moisture, friction, cracking, and abrasion, while a poorly finished one fails prematurely—even if made from high-quality leather.
Below is the most comprehensive, industry-level guide covering every finishing step used in professional pet accessory factories.
1. Edge Finishing: Smooth, Durable, and Moisture-Resistant
Edge finishing is not just aesthetic. Properly burnished edges:
- prevent moisture penetration
- reduce fraying and fiber splitting
- improve handler comfort
- prevent collar abrasion
- enhance professional appearance
Step-by-step edge preparation
- Sanding (Leveling the Edge) Use 320–400 grit sandpaper to level the cut edge. Sand in the direction of the leather fibers, not perpendicular. Smooth edges ensure consistent burnishing.
- Beveling (Rounding Sharp Corners) Use a #2 or #3 beveler for 8–10 oz leather. Bevel both sides of the strap. Rounded edges create a softer hand-feel.
- Second Sanding Pass Move to 600–800 grit to create a satin-smooth edge. This ensures the burnishing agent adheres evenly.
How to burnish the edges for a sealed, glossy finish?
Burnishing seals the leather fibers through friction and heat.
Burnishing Steps
- Apply burnishing agent Best options:
- Gum tragacanth
- Tokonole
- Saddle soap
- Water (minimalist method)
- Burnish using a wooden slicker or bone folder Rub rapidly to generate heat. The heat + moisture compress the fibers.
- Repeat with progressively finer slicker grooves This polishes the edge to a glass-like shine.
- Final buff (optional) Use denim or canvas for final gloss enhancement.
Burnish Outcome
- Waterproof edge
- Increased durability
- Luxury-grade finish
- Fiber seal that prevents fraying
Factories often use motorized burnishers for consistency across large-scale production.
2. Conditioning: Maintaining Flexibility and Preventing Cracking
Leather is skin—and skin dries out. Conditioning restores essential oils, increases flexibility, and prevents cracking during pulling or bending.
Most recommended conditioners
- Neatsfoot oil(deep hydration for veg-tan leather)
- Mink oil(softening + waterproofing)
- Lanolin-based balms(natural flexibility)
- Beeswax-rich conditioners(water resistance + shine)
- Leather honey / wax-oil blends(premium finish)
Conditioning Procedure
- Apply a thin, even coat using a lint-free cloth
- Allow the leather to absorb naturally (20–40 minutes)
- Wipe excess oil
- Air dry (never heat dry)
Why Conditioning Matters
- prevents dryness cracks
- keeps fibers flexible under tension
- improves color richness
- enhances long-term durability
- reduces surface abrasion damage
Unconditioned leather will stiffen, crack, and fail faster—especially in cold or dry climates.
3. Dyeing & Waterproofing: Aesthetic + Practical Protection)
Dyeing
Two dye types dominate professional use:
- Alcohol-based dyes → deep penetration, vibrant color
- Water-based dyes → safer, less drying
Dyeing Steps
- Deglaze surface (if necessary)
- Apply dye in thin, even coats
- Let each layer dry completely
- Buff between coats
- Apply sealant to prevent rub-off
Waterproofing
Waterproofing increases resistance to:
- rain
- humidity
- dog drool
- sweat
- mud
Waterproofing options:
- Acrylic resolene (high protection)
- Carnauba wax finishes
- Beeswax balm
- Silicone-free waterproofing spray
4. Softening Leather Without Weakening the Fibers
Safe Softening Techniques
- Apply minimal oil (over-oiling weakens leather)
- Bend and flex the strap slowly
- Use hand-warming (body heat improves flexibility)
- Apply lanolin balm for gentle softening
Avoid These Mistakes
- soaking leather in water
- applying excessive oil
- using heat guns
- over-conditioning
Why Softening Matters
A stiff leash hurts the handler’s hand and makes control less smooth. Correct softening maintains tensile strength while improving comfort.
5. Testing: Ensuring Strength, Safety, and Reliability
Testing is what separates professional-grade leashes from amateur ones. A high-quality leather leash must endure pulling, jerking, twisting, abrasion, and long-term flex.
Professional Pull-Strength Testing
Factories use tensile testing machines to measure breaking strength. Minimum recommended pull resistance:
| Dog Weight | Pull Strength Minimum | Notes |
|---|---|---|
| Small (≤10 kg) | 150–200 lbs | small clip acceptable |
| Medium (10–25 kg) | 250–300 lbs | must resist sudden jerks |
| Large (25–40 kg) | 350–500 lbs | double rivets recommended |
| XL / Working Dogs (40+ kg) | 500–800+ lbs | industrial-grade stitching |
Manual Testing (for DIY Makers)
- apply full body weight
- jerk test with sudden pulls
- twist/torque test on the clip
- handle loop tension test
Areas to Inspect After Testing
- rivet loosening
- stitch fraying
- fiber stretching
- fold cracking
- hardware deforming
A safe leash passes all tests without deformation or fiber tearing.
6. Bending Fatigue Testing
Dog leashes undergo thousands of micro-bends daily. Repeated flexing weakens dry or poorly finished leather.
Factory Flex Test
Strap is bent back and forth 500–1000 cycles to simulate long-term use.
Outcome Indicators
- no cracking
- minimal color abrasion
- no fiber separation
- stable temper
A leash that cracks early is unsafe—flex testing prevents future failure.
7. Water Exposure and Abrasion Testing
Professional OEM factories perform:
Water Immersion Test
- brief soaking → drying cycle
- checks for stretch or discoloration
Abrasion Test
- simulates dragging on pavement or concrete
- ensures edges remain sealed
UV Exposure Test
- checks color fading in sunlight
Consumers rarely consider these, but brands must ensure product safety and longevity.
Conclusion
A well-crafted leather dog leash is far more than an accessory—it is a combination of strength, craftsmanship, and thoughtful design. From selecting full-grain leather to burnishing edges, reinforcing stress points, conditioning the strap, and testing for safety, every step contributes to a premium product that dog owners can trust for years. Whether you’re a pet brand, retailer, or professional dog trainer, creating a premium leather leash requires precision and expertise.
If you want to develop your own leather dog leash line—custom colors, hardware, thickness, embossing, or packaging—Szoneier Leather is ready to help.
Contact Szoneier Leather today to start your custom leather dog leash project. We support design development, material sourcing, rapid prototyping, bulk production, and complete branding solutions.


