 Skip to content
Leather belts often get treated like basic wardrobe accessories: you buy one, wear it until it starts to crack or peel, then toss it. But did you know a well‑made belt can last for years, becoming a signature piece that grows more comfortable (and even more beautiful) over time? Whether you’re a small brand wanting to expand into leather goods, a hobbyist aiming to refine your technique, or a larger business scaling up production, understanding how a leather belt is truly made – from picking the right hide to packaging the final product – can make all the difference. In this comprehensive guide, we’ll dig into every step: the best leathers to use, the thickness sweet spot, crucial tools, finishing techniques, hardware attachment, and more.
You’ll need top‑tier leather (often full‑grain cowhide between 3.5–5 mm thick), essential tools (like knives, punches, stitching awls, and edge finishers), quality hardware (buckles, rivets), and a reliable workflow. Whether you’re crafting casual, dress, or heavy-duty belts, nailing each step—cutting, stitching, hardware installation, conditioning, and QC—elevates your final product’s durability and style.
What Materials and Tools Do You Need for Leather Belt Making?
Get high‑quality hides (cowhide or exotic, 3.5–5 mm thick), reliable cutting tools, punches, stitching awls, adhesives, edge finishing supplies, and strong hardware like buckles and rivets. These essentials form your belt‑making toolkit.
You can’t build a house without the right foundation,and you can’t make a solid leather belt without the correct tools and materials. Some items might overlap with general leathercraft, but belts have unique stresses (like daily pulling) that influence your choices.
Basic Leathercraft Tools
Cutting Tools:
- Utility Knife / Leather Knife:
- Price Range: $5–$30, depending on blade quality.
- Pro Tip: Keep extra blades on hand to swap out the moment you feel dragging.
- Rotary Cutter (Optional):
- Price: $10–$40.
- Great for long, straight cuts if you have a large cutting mat.
Hole Punches:
- Revolving Punch:
- Often 6 different punch sizes on a rotating head, handy for holes.
- Price: $10–$50.
- Drive Punch Set:
- Single-size punches for more consistent results.
- Price: $3–$10 each, or $20–$50 for a set.
Stitching Setup:
- Awl / Pricking Iron / Stitching Chisel:
- Create holes in precise alignment.
- Price: $15–$80, depending on brand and teeth count.
- Needles & Thread:
- Waxed thread (polyester or nylon) recommended.
- Price: $5–$15 for a spool that can last numerous projects.
Edge Tools:
- Edge Beveler:
- Removes that sharp 90° corner, cost: $10–$40.
- Burnisher (Wood or Plastic):
- Slicks edges for a polished finish, cost: $5–$25.
- Edge Paint / Dye (Optional):
- Ranges $10–$30 for small containers, used to seal and color edges.
Adhesives & Conditioners:
- Leather Cement / Contact Cement:
- $5–$15 per container.
- A small dab helps hold layers or loops in place.
- Leather Balm / Conditioner:
- $10–$20. Keeps the final belt supple and protected.
Hardware Tools:
- Rivet Setter or Snap Setter:
- $10–$50 for a basic kit.
- Buckle Press (Optional)
- For high-volume production; can cost $200–$500+.
Hardware Must‑Haves
Buckles:
- Materials: Brass, nickel, stainless steel, or alloy.
- Average Cost (bulk): $0.50–$2 each for standard metal designs, higher for decorative or brand‑specific.
Rivets / Chicago Screws:
- Price: $0.10–$0.80 each, depending on finish and quantity.
- Provide structural support, especially near the buckle fold.
Typical Hardware Costs (Bulk Orders)
| Hardware | Basic Unit Cost (USD) | Bulk Packs (1000 pcs) | Common Finishes |
|---|---|---|---|
| Belt Buckle | $1–$2.50 | $800–$2,000 | Brass, Nickel, Zinc Alloy |
| Chicago Screw | $0.20–$0.60 | $150–$400 | Brass, Steel, Colored |
| Rivet | $0.10–$0.40 | $80–$300 | Copper, Brass, Nickel |
| Snap | $0.15–$0.50 | $100–$350 | Gunmetal, Silver, Antique |
Setting Up a Productive Workspace
- Cutting Mat / Surface: Minimizes blade dulling, ensures accuracy.
- Comfortable Table Height: If you’re hunched over, you’ll tire quickly and risk sloppy cuts.
- Lighting: Crisp overhead lighting plus a task lamp helps you see grain details, especially for full‑grain hides with natural scars.
Which Types of Leather and Thicknesses Work Best for Belts?
Full‑grain cowhide in the 3.5–5 mm range tops the list for everyday belts. Buffalo suits rustic styles, while exotic hides (like crocodile or ostrich) deliver luxury. Match thickness to usage: about 3 mm for dress belts, up to 5 mm for heavy‑duty.
The million‑dollar question for any belt maker: What is the best leather to make belts from? Let’s also check out related queries like What animal leather is best for belts? What thickness is ideal? What do luxury brands like Hermès or Louis Vuitton use? and Which animal leather is most expensive?
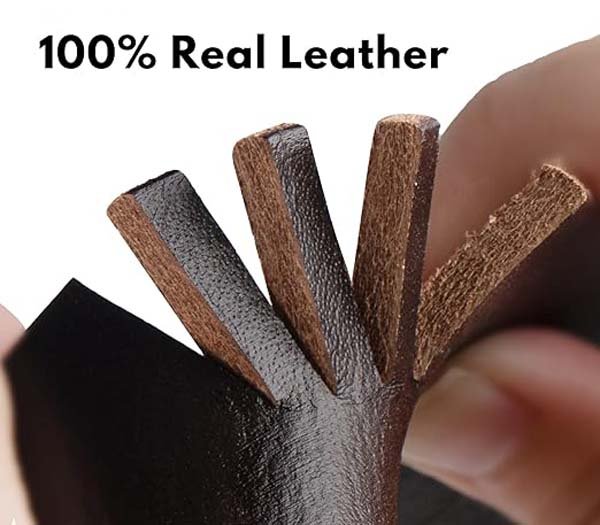
Popular Leathers: Cowhide Still Reigns Supreme
Cowhide (Full‑Grain, Top‑Grain):
- Strong fiber structure, widely available, moderate price.
- Versatile: works for casual, dress, or even utility belts with minimal processing changes.
- Price Range (belt form): $30–$150, though high-end finishing can push it higher.
Buffalo:
- More textured, often stiffer. Great for a rugged, outdoorsy vibe.
- Typically 4–5 mm thick, giving that substantial, “this belt will last forever” feel.
Calfskin:
- Softer, smooth grain, used by fashion houses for polished, dressy belts.
- Wears well for a year or two of heavy use but can be less durable than older cowhide if super thin.
Exotics:
- Ostrich: Quill bumps, noticeable “pimply” texture, mid-range among exotics.
- Croc/Alligator: The Holy Grail for many top-tier brands. Which animal leather is most expensive? Often alligator or crocodile, possibly going $300–$1,000+ per belt.
- Snake/Lizard: Bold scale patterns, typically more niche.
Hermès & Louis Vuitton Preferences
- Hermès: Frequently uses premium calfskin (Togo, Epsom) and exotics like alligator. Belts can exceed $1,000 easily.
- Louis Vuitton: Known for coated canvas with leather trim but also uses exotic skins in limited editions. Often invests in python or crocodile for statement lines.
The Magic Thickness Range
3.5–5 mm is frequently the sweet spot for belts. This thickness translates to about 8–12 oz in leather weight. Here’s a quick breakdown:
| Belt Purpose | Ideal Thickness (mm) | Explanation |
|---|---|---|
| Dress Belt | ~2.5–3.5 | Slender look under suits, not too bulky |
| Casual Belt | ~3.5–4.0 | Good daily wear, robust but comfy |
| Work/Utility | ~4.0–5.0 | Tough, handles tools or heavy loads |
Why it matters: Going under 2.5 mm can lead to tearing near the buckle holes. Exceeding 5 mm can be overly stiff and might dig into your waist.
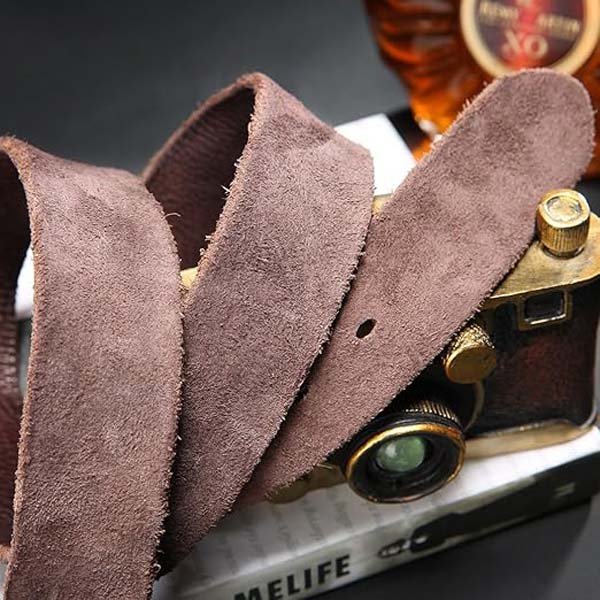
Understanding Tanning & Grain
- Vegetable-Tanned Full‑Grain: Great for that old-school, stiff feel that molds to your shape. Ages to a rich patina.
- Chrome-Tanned Top‑Grain: Softer right away, can yield bright or uniform colors, often used in fashion belts.
How Do You Plan and Cut the Leather for a Belt?
Measure your target waist size, add extra length for the buckle fold and tip, and cut a straight strip along the hide’s spine. Mark carefully, avoiding scars or thin areas for maximum strength.
Determining Length & Width
- Length:
- Common formula: Waist size + about 6–8 inches to accommodate the buckle and tail.
- Example: If someone’s waist is 34 inches, the total belt length might be around 42 inches from tip to buckle fold.
- Width:
- 1.5 inches is a popular casual standard.
- 1.25 inches or narrower for dress belts.
- 1.75 or 2 inches for heavy-duty or statement belts.
Laying Out the Belt on the Hide
- Inspect the Leather: Look for brand marks, scars, or blemishes that might weaken or mar the final product.
- Align With Grain Direction: Typically lengthwise along the backbone is strongest.
- Mark Edges with Chalk or a Light Stylus: Ensures precision.
Cutting Straight & Even
- Using a Long Ruler / Straight Edge:
- Anchor it firmly so your knife doesn’t slip.
- Some folks tape the ruler down.
- Applying Steady Pressure:
- Let the blade do the work—don’t force it if your knife is sharp.
- If it’s a thick hide (like 4–5 mm), you may need multiple passes to get a clean cut.
Minimizing Off-Cuts or Waste
| Method | How It Helps | Typical Impact |
|---|---|---|
| Efficient Layout | Plan belt strips close to each other | Up to 10–15% less scrap |
| Using Smaller Hides | For narrower belts or test prototypes | Saves prime full hides for large orders |
| Scrap Upcycling | Make key fobs, belt loops from leftover | Reduces leftover piles, adds extra revenue streams |
For a brand producing 300 belts monthly, that 10–15% reduction in waste can translate to hundreds of dollars in raw material savings each batch.
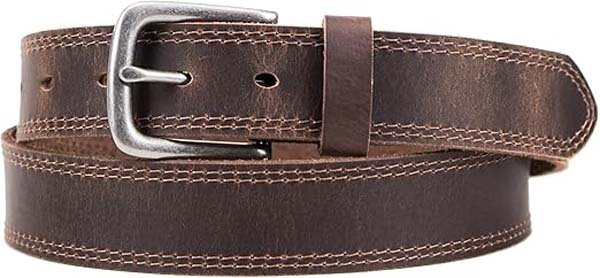
Are There Specific Techniques for Stitching and Edge Finishing?

Hand saddle stitching or lockstitch machines produce strong seams. Then, edge beveling, burnishing, or painting refines the belt’s look and prevents fraying. Quality stitching plus smooth edges create a premium feel.
Think of stitching and edge work as the “tailoring” of your belt. A belt with rough edges or sloppy seams might function, but it won’t scream quality or command higher prices.
Saddle Stitch vs. Machine Stitching
- Saddle Stitch
- Tools: Pricking iron, 2 needles, waxed thread.
- Strength: If one thread segment breaks, the rest remains secure. Great for small-batch or artisanal belts.
- Time: Skilled crafters might do a typical belt seam in ~30 minutes. Novices can take double or triple that.
- Machine Lockstitch
- Tools: Industrial cylinder‑arm or flat‑bed sewing machine that handles leather thickness.
- Strength: Good, but if the thread breaks, a small area can unravel.
- Speed: Perfect for mid or high-volume production lines.
Cost Data:
- A decent industrial leather sewing machine can cost $2,000–$5,000, but drastically speeds production. A manual saddle stitcher invests more labor time but no machine overhead.
Edge Finishing: Bevel, Burnish, or Paint
- Beveling:
- Removes the 90° corner. Makes edges more comfortable.
- Tools typically cost $10–$40 for different sizes.
- Burnishing:
- Rub the edge (often with gum tragacanth or water) until fibers compress and create a shiny, sealed finish.
- Wood burnishers or cloth can be used.
- Edge Paint (Optional):
- Often used in fashion belts or formal lines, can match or contrast the belt color.
- Requires multiple coats for a polished, durable finish.
Before & After: A belt with raw, unburnished edges might look “rustic,” while a burnished edge glows with a clean line, instantly elevating the product’s perceived value.
Stitch & Edge Considerations for “The Three Types of Belts”
Casual Belts:
- Possibly a single row of machine stitching or even no stitching if it’s a single-thickness strap.
- Edge finishing might be a quick burnish or moderate edge paint.
Dress Belts:
- Often lined or have a stitched perimeter. Crisp edges with edge paint or a subtle burnish.
- Double layers (outer, liner) for a refined look, requiring more advanced stitching.
Work/Utility Belts:
- Minimal decoration, possibly thick single-layer.
- Edges are often just burnished or left raw if function is top priority.
What Steps Are Involved in Attaching Belt Hardware and Fasteners?
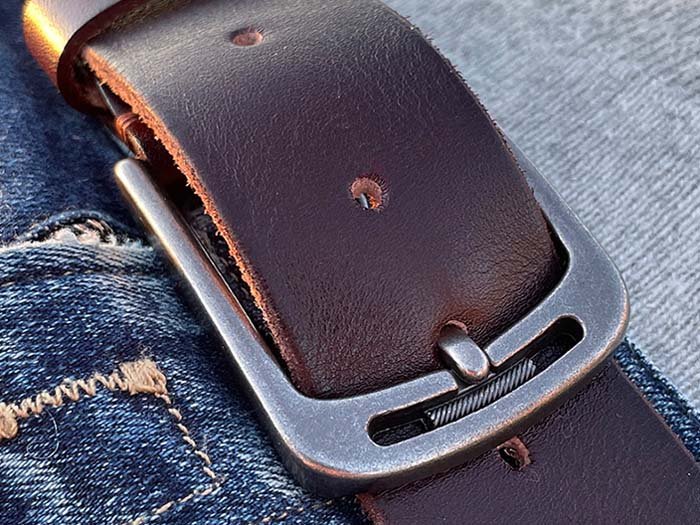
Secure the buckle end using rivets or screws, add a keeper loop, and punch holes for sizing. Alignment and snug hardware attachments ensure a reliable, comfortable belt.
Once the strap is cut, stitched, and edges are finished, it’s time to turn it into an actual belt by adding hardware. This includes the buckle, loops or keepers, and the holes where the wearer adjusts the belt.
Buckle Choices: Standard or Decorative
Metal Varieties:
- Brass (classic, can patina),
- Nickel (shiny, modern),
- Stainless steel (durable, rust‑resistant),
- Alloy (varied finishes, cost-effective).
Styles:
- Prong buckles (most common),
- Western buckles (ornate, large),
- Roller buckles (casual, easy buckling),
- Auto-lock or ratchet buckles (no holes needed, popular in formal lines).
Price Points: Buckles might be $1 in bulk or $10–$20 each if they’re branded or intricately designed.
Rivets vs. Chicago Screws vs. Snaps
Rivets
- Typically hammered or pressed in.
- Provide a permanent hold—less easy to swap the buckle later.
Chicago Screws
- Two-part screw sets that let you replace the buckle.
- Check them occasionally, as some can loosen with heavy wear.
Snaps
- Also allow buckle swapping. Slightly faster than screws, but can be less secure if poorly installed.
Punching Belt Holes
- Hole Spacing: Usually 1 inch apart, with 5 or 7 holes total.
- Hole Position: The middle hole typically matches the belt’s official size. E.g., if a belt is labeled 34, that’s the middle hole’s waist measure.
- Hole Diameter: The pin on the buckle dictates the needed hole size (commonly 4–5 mm).
Hole Placement
| Belt Size (in) | Middle Hole Position (from belt fold, in) | Range of Holes (in) |
|---|---|---|
| 30 | ~27 | ~25, 26, 27, 28, 29, 30 |
| 34 | ~31 | ~29, 30, 31, 32, 33, 34 |
| 38 | ~35 | ~33, 34, 35, 36, 37, 38 |
| 42 | ~39 | ~37, 38, 39, 40, 41, 42 |
Loop or Keeper Installation
- Single Loop: Common approach. Might be stitched onto the belt body or secured with a rivet.
- Additional Floating Loop: For thicker belts or styles that want to rein in the belt tip more effectively.
Tip: If your belt is for a wide range of sizes, consider adding a second floating loop to handle the extra length for smaller waists.
Do You Need Special Treatment or Conditioning for the Leather?
Yes. Conditioning with oils, waxes, or balms prevents dryness and cracking, especially in vegetable‑tanned hides. This final treatment enhances the belt’s appearance and helps it age gracefully.
Leather, especially high‑quality full‑grain, is like skin: it can dry out, crack, or fade if ignored. By applying proper conditioners or finishes, you effectively lock in oils and moisture that keep fibers flexible over time.
Common Conditioning Agents
- Leather Oil (e.g., Mink Oil, Neatsfoot Oil):
- Penetrates deeply, can darken light leathers.
- Good for belts that will see heavy daily use.
- Leather Balms / Creams:
- Often a blend of waxes and oils.
- Provides both nourishment and a slight protective layer.
- Wax Finish (e.g., Beeswax):
- Water-repellent topcoat, can be buffed to a shine.
- Might stiffen the surface slightly if overapplied.
Conditioning Frequency
| Leather Type | Ideal Conditioning Interval | Typical Product Price (USD) |
|---|---|---|
| Veg‑Tanned (Natural) | Every 2–3 months (or when drying) | $10–$20 for small jar |
| Chrome‑Tanned (Dyed) | Every 4–6 months | $15–$25 for cream/balm |
| Exotic (Croc/Ostrich) | Every 2–4 months | $20–$40 specialized care |
(Intervals assume regular wear. If rarely worn, you might condition less frequently.)
Dyes & Color Enhancements
If you want a custom color (e.g., bold red or navy), you’d typically apply leather dye after initial finishing but before your final conditioner. This ensures the dye sets properly, then you seal or condition to lock it in.
Drying & Absorption Time
- Let the belt rest for at least a few hours after conditioning.
- Overly saturating the leather can lead to a greasy surface or color blotches.
- Wipe off any excess product with a clean rag.
Branding & Customer Education
If you sell direct to consumers, consider including a care card:
- Quick bullet points on how often to re-condition.
- Warnings about exposure to water or extreme sun.
- This can reduce returns and build trust in your brand.
Is There a Recommended Method to Quality Check and Package Finished Belts?
Yes. Inspect stitching, edge integrity, hole alignment, and hardware security. Grade belts (A, B, C) based on cosmetic flaws. Then wrap them in protective materials (tissue, dust bags) and label them clearly before shipping or display.
No matter how careful your production is, mistakes happen. A robust quality control stage ensures only the belts meeting your brand’s standards get shipped out. Let’s also see how you can store or package them for a polished unboxing experience.
QA Checklist: How to Identify a Good Leather Belt
- Stitching Review:
- Even spacing, no loose threads. Hand or machine stitching lines should be consistent.
- Check stress areas near the buckle fold.
- Edge Inspection:
- Are edges fully burnished or sealed?
- Any sign of raw fiber fraying or lumps from uneven burnish?
- Hardware Check:
- Make sure rivets or screws are tight.
- Buckle prong moves freely, not stiff or misaligned.
- Hole Placement:
- Holes evenly spaced, cleanly punched, and centered widthwise.
- Try buckling the belt—no major warping or angled folds at the buckle end.
Grading for Consistency
- Grade A: Near-flawless. Perfect edges, uniform color.
- Grade B: Minor cosmetic blemishes but structurally sound (maybe a faint scar or slightly uneven burnish).
- Grade C: Noticeable flaws or color blotches. Might be sold at discount or labeled as “seconds.”
Packaging & Labeling
- Protective Wrapping:
- Tissue paper, foam wrap, or dust bags.
- This avoids scuffs if belts rub against each other in transit.
- Boxing or Hanging:
- Some brands prefer a sleek branded box for premium belts.
- Others do a simple poly bag or cardboard backing for retail display.
- Clear Sizing Info:
- Mark the size on a small tag or inside stamping.
- If you have brand instructions or care details, attach them on a small card.
Adding a Premium Touch
- Logo Stamping or Debossing: Could be on the inside near the buckle.
- Custom Tissue Paper or Stickers: Helps with brand recall.
- Optional “Thank You” Note: If direct‑to‑consumer, a small personalization can go a long way.
How Can You Scale Belt Production While Ensuring Consistency?
Automate repetitive tasks with strap cutters and rivet presses, standardize steps with SOPs, and perform regular batch checks. This balances high volume with the craftsmanship that keeps your brand respected.
If you’re making 5 belts a week, the process is manageable with minimal gear. But what if you jump to 500 belts a month? Or 5,000? That’s where scaling strategies come in, so you don’t sacrifice quality or overwork your team.
Machinery for Efficiency
| Equipment | Approx. Cost (USD) | Production Impact | Best For |
|---|---|---|---|
| Automatic Strap Cutter | $1,500–$3,000+ | Cuts belts quickly & uniformly | Mid- to large-scale (100+ belts/week) |
| Industrial Sewing Machine (Leather-grade) | $2,000–$6,000+ | Fast, uniform stitching | Brands expanding beyond small handmade runs |
| Hydraulic Rivet Press | $500–$2,000+ | Precise rivet setting | High-volume hardware attachment |
| Edge Burnishing Machine | $200–$1,000+ | Speeds up edge finishing | Consistent edges across big batches |
Creating Standard Operating Procedures (SOPs)
- Detailed Steps: From how to measure and cut each belt length to the hole punching pattern.
- Checkpoints: Insert QC checks after cutting, after stitching, and post-hardware.
- Training & Documentation: Onboarding new staff becomes simpler when everything’s spelled out.
Managing Quality Control at Scale
- Batch Sampling: Pull random belts from each batch to check stitching, edges, hardware tightness.
- Material Tracking: Keep notes of which hide batch or buckle shipment was used. If a problem arises, you know where to look.
- Customer Feedback Loop: Encourage buyer feedback. A single recurring complaint (like buckles popping off) might indicate a faulty rivet batch or machine calibration issue.
Maintaining Brand Identity
With scale, it’s easy to slip into generic production. If you value a certain level of hand-finishing or personalization, consider:
- Hybrid Approach: Machine cut straps, but keep a skilled artisan to do final edge burnishes or logo debossing by hand.
- Customizable Elements: Let buyers pick buckle finishes or thread colors. This uniqueness can set you apart in a crowded market.
Conclusion
From selecting hides to carefully attaching buckles, each detail in belt making can elevate the product from a mere accessory to a statement piece. Here’s the quick recap:
- Material & Tools: Secure top-notch leather (e.g., full‑grain cowhide, 3.5–5 mm thick) plus robust hardware. Collect key tools like hole punches, stitching awls, and edge bevelers.
- Leather Selection & Thickness: Match your belt style—casual, dress, or utility. Cowhide stands out for versatility, while exotics make a luxurious statement.
- Cutting & Stitching: Meticulous measuring, steady cutting lines, consistent stitching, and refined edges set your belt apart.
- Hardware & Finishing: Proper buckle installation, hole alignment, and conditioning keep belts comfortable and looking sharp for years.
- QC & Packaging: Detailed checks plus solid packaging communicate professionalism, reduce returns, and boost brand image.
- Scaling Up: Automation, SOPs, and methodical QC let you produce in volume without losing the artisanal vibe or consistency.
Ready to Create or Expand Your Own Belt Line?
If you’re seeking a partner to handle everything from raw materials to final quality checks—especially if you want consistent results at scale—Szoneier Leather is equipped and ready. We’ve spent decades perfecting leather sourcing, product design, and manufacturing, working with all sorts of leathers (cowhide, buffalo, exotic hides), hardware selections, and finishing touches. Contact Szoneier Leather now for a custom quote, and let’s craft belts that combine everyday practicality with the refined details your customers expect. We’ll help you stand out in the competitive belt market, from small artisanal runs to large-scale brand expansions.


