 Skip to content
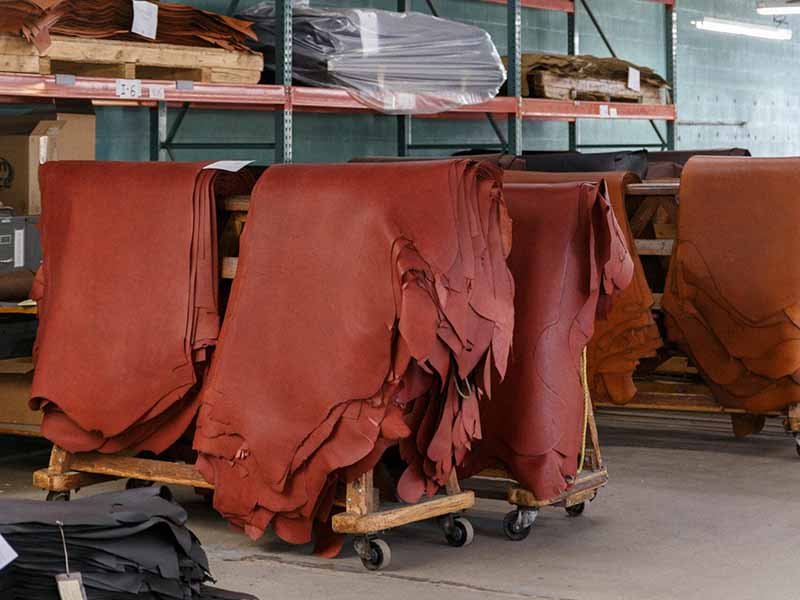
The color of leather is more than a surface — it’s a feeling. That deep mahogany on a handcrafted briefcase, the faded chestnut on a vintage wallet, or the ocean blue of a designer tote — all begin as something much simpler: a pale, natural hide. What transforms it into something luxurious isn’t just craftsmanship; it’s the art and science of dyeing.
In the quiet rooms of a leather workshop, the process unfolds like alchemy. Color meets fiber, oil meets heat, and a piece of animal hide becomes a product with soul. Yet, despite its beauty, leather dyeing is often misunderstood — half chemistry, half intuition, and one of the most defining stages in the life of any leather good.
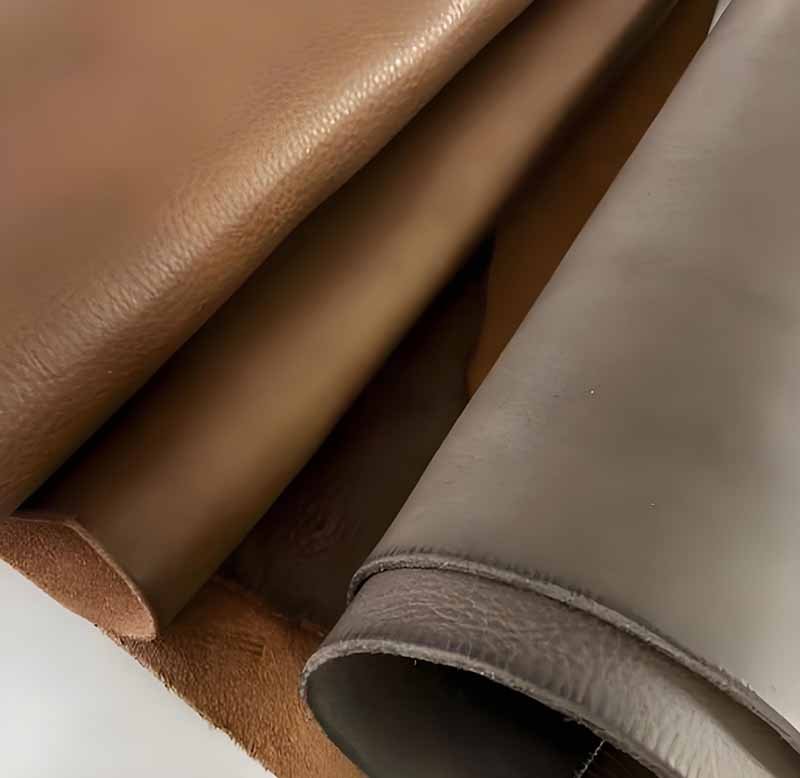
Leather dyeing is the process of infusing pigments or dyes deep into the hide’s fibers to achieve uniform, long-lasting color while preserving softness and breathability. Professional dyeing enhances appearance, durability, and texture, giving each leather product its unique tone and character.
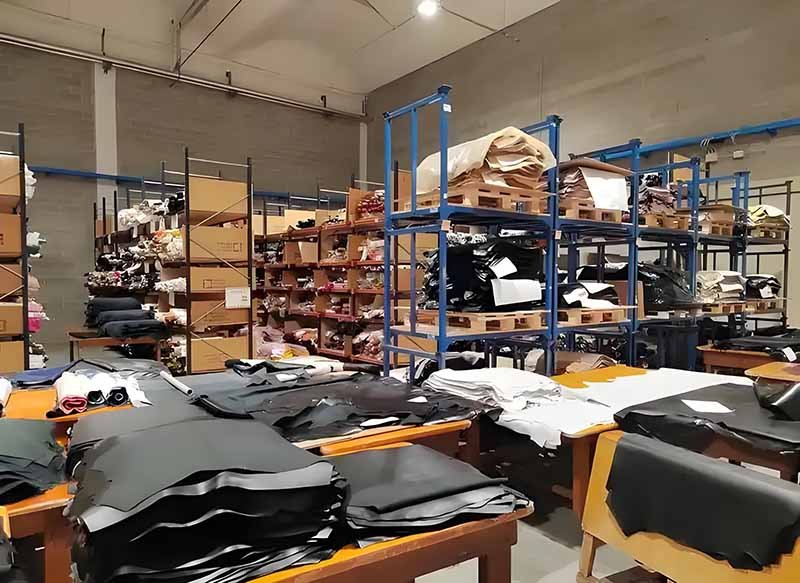
Every shade tells a story: bold colors for fashion-forward designs, subtle gradients for timeless classics. At Szoneier Leather, with over 18 years of factory experience, each dye bath is more than a production step — it’s a controlled dialogue between tradition and technology. From oil-based hand finishes to eco-certified drum dyeing, we’ve learned that perfect color isn’t just applied — it’s engineered.
And if you’ve ever wondered what it takes to turn a raw hide into a masterpiece, the answer begins right here — where chemistry meets craftsmanship.
Let’s dive into how professional tanneries and manufacturers bring color to life.
What Is Leather Dyeing and Why Does It Matter?
Leather dyeing is the process of coloring natural hides by allowing dyes or pigments to penetrate and chemically bond with collagen fibers. This enhances not only the appearance but also the durability and flexibility of leather. Proper dyeing creates long-lasting, vibrant color without sealing the pores — preserving breathability and softness. High-quality dyeing is essential for ensuring consistent tone, rich depth, and premium product performance across leather goods.
The True Purpose of Leather Dyeing
Leather dyeing is not simply about adding color; it’s about engineering the personality of leather. Raw hides, even when perfectly tanned, are pale and neutral — more like a blank canvas than a finished material. Dyeing transforms them into visually expressive surfaces with tone, contrast, and emotional character.
The process serves three crucial purposes:
| Purpose | Description | Impact on Final Product |
|---|---|---|
| Aesthetic Enhancement | Adds uniform or gradient color; highlights grain and texture | Defines brand identity and product appeal |
| Functional Improvement | Increases resistance to UV, moisture, and oxidation | Extends product lifespan |
| Tactile Preservation | Keeps natural softness and flexibility intact | Ensures premium handfeel and usability |
A poorly dyed leather may crack, fade, or feel dry. But a perfectly dyed hide — like those produced at Szoneier Leather’s facility — develops a rich tone that deepens beautifully with time, earning that sought-after vintage patina luxury brands love.
The Chemistry Behind Dyeing
At its core, leather dyeing is a controlled chemical interaction between colorants and collagen fibers. When dye molecules penetrate the leather, they attach themselves through:
- Hydrogen bonding (in water-based dyes)
- Van der Waals forces (in oil-based systems)
- Ionic attraction (for metal-complex or acid dyes)
This bonding process is what differentiates true dyed leather from surface-painted leather. In the latter, color sits on top like a coating; in the former, it lives within the material, creating depth and resilience.
Each dyeing formula contains three main components:
- Colorant (dye or pigment) — Provides hue and saturation.
- Carrier (solvent or water base) — Controls absorption speed.
- Fixative / Binder — Locks dye molecules into the fiber matrix.
The challenge is balance: too much carrier and the color bleeds; too little and the hue looks flat or uneven.
The Physical Structure of Leather and Dye Behavior
Leather is made up of three fiber layers — the grain, corium, and flesh. Each interacts differently with dye molecules.
| Layer | Composition | Dye Behavior |
|---|---|---|
| Grain | Densely packed, visible surface | Absorbs less dye; defines tone and reflection |
| Corium | Looser fiber network | Holds more dye; creates depth |
| Flesh Layer | Coarse fibers | Absorption depends on tanning and finish |
Professional dyeing ensures color penetration through the corium without oversaturating the grain. This is why a cross-section of well-dyed leather reveals consistent color throughout — a mark of craftsmanship.
The Art: From Uniform Color to Natural Variation
While factories pursue consistency, artisans celebrate controlled imperfection. Dyeing can create uniform tones for mass production or handcrafted variation for bespoke goods.
Uniform Dyeing (Factory Standard):
- Used for luxury handbags, belts, and OEM runs.
- Ensures identical batches for international brands.
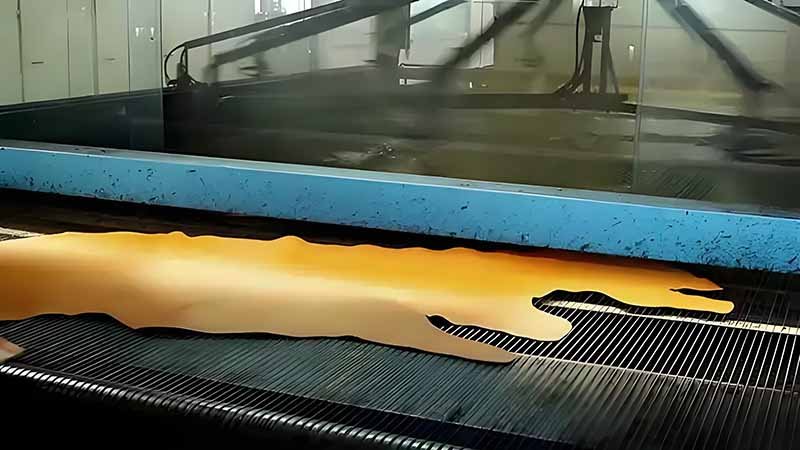
- Achieved via drum dyeing under monitored conditions.
Artisanal Dyeing (Hand Finish):
- Popular for wallets, small accessories, and couture pieces.
- Emphasizes brush marks, gradients, and tone shifts.
- Uses sponge, dauber, or airbrush for organic effects.
Why Consistent Dyeing Is Vital for Brands
From a production standpoint, color consistency is non-negotiable. For brands that produce belts, wallets, or watch straps across multiple batches, even a small deviation in hue can affect customer trust and inventory management.
Example: If a brand’s signature brown varies between lots, consumers will notice — especially when mixing accessories in a single retail display.
To prevent this, Szoneier’s in-house system includes:
- Spectral analysis before every batch
- Fixed dye-to-hide ratio control
- Batch traceability logs for repeat orders
The Environmental Dimension: Eco-Dyeing Evolution
Traditional dyeing relied on solvents and heavy-metal mordants, but environmental standards are transforming the industry. Modern factories like Szoneier now use REACH- and RoHS-compliant dyes that are free from azo compounds and chromium VI.
Eco-friendly innovations include:
- Water-based systems: 70% lower VOC emissions
- Closed-loop recycling: 90% of dye bath reused
- Low-salt mordants: Reduced chemical waste
- Bio-based colorants: Derived from plant pigments
These methods reduce environmental impact while maintaining industrial performance — proving that sustainability and beauty can coexist.
What Types of Leather Can Be Dyed?
Almost all natural leathers can be dyed, but the technique, color depth, and final effect depend on the tanning process and surface finish. Vegetable-tanned leather absorbs dyes most deeply, chrome-tanned and finished leathers need surface treatments, and suede or nubuck require gentle dyeing to preserve texture. The key lies in matching the right dye type and method to the leather’s fiber structure and intended use.
Vegetable-Tanned Leather
Vegetable-tanned leather (Veg-tan) is the gold standard for dyeing flexibility. It’s tanned using organic plant tannins (from oak bark, mimosa, or quebracho), which leave the fibers open and absorbent.
Why it’s ideal for dyeing:
- Highly porous and breathable.
- Minimal chemical residue.
- Accepts both penetrating and surface dyes.
- Ages into a natural patina.
Applications: Used widely for belts, wallets, watch straps, premium bags, and artisanal goods.
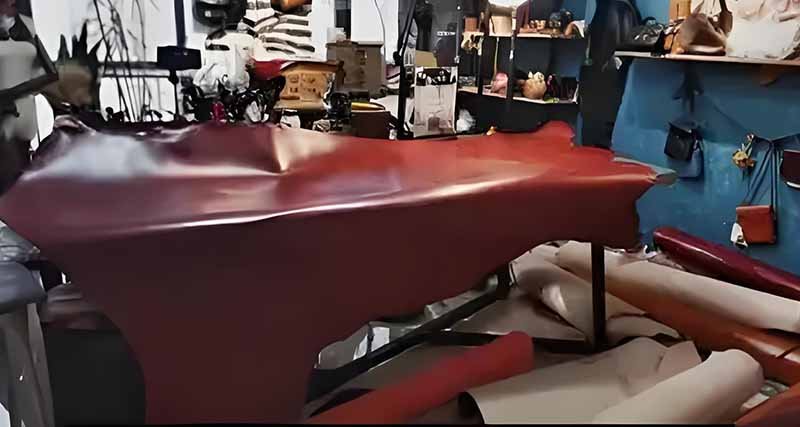
Szoneier Insight: For a European client’s heritage belt line, we used vegetable-tanned cowhide dyed with oil-based aniline for depth and longevity. The surface darkened over time, developing a golden-brown patina that became the brand’s signature.
Color Behavior: Veg-tan leather shows more tonal variation — darker at folds, lighter at peaks — making it ideal for luxury and handcrafted aesthetics.
Chrome-Tanned Leather
Chrome-tanned leather is the world’s most common type — accounting for over 80% of leather production. It’s treated with chromium salts that stabilize collagen fibers, resulting in a softer, more flexible feel.
However, this chemical structure reduces absorbency — dyes don’t penetrate as deeply as in vegetable-tanned hides.
Why dyeing chrome-tanned leather is challenging:
- The fibers are more compact and coated with chromium complexes.
- Color tends to remain near the surface.
- Requires specialized water-based or pigment dye systems to ensure adhesion.
Advantages:
- Excellent color uniformity.
- Resistant to shrinkage and water.
- Ideal for bright, modern shades used in handbags, car upholstery, and footwear.
Semi-Chrome Leather
To achieve both depth and softness, many premium factories (including Szoneier) use semi-chrome leather — a hybrid of vegetable and chrome tanning.
Process :
- First stage: pre-tanning with vegetable tannins.
- Second stage: chrome retanning for flexibility and resilience.
- Result: a strong yet smooth hide that accepts deep dyes evenly.
Advantages:
- Deep internal color with minimal streaking.
- Balanced tensile strength and softness.
- Excellent shape retention for structured products like handbags, satchels, and leather boxes.
Szoneier Example: For a luxury bag line, our factory used semi-chrome calf leather dyed in three phases — base color penetration, mid-layer conditioning, and surface finishing — achieving unmatched tone consistency across 200+ production units.
Full-Grain, Top-Grain, Split & Corrected-Grain — Structural Impact on Dye
| Leather Type | Fiber Structure | Dye Absorption | Recommended Dye Type |
|---|---|---|---|
| Full-Grain | Untouched grain, tight fibers | Deep but uneven | Alcohol/Oil-based penetrating dyes |
| Top-Grain | Sanded slightly smooth | Even, moderate | Water-based or semi-aniline dyes |
| Split Leather | Inner fibrous layer | Absorbs fast but blotchy | Pigment or coating dyes |
| Corrected-Grain | Embossed, polyurethane-coated | Minimal penetration | Pigment-only, spray application |
Full-Grain Leather
Natural pores and textures create rich tone variation — perfect for luxury goods where authenticity matters. Dyes penetrate irregularly, giving depth and character.
Top-Grain Leather
Lightly buffed surface ensures smoother dye absorption — preferred for consistent, high-end retail finishes.
Split Leather
Often used in linings or suede, but uneven density demands controlled spray dyeing to avoid patchy tone.
Corrected-Grain Leather
Typically pre-coated with polymers for uniformity; only pigment finishes adhere. These are popular in mass-market bags or utility products needing durability over aesthetics.
Specialty Leathers
Aniline Leather
Purest form of dyed leather — no surface coating, just color that penetrates directly.
- Vibrant tone with visible natural markings.
- Soft, breathable, and high-end.
- Sensitive to scratches and UV light.
Used for: Luxury bags, wallets, and furniture. Dye Type: Transparent penetrating aniline dyes.
Semi-Aniline Leather
Has a thin protective layer (3–5 microns).
- Slightly muted tone but more practical durability.
- Easier to maintain.
- Favored in modern retail brands seeking balance.
Suede
Made from the underside of hide; soft, velvety nap.
- Dyed using fine water-based sprays to preserve texture.
- Over-saturation can stiffen fibers.
- Requires waterproof sealants afterward.
Nubuck
Similar to suede but buffed on the grain side.
- Absorbs dye less deeply.
- Needs special low-viscosity, penetrating dyes.
- Typically finished with anti-soil coatings to resist stains.
Patent Leather
Highly glossy due to PU or acrylic coating.
- Cannot absorb dye beneath the surface.
- Only surface pigments can be used, applied with heat lamination.
Exotic Leathers and Their Dye Behavior
| Leather Type | Challenges | Factory Techniques Used |
|---|---|---|
| Sheepskin/Lambskin | Fine fibers; absorbs unevenly | Drum dyeing with soft oil finishes |
| Goatskin | Dense grain; resists deep penetration | Pre-conditioning and double dyeing |
| Buffalo Leather | Thick structure; large pores | Immersion dyeing with long soak cycles |
| Ostrich | Quill bumps cause uneven tone | Hand sponge dyeing for precision |
| Crocodile | Hard scales; dye remains shallow | Spray dye + protective gloss coating |
Szoneier Specialization: We perform dual-stage coloring for exotic leathers — first penetrating dyes for base tone, then hand-tinted finishes for accent definition. This process is used for small-batch custom OEM orders like jewelry boxes or collectible accessories.
Finished vs Unfinished Leather
Not all leathers can be re-dyed or recolored.
- Unfinished (Aniline, Veg-Tan): Fully dyeable; open pores absorb evenly.
- Finished (Pigmented, Coated): Requires stripping before recoloring.
- PU- or PVC-Laminated: Cannot be re-dyed; only painted or recoated.
Industrial Tip: If a client requests a color change on coated stock leather, Szoneier’s team conducts a “Finish Strip Test” — determining whether the coating can be safely removed without damaging the hide structure.
Which Leather Dye Types Are Most Commonly Used?
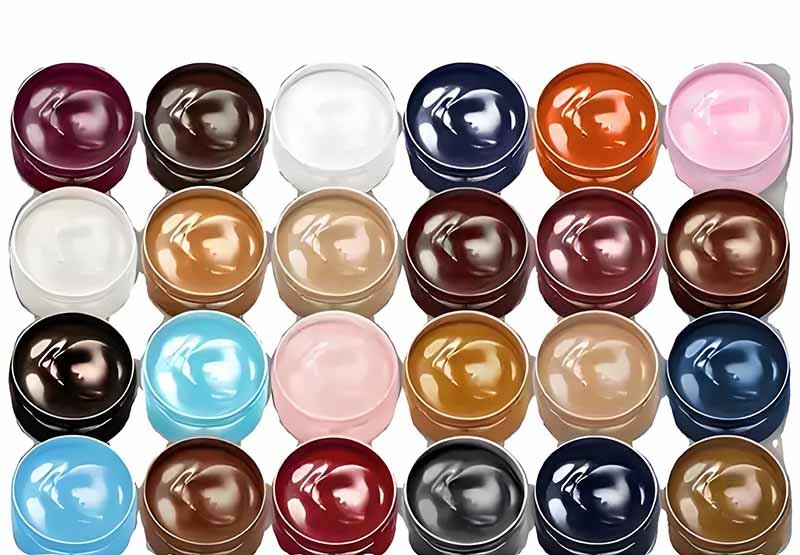
The four most common leather dye types are alcohol-based, water-based, oil-based, and pigment-based. Alcohol dyes provide intense color and quick drying, oil dyes offer rich tone and flexibility, water dyes are eco-friendly and ideal for even coverage, while pigment dyes coat the surface for consistent, opaque finishes. Factories often combine these systems to balance penetration, durability, and visual texture — ensuring long-lasting color and natural leather feel.
Understanding the Four Core Leather Dye Categories
All professional leather coloring systems fall into one of four main chemical families. Each has its own interaction with leather fibers, appearance outcome, and ideal use case.
| Dye Type | Penetration Depth | Finish Effect | Ideal Use | Key Benefit |
|---|---|---|---|---|
| Alcohol-Based | Deep | Vibrant, fast-drying | Vegetable-tanned leather | Rich tone, strong color |
| Water-Based | Medium | Natural, even | Chrome or semi-aniline leather | Eco-friendly, low VOC |
| Oil-Based | Deep to medium | Soft, lustrous | Luxury bags & belts | Supple feel, long wear |
| Pigment-Based | Surface only | Opaque, consistent | Coated leathers, automotive | High coverage, uniform look |
A professional leather manufacturer like Szoneier Leather doesn’t choose a single dye type — we often combine multiple systems to achieve a specific brand aesthetic or performance goal. For example, a semi-aniline bag may use an oil-based base dye for depth, followed by a pigment topcoat for protection and gloss.
Alcohol-Based Dyes
How They Work
Alcohol-based dyes use a solvent carrier (usually ethanol or isopropanol) that quickly penetrates leather fibers. The solvent evaporates fast, leaving behind concentrated color molecules that bond with the collagen network.
Advantages
- Intense color saturation — excellent for bold hues (red, black, navy).
- Quick drying — ideal for time-sensitive production lines.
- Deep penetration — preserves leather’s natural grain visibility.
Disadvantages
- The solvent base can dry out leather, requiring conditioning afterward.
- Less forgiving — streaks appear if applied unevenly.
- Can produce slightly harsh odor in poorly ventilated setups.
Best Used For
- Vegetable-tanned leather (tooling, belts, wallets).
- Handcrafted or small-batch leather goods needing deep, organic color.
Water-Based Dyes
How They Work
Water-based dyes use water as a solvent, with small amounts of co-solvents or surfactants to help pigment dispersion. Instead of evaporating rapidly, they absorb gradually, allowing color to level naturally across the hide.
Advantages
- Eco-friendly: Low VOC, biodegradable, safe for workers.
- Even coverage: Slow absorption reduces blotching.
- Soft handfeel: Maintains the natural touch of the leather.
- Compatible with REACH and RoHS standards.
Disadvantages
- Slower drying time, often requiring controlled-air chambers.
- Slightly lower color intensity than solvent-based systems.
- Must be sealed to ensure water resistance.
Best Used For
- Chrome-tanned and semi-aniline leathers.
- Upholstery and fashion bags that require consistent finish and odorless quality.
Industrial Data Table
| Metric | Alcohol-Based | Water-Based |
|---|---|---|
| VOC Emission | 180–240 g/L | <30 g/L |
| Avg. Dry Time | 30 min | 90–120 min |
| Color Depth | Very High | Medium–High |
| Worker Safety | Moderate | Excellent |
| Cost Efficiency | High | Moderate |
Eco Trend: Water-based dyes are now the preferred choice for European luxury brands, driven by environmental certification and consumer demand for low-odor, sustainable products.
Oil-Based Dyes
How They Work
Oil-based dyes suspend colorants in natural or synthetic oils. When applied, they soak into fibers slowly, delivering deeper penetration with a natural sheen. The oil component replenishes the hide’s moisture, leaving it flexible and smooth.
Advantages
- Rich tone and high lightfastness.
- Soft, nourished finish that enhances feel and appearance.
- Superior wear resistance — great for bags, belts, and straps.
- Resists cracking under bending stress.
Disadvantages
- Longer drying time (up to 24 hours).
- Can slightly darken over time, especially with sun exposure.
- Requires precise temperature control during application.
Best Used For
- Luxury handbags, watch straps, belts, and wallets.
- High-end OEM production requiring “buttery” leather texture.
Szoneier Example: For a French luxury belt maker, Szoneier developed an oil-dye process using Italian-sourced colorants. After 10,000 flex tests (ISO 5402), the leather showed no cracking and maintained 97% colorfastness after 200 hours of UV exposure.
Color Performance Insight:
| Parameter | Oil Dye Result |
|---|---|
| Flex Endurance (10k cycles) | No cracks |
| UV Colorfastness (ISO 105-B02) | Grade 4–5 |
| Moisture Resistance | Excellent |
| Handfeel Retention | +20% vs. alcohol-based |
Professional Tip:
For dense hides, Szoneier uses pre-heated oil baths (40°C) to improve penetration uniformity without fiber distortion.
Pigment-Based Dyes
How They Work
Pigment dyes (technically coatings rather than penetrating dyes) sit on top of the leather surface, sealed by a binder like acrylic or polyurethane. They mask imperfections, providing uniform color and enhanced durability.
Advantages
- Perfect surface uniformity — hides scars or irregularities.
- High abrasion and water resistance.
- Vibrant, repeatable colors across large production runs.
- Excellent for automotive, luggage, and utility bags.
Disadvantages
- Less natural feel — can slightly stiffen the surface.
- Breathability is reduced.
- Cannot develop natural patina over time.
Best Used For
- Corrected-grain, split, or coated leathers.
- Products requiring identical color reproduction — such as OEM uniform accessories, tool bags, or retail displays.
Pigment vs Dye – Aesthetic Comparison
| Aspect | Penetrating Dye (Oil/Alcohol/Water) | Pigment Dye |
|---|---|---|
| Color Depth | Natural, translucent | Solid, opaque |
| Grain Visibility | Preserved | Masked |
| Patina Development | Yes | No |
| Surface Feel | Soft, natural | Smooth, coated |
| Maintenance | Regular conditioning | Minimal care |
Hybrid and Multi-Layer Systems
In today’s factory-grade production, single-dye systems are rare. To balance beauty and performance, hybrid dyeing combines multiple techniques:
- Base Layer: Penetrating dye (oil or water) for color foundation.
- Mid Layer: Fixative or binder for adhesion.
- Top Layer: Pigment or wax finish for gloss and protection.
Example — Szoneier “Tri-Layer System”
- Phase 1: Water-based aniline drum dye (depth + eco-friendliness).
- Phase 2: Oil-conditioning layer (softness + elasticity).
- Phase 3: Thin pigment mist for UV protection and surface uniformity.
This system gives a natural yet durable look, ideal for premium OEM clients seeking retail-ready finishes without post-processing.
Specialty & Emerging Dye Technologies
Aniline and Semi-Aniline Systems
- Aniline dyes: Fully transparent, showing natural grain and pores.
- Semi-aniline: Adds a micro-layer for protection while maintaining natural tone.
- Common in luxury handbags and furniture due to their premium feel.
Metal-Complex Dyes
Used for industrial-grade colorfastness. Colorants are bonded with metallic salts (e.g., copper, chromium complexes) — extremely stable but less eco-friendly.
Nano-Structured Dyes
Next-gen innovation where nano-sized color particles bond more evenly. Benefits:
- Greater UV resistance.
- Reduced rub-off.
- Vibrant reflection for fashion-grade applications.
How Do You Prepare Leather for Dyeing?
Proper leather dyeing starts with cleaning, deglazing, and moisture calibration. The leather’s surface must be stripped of waxes, oils, and finishes that block dye absorption. Then, it’s lightly dampened to balance fiber hydration and tested for even absorption. This ensures uniform penetration, true color tone, and long-term colorfastness. Professional factories like Szoneier Leather use controlled humidity and pH balancing to guarantee smooth, consistent dye results across large production batches.
Step 1 – Cleaning and Deglazing
Every hide contains oils, lubricants, or surface polishes from tanning. These residues can seal pores and prevent dye molecules from bonding to collagen fibers. Deglazing removes these barriers, restoring the leather’s natural absorbent state.
Process
- Dust and Dirt Removal – The surface is first cleaned using lint-free cloths soaked in mild soap solution.
- Deglazer Application – A solvent-based or citrus-based deglazer (depending on eco requirements) is applied evenly using a soft pad.
- Gentle Wipe Down – Circular motions lift away old wax and color residues without over-stripping.
- Air Drying (15–30 mins) – The surface is left to evaporate solvents fully before proceeding.
Industrial Formulas Used
| Type | Chemical Base | Purpose | Used By |
|---|---|---|---|
| Traditional Deglazer | Acetone/Ethanol | Removes oils, polishes | Artisans |
| Industrial Deglazer | Ethyl acetate mix | Strips coatings, faster drying | Factories |
| Eco Deglazer | Citrus terpene | Non-toxic, REACH-compliant | Szoneier eco line |
Szoneier Insight: We’ve developed a low-VOC deglazing solution (VOC < 30 g/L) that effectively cleans chrome- and vegetable-tanned hides without altering the fiber’s elasticity. Our technicians test pH (ideal range: 5.0–5.5) after each deglazing stage to ensure neutralization before dyeing.
Step 2 – Surface Buffing (if required)
After deglazing, certain hides—especially top-grain or corrected-grain leathers—require micro-sanding or buffing to remove residual finish layers and smooth the surface. This helps achieve even dye absorption.
Tools Used:
- 1,000–1,500 grit sanding pads (for precision control).
- Fine nylon mesh for buffing delicate surfaces.
Factory Control Metric: Buffing depth ≤ 0.03 mm — enough to open the surface pores but not damage the grain.
Caution: Over-buffing can flatten the leather texture or alter thickness, especially in thin calfskins (<1.2 mm).
Step 3 – Moisture Conditioning
Leather that’s too dry absorbs dye unevenly — like parched soil soaking up rain in blotches. Overly wet leather, on the other hand, dilutes the dye and reduces penetration. The ideal condition is “cool damp” — where fibers are hydrated but not saturated.
Professional Method
At Szoneier, we use a controlled humidity chamber before dyeing to ensure consistent fiber hydration.
| Parameter | Optimal Range |
|---|---|
| Relative Humidity | 60–70% |
| Temperature | 22–26°C |
| Surface Moisture | 6–8% by weight |
How It’s Done
- Leather is wiped with a slightly damp sponge or misted with distilled water.
- It rests in a humidity chamber for 15–20 minutes.
- A moisture meter confirms uniform hydration across the hide (±0.5% tolerance).
This ensures even dye flow during application, preventing streaking or light patches.
Step 4 – pH Balancing and Fiber Activation
The Chemistry
Leather’s natural pH after tanning can vary from 3.5 to 6.5, depending on whether it’s vegetable- or chrome-tanned. If the surface is too acidic, dye molecules may bond too quickly and unevenly. If it’s too alkaline, color adhesion becomes weak, leading to rub-off or bleeding.
To counter this, factories apply a buffer solution to balance fiber chemistry before dyeing.
Szoneier Standard pH Adjustment
| Leather Type | Ideal pH Range Before Dyeing |
|---|---|
| Vegetable-Tanned | 5.0 – 5.5 |
| Chrome-Tanned | 4.2 – 4.8 |
| Semi-Chrome | 4.8 – 5.2 |
Factory Application: A mild acidified conditioner (e.g., formic acid + fatliquor blend) is sprayed on the surface and allowed to settle for 10 minutes. This activates the fibers, creating a receptive structure for color penetration.
Bonus: The pH-balancing stage also improves leather’s tensile flexibility, reducing brittleness after dyeing.
Step 5 – Testing Absorption and Color Behavior
Before full-scale dyeing, technicians perform a spot test on a small cut of the same leather batch. This predicts how the leather will absorb and reflect color.
Test Parameters
- Absorption Time (sec): How long before color fully penetrates.
- Surface Spread (mm): How far dye diffuses laterally.
- Tone Variation (%): Difference between wet and dry appearance.
| Test Metric | Ideal Result Range |
|---|---|
| Absorption Time | 5–15 sec |
| Spread Width | <10 mm |
| Color Dry Shift | <15% |
Szoneier’s Dye Lab uses digital color spectrophotometers to record ΔE (color difference) after drying, ensuring that what appears wet matches the target color within ±1.0 tolerance.
Step 6 – Edge and Underside Preparation
For products like belts, straps, and wallets, edges and undersides require special preparation because they absorb differently.
Edge Prep Process:
- Sand edge lightly to remove sealing wax.
- Apply a degreasing agent to ensure even absorption.
- Test dye on a 2 cm section before proceeding.
Underside Prep: For split or suede-like surfaces, we apply a fiber-set solution to stabilize open fibers before dyeing. This prevents dye bleeding and helps achieve a uniform matte finish.
Step 7 – Temperature and Environment Calibration
The dyeing environment plays a critical role in color outcome. Temperature affects solvent evaporation; humidity influences absorption speed.
Szoneier Environmental Settings:
| Condition | Recommended Range | Purpose |
|---|---|---|
| Room Temp | 23–26°C | Prevent rapid solvent loss |
| Relative Humidity | 50–65% | Maintain even absorption |
| Airflow | Moderate, filtered | Avoid dust and lint contamination |
Important: Avoid direct sunlight or high fan speeds during preparation — these can prematurely dry the surface and cause streaks during dye application.
Optional Step – Stripping Old Dye (for Re-Dye or Repair)
In some cases, leather already contains old dyes or finishes. If re-coloring, the old dye must be stripped carefully without damaging fibers.
Process:
- Apply a dedicated dye stripper (we use acetone-free ethyl acetate formula).
- Lightly buff with a soft cloth until surface color lifts.
- Neutralize using a weak vinegar-water solution (pH ~5.5).
- Air dry completely before new dye application.
Caution: Over-stripping removes protective oils — always follow with reconditioning before re-dyeing.
Common Preparation Mistakes
| Mistake | Effect | Szoneier Solution |
|---|---|---|
| Incomplete deglazing | Patchy color | Two-stage solvent and pH test |
| Over-wetting | Weak color depth | Humidity control chambers |
| Skipping pH test | Uneven tone or cracking | Automated pH scan before dye |
| Dirty environment | Surface specks | HEPA-filtered air system |
How to Apply Leather Dye Step by Step
Apply leather dye in thin, even layers on a clean, deglazed, lightly damp surface. Start with a light base coat, allow 10–30 minutes to flash dry, then add 2–4 subsequent coats until target depth is achieved. Buff between coats, control temperature (22–26°C) and humidity (50–65%), and finish with a sealant (wax, acrylic, or oil) to lock color and improve rub resistance. For volume production, use drum dyeing with controlled bath pH, temperature, and time.
The Core Workflow at a Glance
| Stage | Action | Target Controls | Outcome |
|---|---|---|---|
| 1. Substrate Ready | Surface cleaned, deglazed, pH balanced, moisture calibrated | pH 4.8–5.5; surface moisture 6–8% | Even absorption |
| 2. Base Coat | Light, even application | Thin film, no pooling | Anchors tone |
| 3. Flash Dry | Short rest before recoat | 10–30 min at 22–26°C | Prevents streaks |
| 4. Build Coats | 1–3 additional coats | Total 2–4 coats typical | Target depth |
| 5. Inter-coat Buff | Gentle buff with felt/microfiber | 20–60 sec, light pressure | Leveling & luster |
| 6. Cure/Dry | Air or chamber dry | 60–180 min (method-dependent) | Color fixation |
| 7. Seal/Finish | Wax, oil, acrylic, or hybrid | Film 3–8 μm; rub fastness test | Protection & handfeel |
| 8. Final QA | Rub/adhesion/ΔE checks | ISO 105-X12; ΔE ≤ 1.0 | Shipment-ready |
1. Manual Application: Sponge, Dauber, Pad, and Airbrush
Manual methods are ideal for small runs, gradients, edges, wallets, belts, or when you want artisanal variation. They’re also the basis of high-touch premium lines.
Tools You’ll Use
- Applicators: wool dauber, sponge pad, lint-free cloth, felt block
- Spray: HVLP airbrush/spray gun (0.8–1.0 mm nozzle for dyes)
- Buffers: soft microfiber/felt wheels (low RPM)
- Meters: IR thermometer, hygrometer, moisture meter
- Supports: clean cradles or clip frames to avoid finger marks
Base Coat (Anchor Layer)
- Goal: Lay down an ultra-thin “anchor” layer that wets fibers evenly.
- Method:
- Dampen the applicator (not dripping).
- Apply in overlapping figure-8 or circular motions with light pressure.
- Work with the grain direction first, then cross-grain to level.
- Tip (Szoneier): If your dye is very strong (alcohol/oil), pre-cut 10–20% with the appropriate reducer for the first pass to avoid blotching.
Typical Parameters (Base Coat)
| Dye | Viscosity | Coat Weight | Flash Dry |
|---|---|---|---|
| Alcohol-based | Low | Very thin | 10–15 min |
| Water-based | Low-med | Thin | 20–30 min |
| Oil-based | Med | Thin | 20–40 min |
2. Build Coats
Apply 1–3 more thin coats until the target depth is reached.
- Maintain wet edge to avoid lap marks.
- Rotate the hide to observe under different angles/lighting (6500K neutral).
- Buff lightly (felt pad) after each flash dry to knock down grain raise and unify sheen.
Inter-Coat Control
- Room: 22–26°C, RH 50–65%
- Flash: 10–30 min depending on dye system
- Buff: 20–60 seconds, very light pressure
Airbrush/HVLP for Ultra-Even Finishes
- Nozzle: 0.8–1.0 mm; Atomizing Pressure: 1.2–1.6 bar
- Distance: 15–25 cm from surface; Pass Speed: 10–15 cm/sec
- Pattern: 50% overlap, cross-hatch for uniformity
- Why: Minimizes streaks, ideal for semi-aniline or top-grain where consistency is king.
3. Edge & Strap Dyeing (Belts, Wallets, Handles, Watch Straps)
Edges absorb differently and need their own mini-workflow.
Edge Prep
- Sand progressively (400 → 800 → 1200 grit)
- Deglaze edges (quick pass)
- Prime (optional): thin edge-base for very open fibers
Edge Dye Application
- Apply very thin dye coats with a fine edge roller, dauber, or micro-brush.
- Dry 10–20 min between coats; usually 2–4 coats total.
- Burnish with canvas or felt for gloss; repeat dye/burnish if needed.
Edge Sealing (High-Wear Builds)
- Seal with edge paint (PU/acrylic) or wax-oil mix.
- Target final edge film: 0.20–0.35 mm (tooling/straps) for durability.
- Rub-test (dry/wet) to Grade 4–5 (ISO 105-X12).
4. Immersion & Drum Dyeing
Use for full hides and large batches where color uniformity and throughput matter.
Bath Preparation
- Dye Concentration: 2–5% owf (on weight of fiber) typical; adjust by leather density
- pH: 4.5–5.2 (veg-tan higher; chrome-tan lower)
- Temperature: 45–60°C (higher temp = faster diffusion)
- Additives: wetting agents, leveling agents, anti-foam as needed
Drum Process
- Load prepped hides → warm rotation (5–10 min)
- Add dye solution slowly while rotating
- Dye phase: 45–120 min (monitor color take-up)
- Fixation: add fixative/retainer; 10–20 min
- Rinse: brief to remove surface excess
- Sammying/Setting: mechanical water removal, then hang or frame dry
Factory Control Table
| Leather | Temp | Time | Notes |
|---|---|---|---|
| Veg-tan, 1.6–2.0 mm | 50–55°C | 60–90 min | Deep tone, check core cut |
| Chrome-tan, 1.2–1.6 mm | 45–50°C | 45–75 min | Focus on evenness |
| Calf, 1.0–1.4 mm | 45–48°C | 40–60 min | Gentle handling, low foam |
5. Drying & Curing
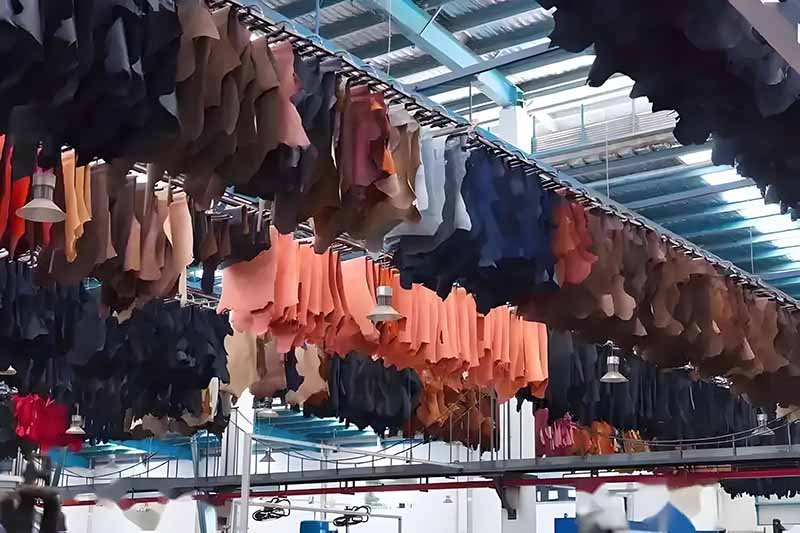
Proper drying prevents migration, tide marks, or surface hardening.
| Method | Conditions | Duration | Use Case |
|---|---|---|---|
| Ambient Rack | 22–26°C; RH 45–60% | 2–6 h | Small batches, natural finishes |
| Warm Air Chamber | 30–40°C, controlled airflow | 60–180 min | Factory throughput |
| IR Assist | Gentle IR panel pass | 5–10 min assist | Dark shades, fix top tone |
Tips
- Avoid direct sun or high-velocity fans.
- Maintain even spacing between hides for airflow uniformity.
- Do not stack until core moisture returns to baseline (≤12% for most leathers).
6. Inter-Coat Buffing & Final Finishing
Buffing between coats and before sealing ensures even reflection and touch.
- Media: felt wheel/cloth; Pressure: light; Time: 20–60 sec/area
- Why: Levels micro-roughness, enhances depth without “plastic” look
- Optional: very fine wax pre-coat for warm, pull-up visual on veg-tan
Finish Options (Choose by Product & Brand Tone)
| Finish | Look/Feel | Protection | Use |
|---|---|---|---|
| Wax/Oil | Warm, natural, patina-friendly | Water beading, flexible | Belts, heritage bags |
| Acrylic (thin) | Clean, semi-gloss | High rub/UV | Handbags, footwear |
| PU Micro-Film | Smooth, durable | Excellent stain resistance | Travel goods, utility |
| Hybrid (oil + thin pigment) | Natural depth + uniform top | Balanced | Luxury bags (semi-aniline) |
7. Coat Counting & Timing Cheat Sheet
- Standard manual finish: 1 base + 2 build = 3 coats
- High-saturation look: 1 base + 3–4 builds = 4–5 coats
- Flash dry: 10–30 min per coat (system dependent)
- Total process (manual, small item): 2–6 hours including cure
- Total process (drum, full hides): Half-day to 1 day including drying & finishing
Troubleshooting
| Symptom | Likely Cause | Immediate Fix | Prevent Next Time |
|---|---|---|---|
| Streaks/Lap marks | Over-wet edge; uneven pass | Light re-mist, re-flow with reducer | Maintain wet edge; spray cross-hatch |
| Blotches | Dry substrate or residue | Re-deglaze spot; thin glaze coat first | Better moisture balance (6–8%) |
| Rub-off (dry/wet) | Under-cured or no topcoat | Add fixative; bake-assist 35–40°C; apply sealant | Respect flash times; seal to film ≥3 μm |
| Dull/flat color | Dye too viscous; heavy coats | Cut 5–15% with reducer; buff between coats | Thinner passes; proper flash |
| Edge cracking | Over-thick film; no burnish | Sand, re-dye thin; add flexible edge paint | Build edge in micro-layers |
How to Finish, Seal, and Protect Dyed Leather
After dyeing, protect leather with a thin, flexible topcoat that locks color, resists abrasion, and preserves handfeel. Typical stacks use wax/oil for warmth, acrylic for rub fastness and clarity, or PU micro-film for stain/UV resistance. Apply in 2–3 thin coats, buff between layers, and cure under 22–26°C, 45–60% RH. Aim for film 3–8 μm, rub fastness ISO 105-X12 ≥ Grade 4 (dry), and add DWR + UV absorbers for outdoor goods.
1. Finish Families
| Finish Class | What It Is | Strengths | Trade-offs | Best Use |
|---|---|---|---|---|
| Wax / Oil (beeswax, carnauba, lanolin) | Penetrating & surface waxes/oils | Warm patina, rich pull-up, flexible | Lower stain/UV resistance, needs maintenance | Heritage belts, artisanal bags |
| Acrylic (water-borne) | Clear polymer film | High clarity, rub fastness, low VOC | Slight film feel if overbuilt | Handbags, wallets, interiors |
| PU Micro-Film (water- or solvent-borne) | Thin polyurethane coat | Excellent stain/UV/sweat resistance, flexible | Can reduce breathability if too thick | Travel, outdoor, utility |
| Hybrid (oil/wax + acrylic mist) | Layered system | Natural depth + protection | Process control required | Semi-aniline luxury lines |
| Edge Paints (PU/acrylic) | Edge-only coating | Chip-resistant edges | Needs multi-layer build | Straps, belts, watch bands |
2. Target Outcomes & Measurement
| Property | Target | Why It Matters |
|---|---|---|
| Film Thickness | 3–8 μm (face); 0.20–0.35 mm (edge build) | Protection without plastic feel |
| Gloss @60° | Matte 5–10 GU · Satin 15–30 GU · Gloss 40–70 GU | Brand look consistency |
| Contact Angle (Water) | ≥ 90° (DWR applied) | Beading = better moisture resistance |
| Rub Fastness (ISO 105-X12) | Dry ≥ 4, Wet ≥ 3–4 | Color won’t transfer |
| Flex (ISO 5402) | 10k cycles, no crack/flake | Real-world bending durability |
| UV (ISO 105-B02) | Grade 4–5 | Color stability outdoors |
| Odor/VOC | Low, REACH/RoHS compliant | Retail acceptance, worker safety |
3. The Finishing Sequence
Environment: 22–26°C · 45–60% RH · filtered moderate airflow
- Level Buff (Pre-finish): Felt or microfiber, 20–60 sec per area to smooth micro-roughness.
- Sealer Coat (very thin):
- Option A (Natural look): oil-in-water emulsion (0.5–1.0 μm).
- Option B (Protection first): diluted acrylic 1:1 with water (1–2 μm). Flash: 10–20 min.
- Body Coat (build for performance):
- Acrylic or PU micro-film via HVLP or pad.
- Cross-hatch passes with 50% overlap, 15–25 cm distance. Flash: 20–30 min; Buff: light, 20–40 sec.
- Effect / Handfeel Layer (optional):
- Wax/oil wipe for warmth OR matte agent pass for low gloss. Flash: 15–25 min.
- Top Coat (lockdown):
- Acrylic (clarity) or PU (stain/UV). Cure: ambient 2–4 h or chamber 30–90 min @ 30–40°C.
- Post-Finish QA:
- Rub, flex, ΔE, gloss, contact angle.
4. Chemistry Notes
- Waxes (beeswax/carnauba): crystal structure gives gloss & pull-up; blend ratios tune warmth vs hardness.
- Oils (neatsfoot, lanolin, silicone-modified): replenish lubrication; prevent brittleness; too much can lower rub fastness.
- Acrylics: clear particles coalesce into a transparent film; great clarity and rub at thin builds.
- Polyurethanes (aliphatic PU): superior sweat/abrasion/UV resistance, stay flexible over temperature swings.
- Additives:
- UV absorbers (benzotriazole, HALS) for color stability.
- DWR (fluorine-free silicones) to increase water contact angle.
- Levelers/anti-foam for spray uniformity.
- Matting agents to dial in gloss precisely.
5. Process Parameters — Spray & Wipe Application
Spray (HVLP) Settings
| Nozzle | Pressure | Pass Speed | Distance |
|---|---|---|---|
| 0.8–1.0 mm | 1.2–1.6 bar | 10–15 cm/sec | 15–25 cm |
Wipe/Pad Settings
- Use lint-free pads; ultra-thin wet film.
- Figure-8 motion, minimal pressure; maintain a wet edge.
- If streaks appear, add 5–10% reducer and re-flow.
Between Coats
- Flash: 15–30 min.
- Buff: felt or microfiber, light pressure (do not burn through).
- Maintain ΔE shift ≤ 1.0 between coats.
6. Edge Finishing (Straps, Belts, Handles)
Edges take the most abuse—finish them like a miniature product.
- Prep: Sand 400→800→1200; quick deglaze; dust off.
- Prime: Thin edge base (optional for open fibers).
- Dye Edge: 2–4 ultra-thin passes, flash 10–20 min.
- Edge Paint: PU/acrylic micro-layers (2–5 coats).
- Burnish/Seal: Felt wheel + final topcoat.
Edge Specs
| Metric | Target |
|---|---|
| Film Build | 0.20–0.35 mm |
| Chip Resistance | Pass drop & bend tests |
| Rub Fastness | Dry ≥ 4, Wet ≥ 3–4 |
7. Outdoor/High-Wear Protection — Szoneier Upgrades
- PU Topcoat + UV Pack: Aliphatic PU + UV absorbers → Grade 4–5 UV stability.
- DWR (Fluorine-free): Silicone nano-emulsion → contact angle ≥ 90°.
- Anti-Soil / Anti-Sweat: Blocks perspiration acids and denim dye transfer.
- Odor Control: Low-VOC, REACH-compliant systems for premium retail.
Common Mistakes and Troubleshooting
Uneven dyeing, streaks, or color rub-off occur from poor preparation or improper drying. Fixing involves neutralizing, re-conditioning, or applying secondary coats. Consistency comes from controlling humidity, solvent ratios, and dye viscosity.
Over-Saturation and Uneven Absorption
Too much dye or uneven pressure causes blotching. Fix: Strip surface lightly, reapply thinner coats in circular motion.
Residue or Finish Contamination
If leather wasn’t fully deglazed, color won’t penetrate evenly. Solution: Deep clean, re-dye with slow-drying water-based formula.
Choosing the Right Neutralizer or Cleaner
After dyeing, residue acids or solvents must be neutralized with pH-balanced cleaners to maintain fiber elasticity.
Conclusion
Color is not just an aesthetic choice — it’s the signature of a maker’s intent. Each shade of leather tells its own quiet story: the deep chestnut of a travel bag that’s seen a hundred airports, the smoky blue of a luxury wallet that ages gracefully in the palm, or the sunlit tan of a belt that softens with every year. Behind every tone lies chemistry, patience, and a craftsman’s intuition — an invisible conversation between fiber, dye, and time.
Let your brand’s colors tell your story — with Szoneier’s expertise in precision dyeing, finishing, and OEM customization.


