 Skip to content
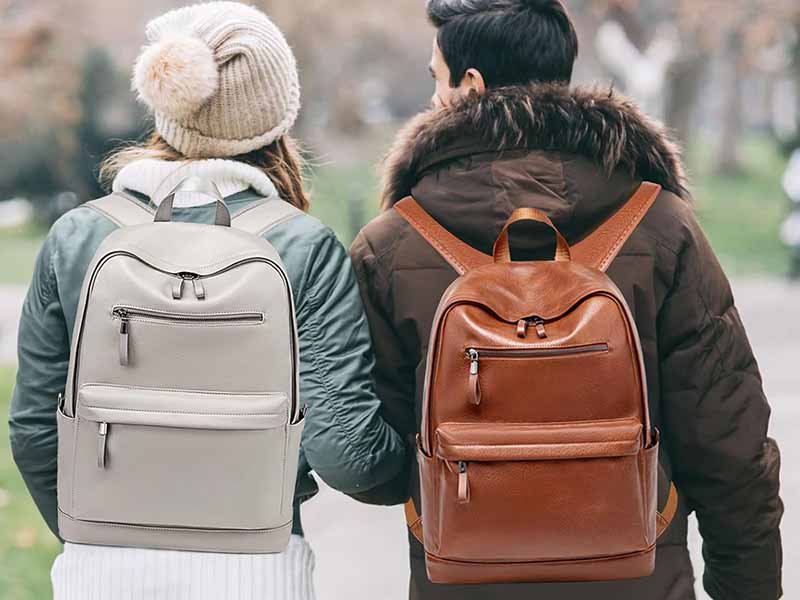
A leather backpack is not just a bag—it’s a long-term companion. It carries daily essentials, travels through rain, heat, friction, and time. And yet, when it comes to cleaning, most people hesitate. Some avoid cleaning altogether, fearing damage. Others act quickly—using water, wipes, or soap—only to discover stains, stiffness, or color loss later.
The truth is simple but often misunderstood: leather does need cleaning, but it must be cleaned correctly. Leather is skin, not plastic. It absorbs, reacts, and ages. The wrong method doesn’t just clean poorly—it can permanently change texture, color, and strength.
This confusion leads to three of the most searched questions on Google today:
- How do I clean my leather backpack?
- Will water ruin a leather bag?
- How do you clean a backpack without ruining it?
The answers are not universal, because leather itself is not universal. The right approach depends on leather type, finish, construction, and use environment—details professional leather manufacturers understand but consumers rarely see explained clearly. To clean a leather backpack safely, first identify the leather type, then use minimal moisture, gentle leather-safe cleaners, and soft cloths. Water will not ruin leather if used sparingly, but soaking or scrubbing can cause stains, stiffness, and damage. Always clean gently, spot-test first, and condition leather afterward to restore oils and flexibility.
If you want your leather backpack to last years—not months—understanding these fundamentals is essential. Let’s start with the most important question of all: what kind of leather are you actually cleaning?
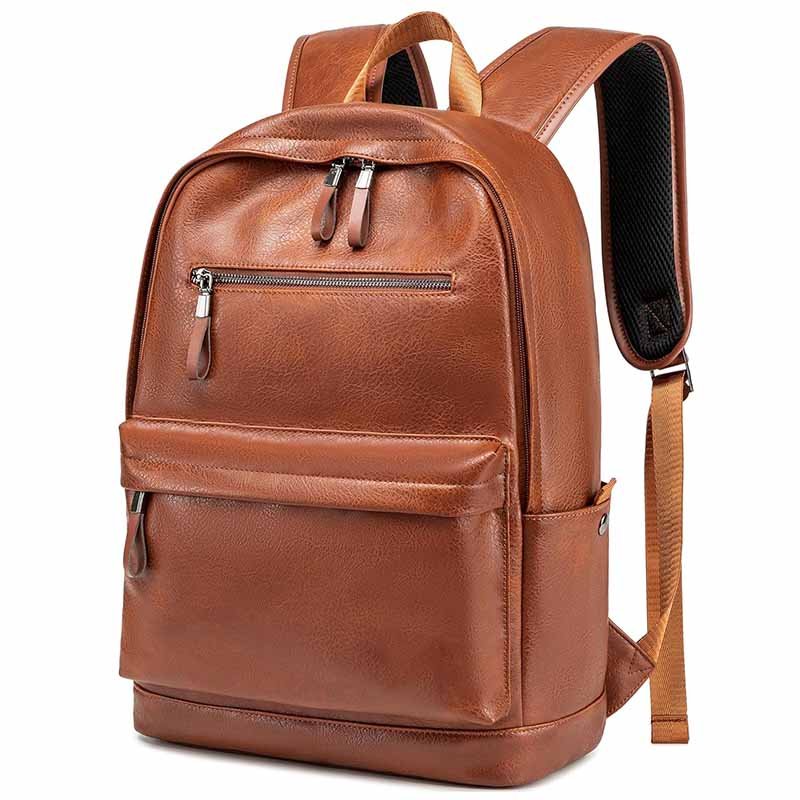
What Type of Leather Backpack Do You Have
Before cleaning a leather backpack, you must identify its leather type and surface finish. Full-grain, top-grain, genuine leather, suede, and nubuck react very differently to water, cleaners, and friction. Smooth finished leathers are generally safer to clean with minimal moisture, while suede and nubuck are highly water-sensitive. Correct identification prevents discoloration, stiffness, and permanent damage during cleaning.
Most leather backpacks are damaged before cleaning even starts—because the owner assumes “leather is leather.” In reality, leather differs by grain quality, finishing process, coating level, and fiber openness, all of which determine how it reacts to moisture and cleaning agents.
Professional leather factories like Szoneier Leather always identify leather type before any treatment. End users should follow the same logic.
What type of leather is your backpack made from?
From a manufacturing and performance perspective, leather backpacks usually fall into three structural grades:
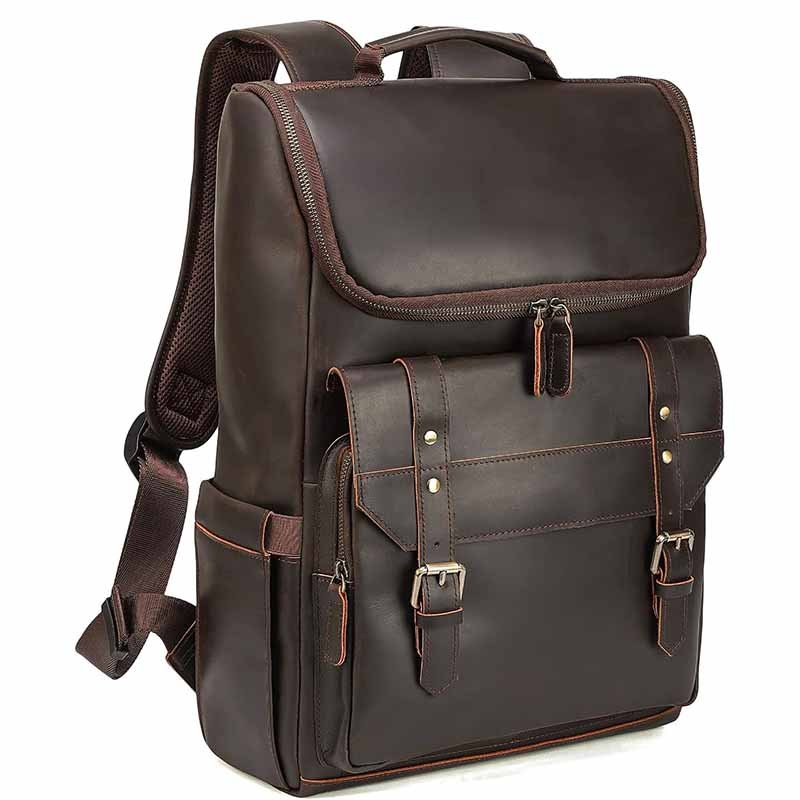
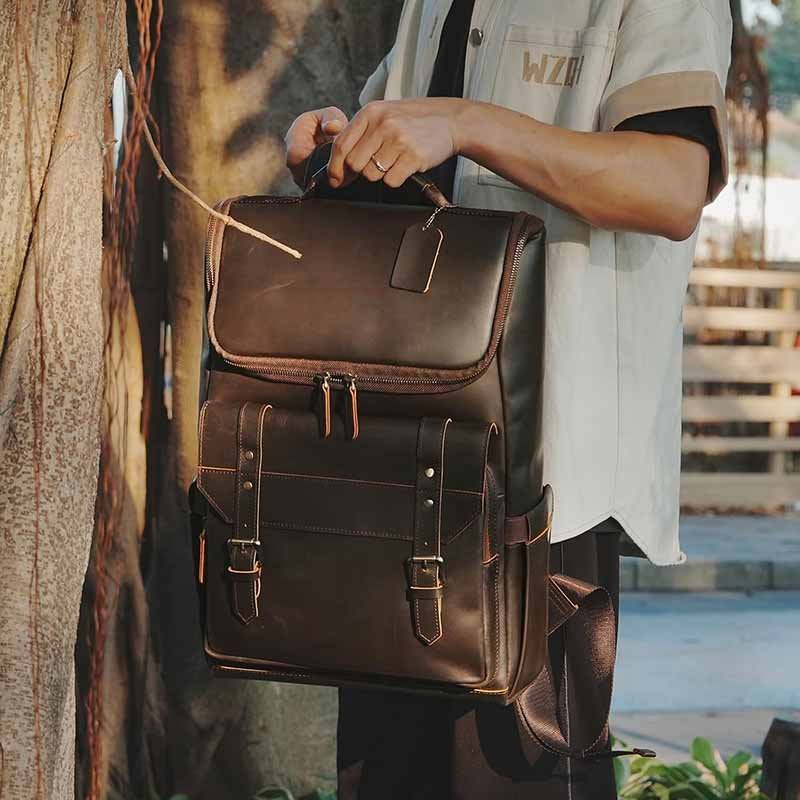
- Full-grain leather This is the highest quality leather, using the complete natural grain. It is breathable, strong, and ages beautifully—but it also absorbs moisture and oils easily. Cleaning must be gentle and followed by conditioning.
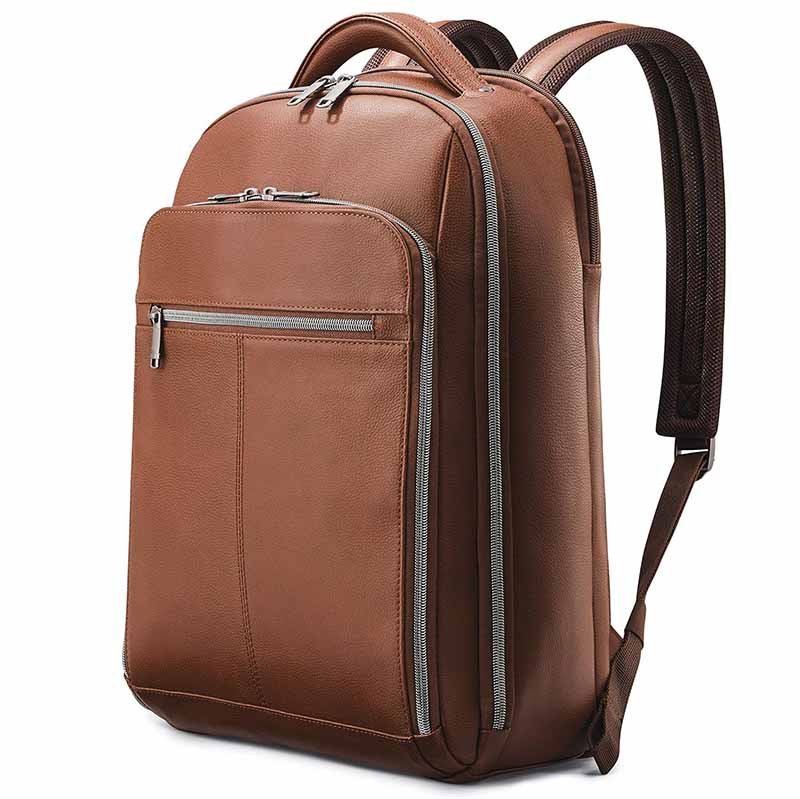
- Top-grain leather Lightly sanded and finished to improve uniformity. It offers a balance between durability and ease of care. Most premium everyday leather backpacks use top-grain leather.
- Genuine leather (split leather) Made from lower layers of hide with a surface coating. It is more resistant to water on the surface but less durable long-term. Over-cleaning can cause cracking or peeling.
Understanding this distinction explains why some leather backpacks tolerate cleaning better than others.
Is your backpack smooth leather, suede, or nubuck?
Beyond leather grade, surface finish is even more important for cleaning decisions.
- Smooth leather Has a sealed or semi-sealed surface. This is the most common type used for leather backpacks. It tolerates light moisture and gentle cleaners when used correctly.
- Suede leather Has an open, brushed surface made from the underside of the hide. It stains easily and should never be cleaned with water-based methods.
- Nubuck leather Similar to suede but made from the top grain. It looks refined but is extremely sensitive to moisture, oils, and friction.
If your backpack feels velvety or fuzzy to the touch, it is likely suede or nubuck—and requires completely different care than smooth leather.
Which leather types are most sensitive to water and cleaning?
Not all leather reacts the same to water. Sensitivity generally follows this order:
- Nubuck (most sensitive)
- Suede
- Unfinished or aniline full-grain leather
- Semi-finished top-grain leather
- Corrected or coated leather (least sensitive)
This explains why the common question “Will water ruin a leather bag?” has different answers. Water does not ruin leather universally—it ruins certain leather types when misused.
How can you identify your leather type at home?
If you’re unsure, try these safe observation methods:
- Touch test: Smooth leather feels firm and slightly cool; suede/nubuck feels soft and fuzzy
- Visual test: Natural grain patterns suggest full-grain or top-grain leather
- Water drop test (only on hidden areas):
- Absorbs quickly → unfinished leather
- Beads briefly → finished leather
- Leaves dark mark → high sensitivity
Never test water on visible areas.
Why leather type determines how much water is safe
Leather fibers are collagen-based. When they absorb too much water:
- Fibers swell
- Natural oils migrate
- Drying causes stiffness or deformation
Finished leathers slow this process; open-fiber leathers accelerate it. That’s why identifying leather type tells you how much moisture is safe—if any at all.
Why professional factories treat different leathers differently
At Szoneier Leather, different leathers are:
- Finished with different coatings
- Tested for moisture resistance
- Matched with specific care instructions
This ensures backpacks age well rather than deteriorate. Consumers benefit from understanding this logic, even when cleaning at home.
Quick Leather Identification Table
| Leather Type | Water Sensitivity | Cleaning Risk |
|---|---|---|
| Nubuck | Very High | Very High |
| Suede | High | High |
| Full-grain (unfinished) | Medium–High | Medium |
| Top-grain (finished) | Medium | Low–Medium |
| Coated / corrected leather | Low | Low |
Why starting with leather type saves your backpack
Many cleaning disasters happen not because people clean leather—but because they clean the wrong way for that leather. Once the leather type is correctly identified, every other step becomes clearer, safer, and more effective.
Knowing your leather is not optional—it’s the foundation of proper care.
What Should You Use to Clean a Leather Backpack
To clean a leather backpack safely, use soft microfiber cloths, lukewarm water, and leather-specific cleaners or very mild soap. These tools remove dirt without stripping natural oils or damaging leather fibers. Avoid alcohol wipes, baby wipes, vinegar, bleach, or household detergents, as they dry out leather and cause discoloration or cracking. Always use minimal moisture and spot-test before cleaning the entire backpack.
When people ask “How do you clean a backpack without ruining it?”, the answer almost always comes down to what you use. Leather damage is rarely caused by dirt—it’s caused by inappropriate cleaning products that strip oils, weaken fibers, or alter surface finishes.
Professional leather factories like Szoneier Leather test cleaning compatibility during product development. At home, users must be equally selective.
What basic tools are safest for cleaning a leather backpack?
You do not need many tools—just the right ones.
Safe, recommended tools include:
- Microfiber or soft cotton cloths – non-abrasive, lint-free
- Soft-bristle brush – useful for seams, stitching, and textured areas
- Small bowl of clean, lukewarm water – never hot
- Dry towel – for blotting excess moisture
Avoid sponges with rough surfaces or paper towels, which can scratch leather finishes and leave residue.
Which cleaners are actually safe for leather backpacks?
Not all “leather cleaners” are equal, but the following categories are generally safe when used correctly:
- pH-balanced leather cleaners Designed specifically for leather fibers and finishes. These are the safest option for most leather backpacks.
- Very mild soap (highly diluted) Acceptable in emergencies. Use only a drop mixed with water. Never apply soap directly to leather.
- Saddle soap (with caution) Suitable only for durable smooth leather. It cleans effectively but removes oils—conditioning afterward is mandatory.
For premium or full-grain leather backpacks, professional leather cleaners are strongly recommended.
How much water should you use with these tools and cleaners?
Water is a carrier, not the cleaner itself.
Correct rule:
- Cloth should be damp, not wet
- No dripping water
- No soaking or rinsing
Leather should never feel wet to the touch. Excess moisture penetrates fibers unevenly, leading to dark spots, stiffness, and long-term structural damage.
Do baby wipes, alcohol wipes, or disinfectant wipes damage leather?
Yes—almost always.
These products contain:
- Alcohol
- Solvents
- Preservatives
- Fragrances
All of these strip natural oils from leather and break down surface finishes. Damage may not be immediate, but over time it results in:
- Dryness
- Cracking
- Fading or peeling
Baby wipes are one of the most common causes of irreversible leather damage seen by professional leather repair services.
Are household cleaners safe for leather backpacks?
No. Common household products are among the most dangerous choices.
Avoid completely:
- Vinegar
- Baking soda
- Bleach
- Glass cleaner
- Dish soap
- Laundry detergent
These products alter pH levels, dissolve protective coatings, and weaken collagen fibers inside the leather.
If a product is safe for kitchen or bathroom use, it is not safe for leather.
What about “natural” or DIY leather cleaning hacks?
“Natural” does not mean “safe.”
Many online hacks recommend:
- Lemon juice
- Vinegar mixtures
- Essential oils
These may clean temporarily but often cause:
- Acid damage
- Uneven discoloration
- Sticky residue buildup
Professional leather manufacturers avoid these substances entirely. Long-term leather care prioritizes stability over quick results.
Which tools should you never use on a leather backpack?
Never use:
- Hard brushes
- Magic erasers
- Steel wool
- Rough sponges
- Paper towels
These damage the surface grain and cannot be reversed.
Why professional factories emphasize gentle cleaning materials
At Szoneier Leather, leather backpacks are designed with:
- Specific finishes
- Controlled oil content
- Tested surface resistance
Using the wrong cleaner breaks the balance engineered during production. Gentle tools preserve that balance, allowing the leather to age naturally rather than deteriorate.
Quick “Use vs Avoid” Table
| Category | Safe to Use | Avoid |
|---|---|---|
| Cloths | Microfiber, soft cotton | Paper towels |
| Cleaners | Leather cleaner, mild soap | Alcohol, vinegar |
| Moisture | Lightly damp cloth | Soaking, rinsing |
| Brushes | Soft bristle | Hard or abrasive |
| Wipes | None recommended | Baby wipes, disinfectant |
Why choosing the right cleaning materials matters
Using proper tools doesn’t just clean the backpack—it protects its value. Leather backpacks are long-term products. The correct cleaning materials extend lifespan, maintain appearance, and preserve structural integrity.
Once leather fibers are damaged, no conditioner can fully repair them.
How Do You Clean a Leather Backpack Step by Step
To clean a leather backpack step by step, first identify the leather type (smooth vs suede/nubuck), then dry-brush off dust, spot-test a leather-safe cleaner, and wipe gently in small sections with a barely damp cloth. Never soak leather or use heat to dry it. Air-dry naturally, reshape the bag, and finish with a light leather conditioner to restore oils and prevent stiffness.
Step 1: What type of leather are you cleaning
Before you touch water or cleaner, confirm the surface type:
- Smooth leather (full-grain/top-grain/finished leather): safe for gentle damp wiping
- Suede/Nubuck: do not use water-based wiping; use dry methods only
Quick at-home test: If the surface feels fuzzy/velvety, it’s likely suede/nubuck → skip to the “Suede/Nubuck note” in Step 4.
Why this matters: cleaning the wrong way is the #1 reason people “ruin” leather backpacks.
Step 2: What should you do before cleaning
- Empty the bag completely (all pockets, inner compartments)
- Shake out crumbs/dust
- Unzip everything for airflow
- Stuff the bag lightly with clean paper or a towel to hold shape
- Move to a clean, shaded area (no direct sunlight)
Do not: clean over a sink with running water—drips cause water rings fast.
Step 3: How do you remove dust and grit without scratching leather?
This step matters more than people think because grit = micro-sandpaper.
- Use a dry microfiber cloth to wipe the whole bag
- Use a soft brush on seams, stitching lines, and zipper edges
- Focus on high-contact zones: bottom corners, back panel, handle, strap edges
Do not: start with a wet cloth if the bag is dusty. Wet + grit = scratches.
Step 4: How do you spot test?
Spot testing makes cleaning “low risk.”
- Pick a hidden area (bottom edge, strap underside, interior flap leather)
- Put cleaner on the cloth (never directly on leather)
- Wipe 1–2 light passes
- Wait 10–15 minutes
- Check for: color lift, patchy darkening, sticky feel
If you see color transferring to the cloth: stop—your leather finish may be delicate (common in aniline or very soft leather).
Suede/Nubuck note: spot test with suede cleaner or dry brush only.
Step 5: How do you clean the leather surface
For smooth leather backpacks (most common)
Use the “damp cloth + small sections” method:
- Slightly dampen a microfiber cloth (no dripping)
- Apply leather cleaner (pea-size amount) to the cloth
- Wipe one hand-sized area at a time
- Immediately buff that area with a dry cloth
- Repeat around the bag
Pressure: light. Speed: slow and controlled.
Do not: scrub hard, “erase” stains aggressively, or go back and forth rapidly. That’s how finishes get dull and uneven.
For suede/nubuck backpacks
- Dry brush only (suede brush)
- Use suede eraser for marks
- Use suede/nubuck cleaner foam if needed
- Let dry, then brush again to restore nap
Do not**:** use water wipes—water can permanently darken or harden suede/nubuck.
Step 6: Will water ruin a leather backpack? What’s a safe water limit?
Water doesn’t automatically ruin leather. Over-wetting and uneven drying do.
Safe:
- Cloth is damp, leather feels cool—not wet
- Even wiping, no drips
- Slow air-dry
Not safe:
- Rinsing under running water
- Soaking the bag
- Using a very wet cloth
- Leaving wet spots to dry unevenly
Rule you can remember: If you can squeeze water out of your cloth, it’s too wet.
Step 7: How do you clean seams, zippers, and hardware without damage?
These areas hold grime but are also fragile.
- Use a soft brush or cotton swab
- Minimal cleaner on the cloth/swab
- Avoid flooding stitch holes
- Wipe metal hardware dry immediately
Do not**:** leave moisture near hardware—oxidation stains can transfer to leather.
Step 8: How do you dry a leather backpack correctly ?
Drying is where many DIY cleanings fail.
Correct drying:
- Air-dry indoors, room temperature
- Keep away from sunlight, heaters, hair dryer
- Stuff lightly to maintain shape
- Let dry several hours or overnight
Do not: speed-dry. Heat pulls oils out and makes leather stiff or crack-prone.
Step 9: Do you need conditioner after cleaning? How do you apply it properly?
Yes—cleaning removes dirt and oils. Conditioner restores flexibility.
- Ensure the bag is fully dry
- Apply a small amount of leather conditioner to a cloth
- Spread thinly in circular motions
- Let absorb 15–30 minutes
- Buff gently with a clean dry cloth
Do not: over-condition. Too much can darken leather and attract dust.
Step 10: What if your bag is “really dirty” ?
If the bag has heavy grime (travel, commuting, outdoor use):
- Do two light cleaning passes instead of one aggressive scrub
- Let the bag rest/dry 30–60 minutes between passes
- Condition afterward
Deep cleaning is about repeat gentle cycles, not force.
How Do You Remove Common Stains and Marks
To remove stains from a leather backpack, identify the stain type first—water, oil, ink, dye transfer, or scuffs—and use the gentlest method that fits the leather finish. Use minimal moisture, blot instead of scrubbing, and spot-test in a hidden area. Water marks often need even re-dampening, oil stains require absorption, and ink/dye transfer usually needs a leather-specific remover. Stop if color lifts or stains spread.
3 Rules That Prevent Damage
- Identify the leather type Smooth finished leather is far easier than suede/nubuck. If fuzzy/velvety → use suede/nubuck methods only.
- Spot-test first (always) Test cleaners on a hidden area for 10–15 minutes.
- Blot > Rub Most stains become permanent because people scrub aggressively, driving pigment deeper and damaging the finish.
What are the most common stains on leather backpacks?
Most “stains” fall into these categories:
- Water spots / rain marks
- Oil & grease
- Ink / marker
- Dye transfer (from jeans, clothing, or other bags)
- Scuffs / scratches
- Salt stains (winter, sweat)
- Mold/mildew spotting (humidity storage)
The correct method depends on which one you’re dealing with.
How do you remove water spots and rain marks from leather?
Water marks are usually caused by uneven drying, not dirty water.
Best method for smooth leather (safe approach)
- Lightly dampen a clean cloth (barely moist)
- Wipe the entire panel evenly (not just the spot)
- Let it air-dry naturally (no heat, no sun)
- Condition lightly after drying
Why this works: Even moisture distribution prevents “rings” and blends the mark.
Do not: rub only the dark ring. It increases contrast.
If the leather is suede/nubuck: do not wet-wipe. Use dry brushing and specialized suede cleaner.
How do you treat oil, grease, and makeup stains without spreading them?
Oil stains are tricky because oil migrates into leather fibers.
Safe, effective method
- Blot with a dry cloth (do not rub)
- Apply an absorbent powder in a pouch or light layer:
- cornstarch, talc, or baking soda (prefer cornstarch/talc)
- Let sit 8–12 hours
- Brush off gently
- Repeat if needed, then condition lightly
Why this works: absorption pulls oil upward gradually.
Do not: use water and soap immediately—water often spreads oil.
Stop and seek help if the stain grows or the finish becomes dull/sticky.
How do you remove ink, marker, or pen stains safely?
Ink stains are high-risk because removers can lift dye from leather itself.
If the stain is fresh
- Blot immediately with dry cloth
- Use a leather-specific ink remover on a cotton swab
- Dab lightly (do not rub)
- Stop if color begins to lift onto the swab
Why: rubbing spreads pigment and removes finish.
Do not: use alcohol wipes or hand sanitizer. They often strip finish and leave a larger pale patch.
When to stop: if you see leather color transferring, stop and use professional care.
How do you remove dye transfer from jeans or clothing?
Dye transfer is common on light leather backpacks.
Safer approach
- Start with a mild leather cleaner on a cloth
- Wipe gently in small sections
- If needed, use a leather-safe “color transfer” remover (spot-test first)
- Condition lightly afterward
Do not: scrub hard—this often removes the finish and leaves a lighter “clean spot” that looks worse than the stain.
Prevention tip: add a light leather protector and avoid new dark denim contact when the bag is damp (damp leather absorbs dye faster).
How do you remove scuffs and surface marks?
Many scuffs are not stains—they’re friction marks on the finish.
Easy scuff fix
- Wipe with a dry microfiber cloth
- Apply a tiny amount of leather conditioner
- Buff gently with circular motion
- For deeper scuffs, use a matching leather cream/polish (spot-test)
Why: conditioner rehydrates and reduces surface light scattering.
Do not: use “magic eraser”—it’s abrasive and removes finish.
How do you handle scratches and cracks?
Scratches can be:
- Light surface scratches (finish-level)
- Deep scratches (fiber-level)
Light scratches
Condition + buff often improves appearance.
Deep scratches
You may need:
- leather repair balm
- color cream
- professional re-finishing
Rule: If you can feel it clearly with your fingernail, it’s likely beyond simple cleaning.
How do you remove salt stains from sweat or winter exposure?
Salt leaves white crusty edges or cloudy patches.
Safe method
- Use a cloth lightly dampened with distilled water
- Wipe gently to dissolve salt
- Dry naturally
- Condition lightly
Why distilled water: reduces mineral residue.
Do not: scrub salt crystals—they can scratch the finish.
How do you remove mold spots or mildew smell safely?
Mold is both a material risk and a health risk.
If you see light spotting on smooth leather
- Take the bag to a ventilated area
- Wipe gently with a slightly damp cloth (minimal moisture)
- Dry thoroughly with bag open
- Use charcoal deodorizer inside for 48 hours
Do not**:** soak, scrub hard, or seal the bag in plastic.
Professional recommendation**:** If mold is inside padding layers, stitching, or lining seams, professional cleaning is safer.
Stain Risk & Best Action Table
| Stain Type | Risk Level | Best First Action | What to Avoid |
|---|---|---|---|
| Dust/dirt | Low | Dry wipe/brush | Wet wipe on gritty surface |
| Water marks | Medium | Even re-dampening | Spot-only rubbing |
| Oil/grease | Medium–High | Absorb powder + time | Soap/water scrubbing |
| Dye transfer | High | Mild cleaner, then remover | Aggressive scrubbing |
| Ink/marker | Very High | Leather ink remover dab | Alcohol wipes |
| Salt stains | Medium | Distilled water wipe | Scratching crystals |
| Mold | Very High | Dry + ventilation, pro help | Sealing damp bag |
When should you stop DIY stain removal?
Stop and seek professional help when:
- Leather color transfers to your cloth
- Stain spreads during cleaning
- Surface becomes sticky, cloudy, or rough
- You suspect mold in internal layers
- Suede/nubuck gets wet and hardens
A good rule: If cleaning creates a bigger visible area than the original stain, stop**.**
how to reduce future stains
If you want your leather backpack to stay clean longer:
- Use a light leather protector (spot-test)
- Condition regularly to prevent dryness (dry leather stains faster)
- Keep the bag dry and ventilated after rain
- Avoid contact with new dark denim when leather is damp
Prevention is cheaper than restoration.
How Do You Clean the Inside, Lining, and Odors
To clean the inside of a leather backpack, focus on the lining and avoid soaking the leather shell. Vacuum crumbs, wipe the lining with a lightly damp cloth and mild soap, and let it air-dry fully with the bag open. For odors, use dry deodorizing methods like baking soda (in a pouch), activated charcoal, or coffee grounds—never spray perfume or alcohol inside. Moisture control is essential to prevent mold and musty smells.
Step 1: What should you do before cleaning the inside?
- Empty everything (including hidden pockets)
- Turn pockets inside out if possible
- Shake out loose dust
- Open all zippers to allow airflow
- Put the backpack on a clean towel so the leather bottom doesn’t rub against a hard surface
Do not: start with wet wiping if there are crumbs—wet crumbs smear and create sticky residue.
Step 2: How do you remove crumbs, sand, and dust from the lining?
This is the easiest “big improvement” step.
- Use a small handheld vacuum (low suction) or soft brush
- Focus on corners, seams, and pocket bottoms
- If you don’t have a vacuum: use a dry toothbrush or lint roller inside the lining
Why this matters: most interior odor comes from trapped organic debris, not leather itself.
Step 3: How do you clean fabric lining safely?
Most leather backpacks use polyester/cotton fabric lining. Clean it like delicate fabric—but with minimal moisture.
Safe method (recommended)
- Mix a few drops of mild soap in lukewarm water
- Dip a cloth, then wring it nearly dry
- Wipe the lining gently in small areas
- Use a second cloth with plain water (also nearly dry) to remove soap residue
- Blot with a dry towel
Do not: pour water into the bag or soak the lining. The leather shell, seam layers, and padding can trap moisture.
Step 4: How do you clean a leather or microfiber lining?
Some premium backpacks use leather lining or microfiber suede-like lining.
- For leather lining: treat it like smooth leather—damp cloth + leather-safe cleaner + light wipe
- For microfiber lining: use a nearly dry cloth; avoid heavy soap to prevent water marks
If you’re unsure what lining you have, treat it as delicate fabric and keep water minimal.
Step 5: How do you dry the inside properly ?
Drying is the most important part for odor prevention.
Best drying method
- Keep the bag open with zippers open
- Stand it upright so air reaches the bottom
- Stuff lightly with dry paper/towel to absorb moisture
- Air-dry indoors in shade with good ventilation
Do not: use heat (hair dryer/heater) directly. Heat can dry leather too fast and cause stiffness or cracking.
Dryness check: if the lining feels cool or slightly damp in corners, it’s not dry yet.
Step 6: Why does a leather backpack smell bad?
Interior odor usually comes from:
- Moisture trapped after rain or sweat
- Food residue, milk/coffee spills
- Musty storage (closet humidity)
- Smoke smell (cigarette/campfire)
- Mold growth (high humidity)
Understanding the source helps you choose the right solution.
Step 7: How do you remove “everyday bad smell” safely?
Use dry deodorizing methods first (lowest risk):
Option A: Baking soda (safe if kept off leather)
- Put baking soda in a breathable pouch or sock
- Place inside bag for 12–24 hours
- Vacuum/brush out any loose powder afterward
Do not**:** sprinkle baking soda directly onto leather—it can dry and mark leather.
Option B: Activated charcoal
- Place charcoal deodorizer bag inside for 24–72 hours
- Best for long-term odor absorption
Option C: Coffee grounds (in a pouch)
- Absorbs odor quickly but can leave scent—use if you like it
These methods are effective because they remove odor molecules instead of “covering” them.
Step 8: What should you avoid for odors ?
Avoid:
- Perfume sprays (mix with odor, can stain lining)
- Alcohol sprays (dry leather and damage finish)
- Harsh disinfectants (chemical smell + leather damage)
- Essential oils directly on leather (sticky residue + discoloration)
“Smell-good sprays” often create a second problem instead of solving the first.
Step 9: How do you remove a musty smell after rain or humidity?
Musty smell usually means moisture was trapped.
- Air out the bag fully (all pockets open)
- Add charcoal deodorizer inside
- Place in a ventilated space for 24–48 hours
- If lining is damp, do a light lining wipe and dry again
This solves most mild musty odors.
Step 10: How do you know if it’s mold, and what should you do?
Signs of mold:
- Visible specks (white/green/black)
- Strong sour/mildew odor
- Stains that return after drying
If you see mold:
- Stop using the bag immediately (health risk)
- Do not scrub aggressively (spreads spores)
- Wipe lining lightly, then dry completely
- If mold is inside leather layers or padding → professional cleaning is recommended
Mold removal is a situation where DIY has limits.
Inside Cleaning & Odor Fix
| Problem | Best Safe Action | What to Avoid |
|---|---|---|
| Crumbs/dust | Vacuum/brush dry | Wet wiping first |
| Light odor | Charcoal or baking soda pouch | Perfume/alcohol spray |
| Food spill | Mild soap wipe + air dry | Soaking/rinsing |
| Musty smell | Ventilation + charcoal 48h | Heat drying |
| Visible mold | Minimal handling + pro help | Aggressive scrubbing |
How often should you clean the inside of a leather backpack?
Practical guidance:
- Daily use: quick shake/vacuum every 2–4 weeks
- Travel use: after every trip
- Rain/humidity exposure: immediate airing and drying
Inside cleaning prevents odor buildup and extends the backpack’s usable life.
How Do You Condition and Protect a Leather Backpack After Cleaning
After cleaning, condition a leather backpack to restore natural oils and prevent stiffness or cracking. Apply a small amount of leather conditioner with a soft cloth, spread evenly, let it absorb, and buff lightly. Conditioning keeps leather flexible and durable. To protect the backpack, use a leather-safe water and stain protector sparingly. Proper conditioning and protection extend lifespan and maintain appearance.
Why conditioning and protection are not optional
Cleaning removes dirt—but it also removes natural oils that keep leather elastic. Without conditioning, leather slowly dries from the inside, leading to:
- stiffness
- surface dullness
- fine cracks along stress points (corners, straps, flap folds)
From a manufacturer’s perspective, leather care is a cycle: use → clean → condition → protect → use again. Skipping conditioning is the most common reason a leather backpack ages badly even when “clean.”
Step 1: When should you condition a leather backpack?
You should condition after:
- any deep or soap-based cleaning
- exposure to rain or sweat
- long periods of heavy daily use
And periodically, even without cleaning:
- light use: every 3–6 months
- daily use or dry climates: every 1–2 months
If the leather feels dry, stiff, or looks matte and “thirsty,” it’s time—regardless of the calendar.
Step 2: What type of conditioner should you use?
Choose a conditioner designed specifically for leather goods, not shoes or furniture unless clearly stated.
Recommended characteristics
- pH-balanced
- Non-silicone or low-silicone
- Cream or lotion texture (not oily liquid)
Common options
- Leather cream / lotion – best for backpacks (balanced absorption)
- Leather balm – thicker, for dry or older leather
- Beeswax blends – good for durability, but darken leather more
Avoid:
- mineral oil, olive oil, coconut oil
- heavy waxes meant for boots These clog pores, darken leather unevenly, and attract dust.
Step 3: How do you condition a leather backpack correctly (step by step)?
Correct conditioning method
- Make sure the backpack is completely dry
- Apply a pea-sized amount of conditioner to a soft cloth
- Spread thinly in circular motions, one panel at a time
- Pay attention to high-stress areas: straps, corners, folds
- Let absorb 15–30 minutes
- Buff lightly with a clean dry cloth
Key rule: less is more. Leather should feel supple—not greasy or sticky.
Step 4: Can you over-condition leather? (Yes—and it’s a problem)
Over-conditioning is just as harmful as under-conditioning.
Signs of over-conditioning:
- sticky or oily surface
- leather looks overly dark or blotchy
- dust sticks easily
Why it happens:
- too much product
- conditioning too frequently
- using oil-based products
If this happens, stop conditioning and gently wipe with a dry cloth over time to rebalance.
Step 5: How do you protect a leather backpack from water and stains?
Conditioning nourishes leather; protection adds resistance.
What to use
- Leather-safe water & stain protector spray
- Designed for smooth leather goods
- Breathable (does not fully seal leather)
How to apply
- Ensure leather is clean and conditioned
- Spray lightly from 20–30 cm distance
- Apply even mist, not saturation
- Let dry naturally
- Test water resistance after 24 hours
Protection helps against:
- rain spots
- light spills
- dye transfer from clothing
It does not make leather waterproof—only more forgiving.
Step 6: How often should you reapply protector?
General guideline:
- daily use outdoors: every 2–3 months
- occasional use: every 4–6 months
- after heavy rain exposure: reapply once dry
Over-spraying can stiffen leather and affect breathability, so keep applications light.
Step 7: Should you condition and protect suede or nubuck backpacks?
No—at least not the same way.
For suede/nubuck:
- Do not use regular leather conditioner
- Use suede/nubuck protector spray only
- Brush nap regularly with suede brush
Conditioners flatten nap and permanently alter texture.
Step 8: Where should you focus conditioning and protection most?
High-wear zones matter most:
- shoulder straps
- top handle
- bottom corners
- fold lines and flap edges
These areas dry out faster due to friction and body heat.
Common mistakes to avoid (very important)
Using household oils (olive, coconut) Conditioning wet or damp leather Applying thick layers “to be safe” Skipping buffing Using shoe polish instead of conditioner Sealing leather completely with heavy wax or silicone
Most long-term damage is caused by good intentions with the wrong product.
What Mistakes Should You Avoid When Cleaning Leather
Avoid soaking leather, scrubbing aggressively, using alcohol wipes, household detergents, vinegar, or bleach, and drying leather with heat or direct sunlight. These mistakes strip natural oils, damage leather fibers, fade color, and cause stiffness or cracking. Always use minimal moisture, gentle leather-safe cleaners, spot-test first, and air-dry naturally. Finish with a light conditioner to restore flexibility after cleaning.
Leather is durable, but it’s also a natural fiber structure with oils and finishes. Most cleaning “damage” is not random—it follows predictable patterns. Below are the most common mistakes people make when cleaning leather backpacks, leather bags, and leather accessories.
1 What happens if you use too much water on leather?
The mistake:
- rinsing leather under running water
- soaking the bag in a sink
- using a very wet cloth that drips
- spot-wetting only one small area repeatedly
Why it’s harmful: Leather absorbs water unevenly. Fibers swell, oils migrate, and when it dries, the leather can shrink or stiffen—leading to water rings, hard patches, or warped panels.
Do instead: Use a barely damp cloth, wipe evenly, and never let water pool at seams. If water marks appear, even out moisture across the panel and air-dry.
2 Why is scrubbing or “rubbing hard” a big leather cleaning mistake?
The mistake: Scrubbing stains like you would on fabric.
Why it’s harmful: Leather finishes are thin. Hard rubbing removes topcoat, changes texture, and creates shiny “burnished” patches or lighter spots. It also pushes stains deeper into leather fibers.
Do instead: Blot, wipe gently, and repeat light passes. For stubborn stains, use a leather-specific product rather than force.
3 Are baby wipes, alcohol wipes, and disinfectant wipes bad for leather?
The mistake: Using wipes because they feel quick, “clean,” and convenient.
Why it’s harmful: Most wipes contain alcohol, solvents, preservatives, and fragrance—these strip oils, break down finishes, and can cause dryness or discoloration. Damage often appears later as cracking or dullness.
Do instead: Use a leather-safe cleaner and microfiber cloth. If you must do an emergency wipe, use a lightly damp cloth with plain water and dry immediately.
4 Which household cleaners should never touch leather?
The mistake: Using kitchen or bathroom cleaners, dish soap, laundry detergent, vinegar, baking soda, bleach, or glass cleaner.
Why it’s harmful: These products have extreme pH or strong surfactants that destroy the leather’s oil balance and finish. They may “remove” the stain but leave permanent fading, stiffness, or peeling.
Do instead: Use pH-balanced leather cleaner or diluted mild soap (tiny amount) only when necessary, then condition afterward.
5 Why is heat drying (hair dryer / heater / sunlight) so damaging?
The mistake: Trying to dry leather quickly after cleaning or rain exposure.
Why it’s harmful: Heat evaporates moisture too fast and pulls oils out of the leather. This causes stiffness, cracking, shrinkage, and edge curling, especially at corners and straps.
Do instead: Air-dry at room temperature in shade. Reshape the bag with paper/towel stuffing so it dries evenly.
6 What mistakes happen when people skip the spot test?
The mistake: Applying cleaner to the whole bag immediately.
Why it’s harmful: Different leathers (aniline, semi-aniline, coated, suede) react differently. Without spot testing, you risk color lifting, dark patches, or sticky surfaces.
Do instead: Test in a hidden area (strap underside/bottom edge). Wait 10–15 minutes before continuing.
7 Is over-cleaning leather a problem?
The mistake: Cleaning too often, using too much cleaner, or repeating passes until the bag looks “perfect.”
Why it’s harmful: Over-cleaning strips oils and weakens the finish over time. The bag may look clean temporarily but becomes dull, dry, and more stain-prone.
Do instead: Do light maintenance cleaning, and deep clean only when needed. Condition afterward to restore oils.
8 Can you use “natural oils” like olive oil or coconut oil on leather?
The mistake: Using kitchen oils because they seem natural and moisturizing.
Why it’s harmful: These oils oxidize and go rancid over time, causing sticky residue, dark blotches, and dust attraction. They can also weaken stitching areas.
Do instead: Use a leather conditioner designed for leather goods. Apply thinly and buff.
9 What mistakes are specific to suede and nubuck?
The mistake: Treating suede/nubuck like smooth leather (wet wiping, conditioning, waxing).
Why it’s harmful: Water and conditioners flatten the nap and create permanent dark marks or hard spots.
Do instead: Use a suede brush, suede eraser, and suede/nubuck cleaner/ protector only.
10 When should you stop DIY cleaning and get professional help?
The mistake: Continuing to clean when the leather is clearly reacting badly.
Stop immediately if:
- color transfers onto your cloth
- stains spread or enlarge
- leather becomes cloudy/sticky
- mold is present
- the finish begins to peel
Professional leather restoration is safer than repeated DIY damage.
Conclusion
A well-made leather backpack is designed to age—not deteriorate. Proper cleaning preserves strength, appearance, and structure. Poor cleaning shortens lifespan dramatically.
We understand how leather behaves because we work with it every day—from raw material to finished product.
Szoneier Leather is a China-based leather R&D and manufacturing factory with 18+ years of experience, serving global brands and professional buyers.
If you’re planning to develop high-quality leather backpacks—or want expert guidance on materials, finishes, and long-term product care—we’re ready to support your project.
Contact Szoneier Leather today to discuss your custom leather backpack needs and receive a tailored quotation.


