 Skip to content
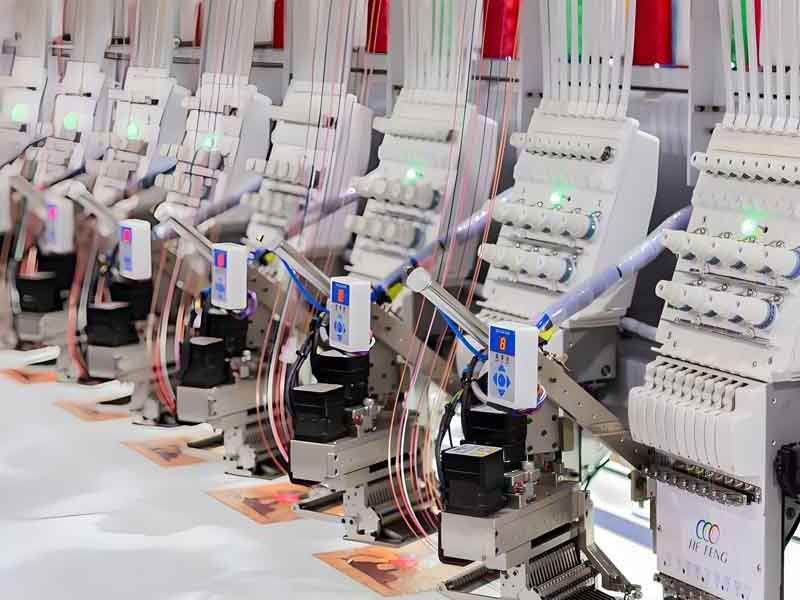
Leather turns a simple logo into a premium statement—but it’s also unforgiving. Unlike woven fabrics, leather won’t self-heal needle holes, and the wrong density can perforate a panel like a postage stamp. The good news? With the right leather type, needle point, stabilizer, and digitizing rules, you can stitch crisply without cracking the finish or weakening the hide. Whether you’re customizing belts for retail or branding luxury bags for a launch, repeatability is everything.
To embroider leather without tearing it, use a leather (cutting-point) needle in size 80/12–90/14, choose medium-firm genuine leather (1.2–2.0 mm) or quality PU, float the piece on sticky tear-away, reduce stitch density (≈0.35–0.45 mm), add minimal underlay, and run at 450–650 spm with lower presser-foot pressure. Test on off-cut swatches and pivot to patches or appliqué for very thick hides or dense logos.
A few years ago, a client came to us with a cracked, over-stitched belt batch from another shop. We re-digitized the art, halved the needle penetrations, floated the strap in a clamp frame, and slowed the machine. The result? Clean edges, zero cracking, and a relieved buyer who reordered seasonally. In the sections below, we’ll show you exactly how to get that outcome—on day one.
Advantages of Leather Embroidery
Every leather product can benefit from the sophistication and elegance that leather embroidery can bring. Here are some additional benefits:
Brand & Aesthetics
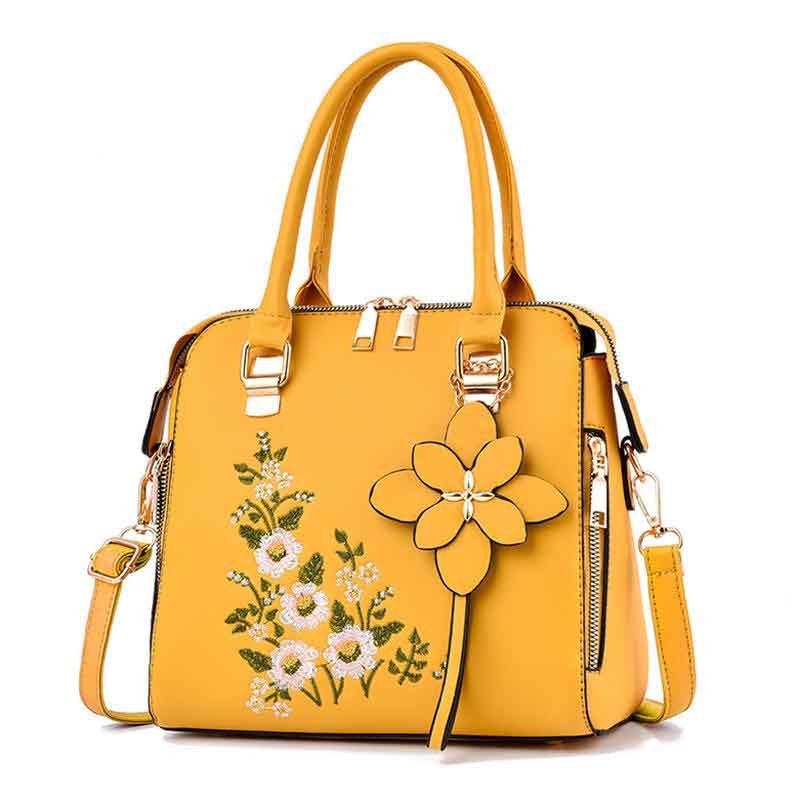
Direct embroidery gives leather a refined, dimensional look that reads premium at a glance. Raised satin stitches catch light differently from the grain, creating crisp edges and depth that printing can’t easily replicate on pebbled or coated finishes. Colors remain vibrant and consistent across production runs, and the tactile feel reinforces quality on bags, wallets, straps, and belts—exactly where customers judge craftsmanship up close.
Durability & Performance
Embroidery integrates into the leather surface without films that can peel or crack, making it ideal for high-touch areas like handles and pocket panels. Polyester embroidery thread delivers strong abrasion and UV resistance, so colors hold up during daily use and incidental cleaning. With proper digitizing and density control, stitch lines flex with the leather, preserving both the logo and the hide’s structural integrity over time.
Production & Cost Advantages
Because embroidery relies on digitized files rather than steel dies or foil plates, tooling costs are low and revisions are fast, which is perfect for seasonal updates or capsule drops. It also adapts well to different placements and part sizes—embroider panels pre-assembly for speed or use clamp/magnetic frames to decorate finished goods. That flexibility reduces setup complexity and helps keep MOQs practical for small to mid-sized runs.
Design Flexibility
Thread palettes enable rich, repeatable color without ink matching, and layered stitch techniques can suggest gradients and highlights on smooth or textured grain. With smart digitizing, fine details like 3–5 mm letters and 1.0+ mm strokes remain legible, while appliqué or mixed methods can add dimension without over-stitching. The result is a premium mark that can be tuned for minimalism, bold branding, or luxury depth.
Operational Benefits
Once a design is approved, documented settings—needle, density, underlay, speed—make reorders highly consistent, even across new leather lots. Damaged or worn areas can often be restitched more cleanly than reprinting or re-foiling, improving serviceability in the field. And because hoop burn is avoidable with floating or clamp frames, cosmetic rejects are fewer, saving both time and material.
Sustainability
Embroidery typically uses fewer chemicals than solvent-based prints or heavy coatings, and its long wear life reduces replacements and returns. By avoiding extra films and minimizing heat exposure, you preserve the underlying leather, extending product lifespan. In short, better durability translates to less waste over a product’s life cycle.
What Leather Types and Thicknesses Work Best for Embroidery?
Choose smooth, medium-firm leathers between 1.2–2.0 mm and avoid overly soft, stretchy, or brittle hides. Corrected-grain, chrome-tanned leathers often stitch cleaner than ultra-soft veg-tan for dense logos. Quality PU leather also works well. Steer clear of very thin skins for dense fills, and test suede/nubuck with topping film to prevent nap compression. Always sample on the same batch of leather you’ll use in production.
Leather isn’t a “fabric”—it’s a non-woven sheet with unique fiber structure, finishes, and tensile behavior. Those facts impact stitch formation, penetration strength, and long-term durability. Here’s how to choose wisely:
1) Grain & finish.
- Smooth corrected grain (chrome-tan): Cleanest lettering and small logos thanks to a sealed surface.
- Full-grain with heavy pebble: Beautiful but can cause uneven stitch height; add a water-soluble topping film and slightly wider satin columns to ride over the texture.
- Pull-up/oil finishes: Can show haloing around holes; reduce density and limit small detail.
- Patent & high-gloss PU: Prone to surface scuff—use protective film under the foot and ensure adhesive/stabilizer won’t imprint.
2) Thickness & firmness.
- 1.2–2.0 mm (≈3–5 oz): The sweet spot for crisp stitch formation without excessive perforation.
- <1.0 mm: Fine for small satin marks, but dense fills risk tearing.
- >2.2 mm: Often better with patches/appliqué or specialized needles and clamp frames.
3) Genuine vs faux.
- Genuine leather: Best hand and longevity; choose even temper.
- PU leather: Consistent thickness and budget-friendly; stitches well if the backing fabric is stable.
- PVC: Heat-sensitive and can chip; keep speeds low, avoid friction heat, and test adhesion.
4) Suede & nubuck. Use a topping film to prevent the nap from crushing. Opt for satin and running stitches with slightly lower density. Avoid large dense fills and tiny text.
5) Pre-production sampling. Never skip swatch tests on the actual leather lot (tanning and finish variations can be dramatic). Document settings and keep swatches labeled for QC.
Leather Selection Quick Guide
| Leather Type | Typical Thickness | Temper | Risk Level | Notes |
|---|---|---|---|---|
| Corrected-grain chrome-tan | 1.2–1.6 mm | Medium | Low | Clean edges; great for logos/monograms |
| Full-grain (pebbled) | 1.4–2.0 mm | Medium-firm | Medium | Use topping film; slightly wider satins |
| Veg-tan (undyed) | 1.6–2.2 mm | Firm | Medium-High | Avoid dense fills; can darken at holes |
| Suede/Nubuck | 1.2–1.8 mm | Soft | Medium-High | Topping film required; limit detail |
| PU (quality) | 1.0–1.4 mm | Medium | Low-Medium | Stable; watch heat and adhesive residue |
| PVC (coated) | 1.0–1.4 mm | Varies | Medium-High | Slow speed, protect surface, test first |
Which Tools, Needles, Threads, and Stabilizers Do You Need?
Use leather (cutting-point) needles in sizes 80/12–90/14 for most work, polyester embroidery thread (40 wt), and a sticky tear-away or firm tear-away stabilizer. Float the leather with clamp frames or hoopless setups to avoid hoop burn. Add a water-soluble topping film on textured or suede leathers. Keep isopropyl alcohol wipes handy for needle gum and surface cleanup.
What Needle do You Use to Embroider Leather?
Choose leather needles with cutting points (e.g., R, LR, LL, S tips). Start with 80/12 for thin to medium hides; move to 90/14 for firmer or thicker panels. For heavy belts or multi-layer seams, 100/16 may be safer. Cutting points slice rather than punch, lowering stress and reducing heat buildup.
1) Needles: size and point geometry.
- R (round/triangle leather): General-purpose; balanced hole shape.
- LR (left twist): Creates a slight slanted stitch, enhancing satin sheen. Good for decorative seams.
- LL (left wedge): Clean entry, terrific for small lettering.
- S (narrow wedge): Smaller hole; helpful for thin leather or tight detail.
Recommended Needle & Thread Matrix
| Application | Leather Thickness | Needle | Thread | Notes |
|---|---|---|---|---|
| Small logos/monograms | 1.0–1.4 mm | 80/12 LL or S | 40 wt Poly | Lower density; minimal underlay |
| Standard logos | 1.2–1.8 mm | 90/14 LR or LL | 40 wt Poly | Most common production setup |
| Bold satin lettering | 1.4–2.0 mm | 90/14 LR | 40 wt Poly | Beautiful diagonal stitch look |
| Heavy straps/belts | 2.0–3.0 mm | 100/16 R or LR | 30–40 wt Poly | Consider clamp frame and slower speed |
2) Threads: strength, sheen, and abrasion.
- Polyester embroidery thread (40 wt, ≈Tex 27): Best all-rounder—UV and abrasion resistant.
- Rayon (40 wt): Lovely sheen but slightly weaker; use only on gentle leathers and light wear zones.
- Nylon: Strong but can yellow with UV and soften with heat; use selectively.
- Metallic: Use cautiously; larger needle (90/14), lower speed, and short stitch length to prevent shredding.
3) Stabilizer & topping choices.
- Sticky tear-away (hoop stabilizer, float leather on top): Our default for panels and bags—no hoop marks.
- Firm tear-away (non-adhesive): Works with temporary spray adhesive on leather’s back side (light, even coat).
- Cut-away: Rarely needed unless the leather backing fabric is unstable; can leave a bulky edge.
- Water-soluble topping film: On pebbled grain, suede, or nubuck to prevent stitches sinking.
4) Hooping alternatives and accessories.
- Clamp frames / magnetic hoops: Even pressure without hoop burn; great for belts, straps, and bag panels.
- Teflon presser feet or foot covers: Reduce friction on sticky finishes.
- Adhesives: Use embroidery-grade temporary adhesives sparingly; avoid overspray that can stain.
5) Maintenance and cleanliness. Leather dust and adhesive can gum up needles. Wipe the needle with isopropyl alcohol during long runs. Replace needles proactively (every 6–8 production hours).
How Should You Digitize Embroidery Designs for Leather?

Reduce density and penetrations. Favor satin and running stitches, use light underlay (edge-walk or narrow zigzag), widen satin columns slightly, and avoid micro-detail below 3 mm letter height. Add pull compensation, round sharp corners, and break long runs to minimize tearing. Always test and record the final density in mm, not “stitches per inch,” for consistency.
Digitizing is where most leather failures start. Leather can’t recover from over-penetration, so the design must aim for fewer, smarter stitches:
Stitch type & density.
- Satin stitches: Primary choice for logos and letters; set column width ≥1.0–1.2 mm for stability.
- Fill (tatami): Use sparingly; choose open fills with 0.45–0.55 mm step and no more than 0.35–0.45 mm overall density for medium hides.
- Running stitches: Great for outlines and details; avoid very short stitch lengths (<1.2 mm) that chew the surface.
Typical Density Ranges (Guideline)
| Element | Thin Leather (≈1.0 mm) | Medium Leather (≈1.4–1.8 mm) | Thick Leather (≥2.0 mm) |
|---|---|---|---|
| Satin columns | 0.35–0.40 mm | 0.40–0.45 mm | 0.45–0.50 mm |
| Fill areas | 0.45–0.55 mm | 0.50–0.60 mm | Prefer appliqué/patch |
| Running stitches | 1.2–1.6 mm length | 1.4–1.8 mm | 1.6–2.0 mm |
Underlay strategy. Underlay prevents sinking and stabilizes columns—but too much underlay doubles penetrations. Use edge-walk underlay for satin (narrow line inside the shape) and a light zigzag only when necessary. Avoid double zigzag and heavy fills under fill areas.
Pull compensation and shape edits. Leather resists stretch differently from cloth. Add pull compensation 0.1–0.3 mm on satins so edges meet cleanly. Round sharp internal corners to reduce stress points that can tear.
Minimum sizes & line weights.
- Minimum letter height: 3.0 mm for clean readability; 4–5 mm looks premium.
- Minimum line width: 1.0 mm for satin; thinner lines risk cuts.
- Avoid micro-serifs and thin negative spaces; simplify paths.
Color layers and sequencing. Stitch large, least detailed areas first. Sequence to minimize travel and repeated penetrations in one zone. For multicolor satins, test for color stacking that can embrittle the leather.
How Do You Hoop or Float Leather and Set Machine Parameters?
Float leather on sticky tear-away or clamp it in a magnetic frame to avoid hoop burn. Mark gently with removable tape, use lower presser-foot pressure, slightly looser top tension, and run at 450–650 spm. Add a water-soluble topping for textured grain. For thick leather or belts, use a 100/16 leather needle, slow to 350–500 spm, and test extensively.
How to embroider thick leather?
Use a 100/16 leather needle, 30–40 wt polyester thread, clamp or magnetic frames, and 350–500 spm speed. Reduce density (toward 0.45–0.50 mm on satins), minimize underlay, and prefer bold satin elements over fills. If the design is dense or the leather exceeds 2.2 mm, pivot to appliqué or an embroidered patch to protect structural integrity.
Can you embroider a leather belt?
Yes,if you control placement and penetration. Belts are typically 2.5–3.5 mm thick and edge-stitched. Float in a clamp/magnetic belt frame, use 100/16 needle, slow to 350–450 spm, and avoid dense fills near holes or edges. Consider pre-punching registration marks (outside the final area) on scrap to verify alignment. For long motifs, break the art into segments to avoid tool marks.
1) Marking and alignment without damage.
- Use low-tack painter’s tape or chalk pencils; avoid pens that can bleed.
- For repeatable placement (e.g., wallet panels), create laser or printed templates and a jig that sets X-Y origin quickly.
2) Floating vs hooping.
- Floating on sticky tear-away: Hoop the stabilizer only, expose adhesive, place leather on top, and perimeter-baste with a long running stitch (3–4 mm) to lock position.
- Clamp/magnetic frames: Best for belts/straps and finished goods. Protect with felt strips on the jaws to prevent bite marks.
3) Machine settings that matter.
- Speed: 450–650 spm for most work; 350–500 spm for thick leather or metallic thread.
- Presser-foot pressure: Reduce until leather feeds smoothly without hopping; too high causes shine or drag.
- Tension: Slightly looser top tension helps prevent cutting; verify balanced knots centered in the leather.
- Foot/needle lubrication: Optional silicone-free dry lube or Teflon foot cover for sticky finishes.
4) Adhesives & toppings.
- Use embroidery-grade temporary adhesive; apply off-piece (spray onto stabilizer), then press leather down to avoid overspray on the good face.
- Topping film on pebbled or suede helps satins sit proud; remove carefully and tamp with a press cloth.
5) Production test protocol.
- Stitch 3–5 replicas on scrap from the same lot.
- Inspect holes with a loupe: holes should be round/clean without tearing between penetrations.
- Bend the piece 180° several times; edges shouldn’t crack or lift.
- Record: needle, thread, density, speed, presser setting, stabilizer type, and leather lot.
Baseline Settings by Leather Thickness
| Leather | Thickness | Needle | Speed (spm) | Density (satin) | Underlay | Notes |
|---|---|---|---|---|---|---|
| Thin panel | 0.9–1.1 mm | 80/12 | 550–700 | 0.35–0.40 mm | Edge-walk | Protect finish; light tension |
| Medium panel | 1.2–1.8 mm | 90/14 | 450–650 | 0.40–0.45 mm | Edge-walk | Default production setup |
| Thick hide | 2.0–2.4 mm | 100/16 | 350–500 | 0.45–0.50 mm | Minimal zigzag | Consider appliqué for big fills |
| Belt/strap | 2.5–3.5 mm | 100/16 | 350–450 | 0.45–0.50 mm | Edge-walk only | Clamp frame; avoid dense fills |
Is Direct Embroidery Better Than Patches, Appliqué, or Mixed Techniques?
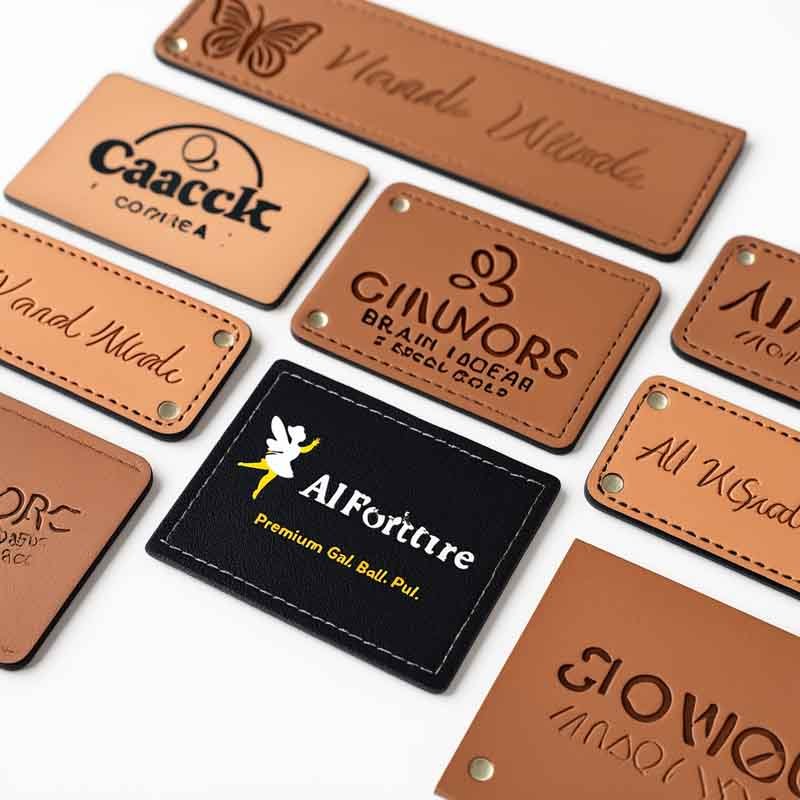
Direct embroidery looks premium but increases penetrations. For very thick hides, complex logos, or areas near stress points, embroidered patches (sew-on or heat-seal) or appliqué reduce stitch counts and risk. Mixed techniques like deboss + satin outline give high-end depth with fewer holes. Choose method by logo density, leather thickness, and serviceability needs.
1) When direct embroidery wins.
- Small-to-medium logos on 1.2–1.8 mm smooth leather.
- Minimal solid fills and clean satin lettering.
- Panels that won’t be repeatedly bent (e.g., bag front pockets rather than boot vamps).
2) When to pivot to patches or appliqué.
- Thick or rigid leather (≥2.2 mm), belts, and straps exposed to bending and stress.
- Dense artwork exceeding safe density or with large fill areas that would perforate the hide.
- High-volume runs needing fast, consistent results—pre-embroider patches, then apply.
3) Mixed-tech premium looks. Combine deboss/foil stamp with a satin outline or minimalist running stitch shadow. You get tactile depth and brand presence with a fraction of the penetrations.
4) Cost, lead time, repairability (practical lens).
| Method | Look & Brand Perception | Risk to Leather | Lead Time | Serviceability |
|---|---|---|---|---|
| Direct embroidery | Highest “crafted” feel | Medium–High (density dependent) | Standard | Hard to repair |
| Embroidered patch (sew-on) | Premium, layered | Low | Fast (batch sew) | Easy to replace |
| Embroidered patch (heat-seal) | Clean, fast | Low–Medium (heat) | Fast | Replaceable (reheat/remove carefully) |
| Appliqué (fabric/leather) | Luxury, dimensional | Low–Medium | Standard | Repair via restitch |
| Deboss/foil + stitch | Luxury retail | Low | Requires dies | Durable & serviceable. |
How Do You Troubleshoot Quality and Prove Durability for Bulk Orders?
Watch for thread shredding, needle cuts, tunneling, and finish cracking. Solve by changing to a leather needle, lowering density, adjusting tension, and slowing speed. Prove durability with rub tests, flex/bend cycles, and stitch security checks. Document a spec sheet so every reorder matches the approved sample.
1) Common failure modes & fixes.
| Symptom | Likely Cause | Fix |
|---|---|---|
| Thread shredding | Wrong needle point; metallic thread at high speed; burr on needle | Switch to leather LL/LR; slow to 400–500 spm; replace needle |
| Cuts/perforation line | Density too high; stitch length too short | Reduce density; increase stitch length; widen satins |
| Tunneling (raised ridge) | Tension too high; no topping on textured grain | Loosen top tension; add topping film |
| Edge fray/poor coverage | No pull compensation; underlay missing | Add 0.1–0.3 mm pull comp; edge-walk underlay |
| Finish cracking | Friction heat; too high presser pressure | Lower speed; reduce foot pressure; Teflon foot |
| Registration drift | Inadequate stabilization; adhesive slip | Perimeter-baste; better sticky stabilizer; clamp frame |
| Needle gumming | Adhesive overspray; PU finish transfer | Spray stabilizer off-piece; clean needle periodically |
2) QC checks at incoming, in-process, and outgoing.
- Incoming leather: Verify thickness (calipers), temper, finish uniformity, and color lot.
- In-process: Check first-article stitches with a loupe, confirm balance, and bend test.
- Outgoing: Inspect for hoop marks, adhesive residue, topping removal, and consistent logo position.
3) Durability tests that matter.
| Test | Purpose | Baseline Guidance |
|---|---|---|
| Dry/Wet Rub (Crock) | Check color transfer and surface finish | 50 dry + 20 wet rubs; no visible dye transfer |
| Flex/Bend Cycles | Evaluate cracking around stitch line | 500–1000 bends at 180°; no cracking or stitch cut |
| Thread Pull | Verify lock and security | 10 N pull on loose thread tails; no unraveling |
| Abrasion Touch | Check top thread wear | 200 cycles with soft pad; minimal fuzzing |
| Heat Exposure | Ensure finish stability | 60 °C for 30 min; no warping (PU/PVC caution) |
4) Care labeling and aftercare. Leather goods with embroidery should avoid soaking and high heat. Recommend wiping with a damp cloth and conditioning the leather occasionally. For PU, avoid solvents.
5) Documentation for repeatable results (spec sheet). Create a one-page spec that travels with the job and gets archived for reorders:
- Artwork: Version/date, size, placement.
- Leather: Type, supplier, lot, thickness.
- Needle: Type and size (e.g., LL 90/14).
- Thread: Brand, color, weight.
- Stabilizer/Topping: Type, brand, method (float/clamp).
- Machine: Model, foot type, speed, tension notes, foot pressure.
- Digitizing: Density (mm), underlay type, pull comp.
- QC: Test results, approved sample photo, operator sign-off.
Why Choose Szoneier Leather for Your Leather Embroidery Programs?
- 18+ years in leather goods (bags, wallets, belts, straps, accessories, boxes) with in-house material R&D, product design, sampling, manufacturing, packaging design, and QC—so your embroidery choices are aligned with real production.
- End-to-end sampling: We digitize, test on your actual hide, and optimize density/needle selection before you commit to volume.
- Multiple branding methods under one roof: Direct embroidery, patches, appliqué, deboss, foil, and mixed techniques—choose by look, budget, and durability.
- Production-grade QC: Documented settings, belt/strap jigs, and durability testing ensure repeatable quality for each reorder.
Ready to See Your Logo on Leather—Clean and Durable?
Share your logo (vector preferred), target product (bag panel, wallet, strap, belt), approximate leather type/thickness, and quantity. We’ll propose the safest method, run a quick test stitch, and quote clear options (direct embroidery vs patch vs mixed). Tell us what you need today—Szoneier Leather will sample, optimize, and deliver on spec, on time.


