
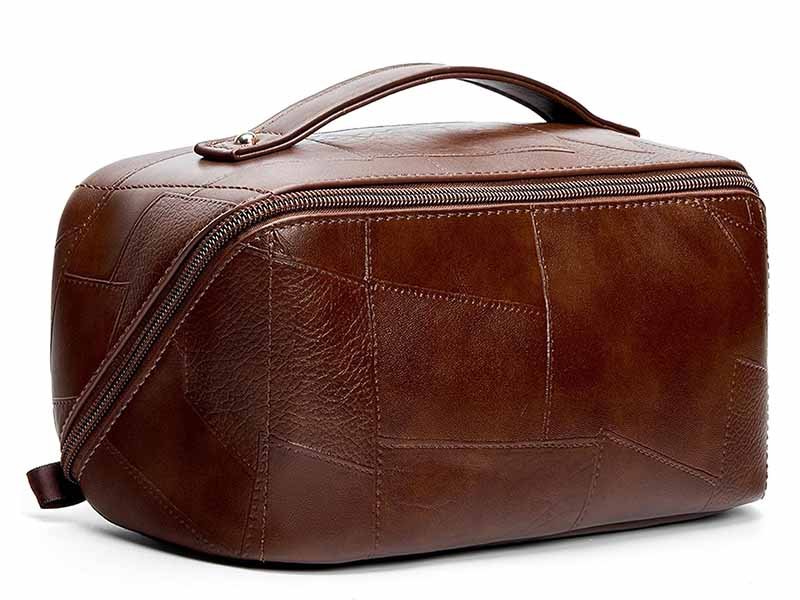
A leather cosmetic bag may carry only a few bottles, brushes, and makeup tools, yet its seams face repeated stress every day. The zipper is pulled from both directions, side panels are pushed outward by hard containers, curved gussets are folded inside luggage, and small tabs carry concentrated force. Many seam failures begin long before the thread breaks. Needle holes may gradually enlarge, leather may tear along an over-perforated line, or a zipper seam may distort until the slider starts rubbing against the edge.
Durable leather cosmetic bag stitching requires a balanced combination of leather thickness, stitch length, thread size, needle point, seam allowance, tension, edge distance, reinforcement, and operator control. More stitches do not always create a stronger seam. Excessive hole density can weaken leather, while stitches placed too far apart may allow gaps, movement, and uneven load distribution.
A failed cosmetic bag often looks perfect when it leaves the factory. Problems appear weeks later at the zipper ends, gusset corners, wrist-strap tabs, or bottom seams. The real measure of quality is not how neat one sample looks on a table. It is how well thousands of repeated stitches survive filling, travel, opening, closing, compression, and daily handling.
What Makes Leather Stitching Durable?
Durable stitching depends on the strength of the thread and the strength of the leather remaining between needle holes. Stitch length, needle diameter, thread size, seam allowance, leather structure, tension, and reinforcement must work as one system. A strong thread cannot compensate for leather weakened by excessive perforation, poor skiving, narrow edge distance, or unsuitable seam construction.
Leather does not recover from a needle hole in the same way as woven fabric. Every penetration permanently separates or cuts part of the fiber structure. A sewing specification therefore needs to protect both sides of the seam equation:
- The thread must resist pulling, flexing, abrasion, and repeated opening.
- The leather between adjacent holes must remain wide enough to carry load.
- The seam allowance must prevent the stitch line from tearing through the edge.
- The reinforcement must spread concentrated force into a wider panel area.
- The tension must hold layers together without cutting into the leather.
- The finished seam must remain stable after bending, filling, and compression.
A cosmetic bag usually contains several seam environments. A straight side seam experiences distributed outward pressure. A zipper-end tab receives short, concentrated pulls. A curved gusset is repeatedly folded and compressed. A wrist-strap attachment may carry the full weight of the packed bag through an area smaller than 30 mm wide.
Using one needle, one stitch length, and one reinforcement method for every area may simplify factory settings, but it can create weak points. Durable construction often requires separate specifications for structural seams, visible topstitching, tight curves, zipper attachment, and hardware tabs.
Leather selection also changes the result. A soft 1.0 mm lambskin and a firm 1.0 mm cowhide share the same measured thickness but behave differently under a needle. Soft leather may stretch and enlarge around the stitch holes. Firm leather may resist stretching but show tearing when the needle point cuts too aggressively.
The table below provides sample-development starting ranges. Final values should be confirmed on the actual leather, lining, reinforcement, thread, and machine planned for production.
| Leather Application | Leather Thickness | Starting Stitch Length | Approx. Stitches per Inch | Starting Seam Allowance | Main Production Concern |
|---|---|---|---|---|---|
| Soft pouch leather | 0.6–0.9 mm | 3.0–3.5 mm | 7–8.5 | 6–8 mm | Stretching and visible needle holes |
| Medium cosmetic bag leather | 0.9–1.3 mm | 3.5–4.0 mm | 6–7 | 7–10 mm | Balance between appearance and strength |
| Firm structured leather | 1.3–1.8 mm | 4.0–4.5 mm | 5.5–6.5 | 8–12 mm | Corner bulk and penetration resistance |
| Decorative topstitching | 0.9–1.8 mm | 3.5–5.0 mm | 5–7 | Based on edge structure | Visual straightness and edge consistency |
| Folded zipper edge | Multilayer | 3.2–4.0 mm | 6–8 | 7–10 mm | Skipped stitches and uneven feeding |
| Tight gusset curve | Multilayer | 3.0–3.8 mm | 6.5–8.5 | 6–9 mm | Puckering and stitch shortening |
Numbers should be treated as engineering references rather than fixed universal standards. A 3.5 mm stitch may perform well on one full-grain cowhide and poorly on another leather with a loose fiber structure.
What Causes Leather Seams to Fail?
Leather cosmetic bag seams usually fail through one of six patterns:
- Thread breakage
- Leather tearing along the stitch line
- Seam allowance pulling away
- Needle holes enlarging
- Stitch formation becoming loose
- Reinforcement separating from the main panel
Thread breakage may result from low abrasion resistance, excessive upper tension, a damaged needle eye, rough zipper teeth, sharp hardware edges, or needle heat during long production runs. A thread can also weaken when the selected size is too small for the load or when repeated bending occurs at the same point.
Leather tearing along the seam often indicates excessive stitch density, an oversized needle, a cutting point that is too aggressive, or insufficient spacing between the stitch line and the cut edge. The thread may remain completely intact while the leather separates like perforated paper.
Seam allowance failure occurs when the stitch line sits too close to the edge or when skiving removes too much fiber near a load-bearing area. A clean, thin folded edge can look refined while lacking enough material to survive long use.
| Visible Failure | Likely Technical Cause | Recommended Correction |
|---|---|---|
| Leather tears between holes | Stitch length too short | Increase stitch length and review needle point |
| Thread snaps beside zipper | Abrasion or excessive tension | Inspect zipper contact and rebalance tension |
| Stitch holes become oval | Soft leather stretching | Add reinforcement tape or backing |
| Seam pulls through cut edge | Edge distance too narrow | Increase seam allowance or move stitch line inward |
| Skipped stitches on folds | Needle deflection or excessive bulk | Review needle size, skiving, feed, and presser foot |
| Loose loops under seam | Tension imbalance | Adjust upper and bobbin tension |
| Wavy zipper topstitching | Uneven feeding or stretching | Stabilize opening and use feeding guides |
| Cracking at corners | Sharp curve and dense perforation | Increase radius and reduce hole concentration |
A factory should never repair every failure by selecting a thicker thread. Stronger thread may transfer more force into already weakened leather and accelerate tearing.
How Does Leather Thickness Affect Stitching?
Leather thickness affects needle penetration, thread visibility, folding behavior, seam bulk, machine feeding, and finished appearance.
Thin leather between 0.6 and 0.9 mm can produce a light, refined cosmetic pouch, but heavy thread may dominate the surface. A large needle may leave open holes around the stitch, especially on smooth leather with a polished finish. Excessive presser-foot pressure may also stretch or mark the panel.
Medium leather between 0.9 and 1.3 mm is widely suitable for soft and semi-structured cosmetic bags. It can support visible topstitching, folded zipper edges, piping, and moderate reinforcement. Construction still needs careful control when several layers meet at the gusset or zipper ends.
Firm leather above 1.3 mm creates stronger shape retention but increases bulk rapidly. A body panel measuring 1.4 mm may become a seam stack of 4–6 mm after adding a folded edge, zipper tape, lining, reinforcement strip, and piping.
Production teams should record the finished layer stack at important areas:
| Area | Possible Layer Combination | Estimated Stack |
|---|---|---|
| Main side seam | Leather + leather + lining | 2.5–4.0 mm |
| Folded zipper edge | Folded leather + zipper tape + lining | 3.0–5.5 mm |
| Piped gusset | Panel + piping strip + cord + gusset + lining | 4.0–7.0 mm |
| Strap tab | Folded tab + body leather + reinforcement + lining | 5.0–8.0 mm |
| Zipper end | Folded leather + zipper tape + end tab + lining | 4.0–7.0 mm |
Skiving can reduce bulk, but removal depth must be controlled. A zipper fold may be skived more heavily along the folding edge while retaining greater thickness under the stitch line. Removing too much material beneath the seam can cause the thread to cut through during repeated use.
How Does Stitch Length Affect Strength?
Stitch length determines how many holes enter the leather and how much load each stitch carries.
Short stitches create a tight visual line and place more thread along the seam. The disadvantage is higher perforation density. A stitch length of 2.0–2.5 mm may look refined on fabric, yet it can create a weak tear line on many leather constructions.
Longer stitches preserve more leather between holes and can create an elegant appearance. However, excessive spacing reduces the number of thread loops carrying the load. Long stitches can also produce visible gaps around curves and soft gussets.
A practical stitch-length decision should consider:
- Leather thickness
- Fiber density
- Leather temper
- Thread diameter
- Needle diameter
- Needle-point geometry
- Distance from the edge
- Number of material layers
- Straight or curved seam
- Structural or decorative purpose
- Expected filling weight
- Required visual style
For many medium leather cosmetic bags, 3.5–4.0 mm provides a useful development range for structural seams. Tight curves may need a controlled reduction, while visible topstitching may use a longer 4.0–4.5 mm setting.
Machine settings must be checked after several complete bags, not only on flat test strips. Stitch length often shortens when the presser foot climbs onto a thick zipper end or strap tab.
Is Machine or Hand Stitching Better?
Machine stitching is generally more suitable for commercial cosmetic bag production because it provides repeatable stitch spacing, faster output, controlled tension, and consistent seam formation across larger quantities.
Industrial lockstitch machines can sew main panels, zipper tape, gussets, piping, pockets, linings, and top edges efficiently. Compound-feed or walking-foot systems help prevent upper and lower layers from moving at different speeds.
Hand saddle stitching offers a different value. Two needles pass through each prepared hole from opposite directions, creating individually formed stitches. The technique can support premium visible details, limited editions, handles, leather tabs, and decorative panels.
The commercial difference becomes significant at scale. A machine-sewn seam may require minutes, while a comparable hand-sewn section can require substantially more labor. A collection of 2,000 cosmetic bags with full saddle stitching would carry a very different cost and lead time from a machine-sewn program.
A practical construction strategy may use:
- Machine lockstitch for main assembly
- Double-row machine stitching for selected load-bearing areas
- Bar tacks or box stitching for attachments
- Hand saddle stitching for visible premium details
- Hand finishing for repair, edge detail, or limited editions
Hand stitching should not be selected only because it sounds more luxurious. Poor hole spacing, narrow edge distance, or excessive hand tension can still damage leather.
How Do Seam Design and Leather Type Work Together?
Seam construction should match leather softness, stretch, thickness, finish, and surface sensitivity.
Soft leather often needs hidden reinforcement around zipper openings, handles, and tabs. Reinforcement tape or woven backing helps prevent the holes from enlarging when the bag is filled. A soft panel without stabilization may slowly stretch until the zipper line becomes wavy.
Firm leather holds shape better but creates bulky corners and stiff gusset turns. Pattern radius, skiving width, seam allowance, and piping diameter need to be planned together. A narrow curve that works in fabric may become difficult to sew cleanly in layered leather.
Highly finished leather shows every needle mark. Removing and resewing a crooked topstitch line leaves permanent holes. Production samples should therefore confirm:
- Stitch distance from the edge
- Corner turning method
- Start and stop positions
- Thread color
- Stitch length
- Backtack position
- Acceptable surface marking
- Machine-foot contact pressure
Grain direction can also affect stretch. Panels cut from different areas of a hide may respond differently even when thickness looks equal. Critical zipper and strap areas should avoid loose belly sections when stronger fiber structure is needed.
Durability comes from designing around the leather’s real behavior rather than forcing every leather into the same pattern and stitch specification.
Which Stitching Methods Work Best?
Industrial lockstitching is the main sewing method for most leather cosmetic bags because it provides strong, efficient, and repeatable construction. Double rows, topstitching, bar tacks, box stitching, piping seams, binding, and selected saddle stitching can be added according to load and appearance. Each method should be assigned to a specific structural purpose rather than added as decoration alone.
A cosmetic bag contains several load zones. Each area experiences a different form of stress:
- Main panels resist outward pressure from bottles and tools.
- Gusset curves experience bending, compression, and friction.
- Zipper seams carry repeated opening and closing force.
- Zipper ends receive concentrated pulling.
- Wrist-strap tabs may carry the entire filled bag.
- Bottom corners contact hard surfaces.
- Internal pockets are pulled when items are inserted and removed.
- Lining seams face sharp caps, brushes, and leaking containers.
One sewing method cannot serve every zone equally well. A single lockstitch may be sufficient for a long body seam when the seam allowance and leather strength are correct. A strap tab may require a reinforcement patch, box stitch, or multiple load-distribution lines.
More stitching does not always create more strength. Two rows placed too close together can form parallel perforation lines and reduce the leather between them. A dense bar tack can secure webbing but cut through thin leather. A visible hand stitch can look premium while offering little structural value when placed outside the main load path.
| Stitching Method | Main Application | Main Benefit | Main Risk |
|---|---|---|---|
| Single lockstitch | Main panel and lining seams | Efficient, stable, repeatable | Relies on correct seam design |
| Double-row stitching | Structured seams and zipper frames | Wider load distribution | Excess perforation when rows are too close |
| Topstitching | Folded edges and zipper openings | Shape control and clean appearance | Visible inconsistency is difficult to repair |
| Bar tack | Zipper ends and narrow tabs | High reinforcement in a small area | Dense stitches may cut thin leather |
| Box stitch | Wide strap or handle tabs | Spreads load across a larger area | Needs enough attachment surface |
| Box-X stitch | Wider webbing or strap ends | Controls force in several directions | Can create bulky thread concentration |
| Saddle stitch | Premium tabs and visible details | Artisanal finish and local stitch security | High labor cost |
| Bound seam | Internal raw edges | Protects edge from abrasion | Added bulk on curves |
| Piped seam | Body and gusset connection | Shape definition and edge protection | Complex multilayer feeding |
| Backtack | Seam start and end | Helps prevent opening | Repeated holes may weaken fine leather |
A professional sewing plan should identify the load path first, then select the stitch method.
What Is a Lockstitch?
A lockstitch forms when the upper needle thread interlocks with a lower bobbin thread inside the material stack. The stitch is widely used in commercial leather goods because it creates a stable seam with a clean appearance on both sides.
For leather cosmetic bags, lockstitching can be used for:
- Body assembly
- Gusset attachment
- Zipper tape installation
- Piping
- Folded edges
- Internal pockets
- Lining construction
- Decorative topstitching
- Label attachment
Balanced tension is critical. The point where the two threads interlock should sit inside the material layers. When upper tension is too strong, the lower thread becomes visible on the top surface. When upper tension is too weak, loose loops may appear underneath.
The sewing team should inspect:
- Top and bottom thread balance
- Hole appearance
- Stitch length consistency
- Layer movement
- Surface marking
- Backtack quality
- Curved seam control
- Stitch formation over thick joints
A flat sample strip cannot reveal every problem. Complete-bag trials are needed because bulk changes around folds, zipper ends, piping joints, and strap attachments.
When Is Double Stitching Needed?
Double-row stitching can improve load distribution and shape control when both rows are positioned correctly.
Useful locations include:
- Structured zipper frames
- Reinforced side seams
- Wide bottom seams
- Handle bases
- Flat lapped panels
- Decorative exterior borders
The distance between rows should be large enough to preserve leather strength while remaining visually controlled. A gap of 3–6 mm may be explored during sampling for many medium-weight cosmetic bag constructions, although final spacing depends on leather thickness, seam width, and thread size.
Double rows should not be added to hide weak construction. An extra row will not correct:
- Leather skived too thin
- Seam allowance too narrow
- Missing reinforcement
- Poor edge preparation
- Loose fiber structure
- Incorrect needle point
- Inadequate tab area
Parallel accuracy matters, especially with contrast thread. A variation of even 1 mm can become visible along a short cosmetic bag zipper. Guides, templates, and operator training may be needed for repeat orders.
Is Saddle Stitching Suitable?
Saddle stitching is suitable for premium products, limited runs, decorative tabs, removable handles, logo patches, and selected exterior details where hand craftsmanship contributes to product value.
The method uses two needles and one continuous thread. Each needle passes through the same prepared hole from opposite sides. Local damage to one stitch is less likely to release a long seam immediately.
Saddle stitching quality depends on:
- Hole spacing
- Hole angle
- Thread diameter
- Thread wax
- Edge distance
- Pulling tension
- Leather firmness
- Backstitch finishing
A hand stitch pulled too tightly can create a sunken channel or distort soft leather. Holes punched too close together can produce the same perforation problem found in machine stitching.
For an order of several thousand cosmetic bags, full saddle stitching can increase labor, lead time, inspection work, and unit cost significantly. Many branded collections use machine construction for structural seams and reserve hand stitching for visible points where customers can appreciate the difference.
Which Seams Fit Cosmetic Bags?
Seam selection affects appearance, shape, turning difficulty, lining fit, edge protection, and long-term strength.
Turned seams are often used for soft cosmetic bags. Panels are sewn inside out and then turned through an opening. Raw edges remain hidden, but bulky leather may resist turning and create thick corners.
Piped seams add a defined outline and help protect panel edges. A piping structure may include a leather strip, internal cord, body panel, gusset, lining, and adhesive. Layer movement must be controlled around curves.
Bound seams cover exposed internal edges with fabric, synthetic binding, or skived leather. Binding improves appearance and protects seam allowances from rubbing against bottles and tools.
Folded seams create clean zipper edges and top openings. Leather is skived and folded over zipper tape or reinforcement. Stitch placement must remain far enough from the fold to retain strength while keeping the edge flat.
| Seam Type | Best Use | Main Advantage | Main Control Point |
|---|---|---|---|
| Turned seam | Soft pouch construction | Hidden raw edges | Corner bulk |
| Piped seam | Structured body and gusset | Defined shape | Layer feeding |
| Bound seam | Exposed interior edges | Clean, protected finish | Binding tension |
| Folded zipper seam | Premium zipper opening | Flat, clean appearance | Skiving and stitch position |
| Lapped seam | Flat decorative construction | Reduced turning | Overlap accuracy |
| Welt-style seam | Selected structured areas | Strong visual line | Added thickness |
Seam type should be selected during pattern development. Changing from a turned seam to piping after sampling can alter panel dimensions, gusset length, lining pattern, sewing time, and cost.
How Does Topstitching Improve Structure?
Topstitching secures folds, holds seam allowances flat, stabilizes zipper edges, controls piping, and gives the cosmetic bag a finished visual line.
Around a zipper, topstitching keeps leather and lining away from the slider. On folded edges, it reduces lifting and rolling. On structured panels, it helps retain shape after turning and packing.
Customers often judge quality through topstitching before examining any hidden seam. Visible defects include:
- Uneven edge distance
- Changing stitch length
- Crooked curves
- Thread tension changes
- Misaligned starts and stops
- Overlapping backtacks
- Skipped stitches over thick joints
- Thread damage
- Surface marks from the presser foot
A production specification should define:
| Item | Example Control |
|---|---|
| Stitch length | 3.8 mm target |
| Edge distance | 2.5 mm from folded edge |
| Thread color | Approved color reference |
| Thread size | Recorded by ticket or Tex size |
| Start position | Hidden beneath zipper-end tab |
| Stop position | Aligned with opposite end |
| Backtack | Limited to approved stitch count |
| Curve tolerance | Confirmed against sample |
| Surface marking | No permanent foot marks |
Contrast thread gives a stronger visual effect but exposes variation. Tone-on-tone thread is more forgiving, yet sewing accuracy should not be relaxed.
For SzoneierLeather custom projects, topstitching, structural seams, reinforcement, edge distance, thread, and leather behavior should be approved together during sampling. A clean sample provides the appearance target; written sewing data allows the factory to repeat the same result across bulk production.
How Should Thread and Needles Be Selected?
Thread and needle selection should match the leather thickness, seam layers, stitch length, machine type, product use, and expected load. A thread that is too fine may break under abrasion, while an oversized thread requires a larger needle hole that can weaken thin leather. The needle point must penetrate cleanly without creating unnecessary cutting damage or leaving visibly enlarged holes.
Thread, needle, leather, and machine settings work as one system. Changing one item may require adjustment to the others. A thicker thread often needs a larger needle eye. A larger needle creates a wider hole. A wider hole may require a longer stitch length to preserve enough leather between penetrations.
Leather cosmetic bags usually contain different seam stacks within one product. The main panel seam may include two leather layers and a lining. A zipper end may contain folded leather, zipper tape, lining, reinforcement, and an end tab. The thread and needle must pass through the thickest approved area without damaging the thinner areas.
A commercial sewing specification should record:
- Thread material
- Thread construction
- Thread size
- Needle system
- Needle size
- Needle-point style
- Stitch length
- Top and bottom thread colors
- Upper tension
- Bobbin tension
- Presser-foot pressure
- Machine type
- Approved seam sample
The values below are useful starting points for development. Final combinations should be tested on the actual leather construction.
| Leather and Seam Condition | Common Thread Range | Common Needle Range | Starting Stitch Length | Main Risk |
|---|---|---|---|---|
| Soft leather, light seam stack | Tex 40–70 | Nm 90–110 | 3.0–3.5 mm | Large holes and surface puckering |
| Medium leather cosmetic bag | Tex 70–90 | Nm 110–130 | 3.5–4.0 mm | Tension imbalance |
| Firm multilayer construction | Tex 90–135 | Nm 130–160 | 4.0–4.5 mm | Needle deflection and skipped stitches |
| Decorative visible stitching | Tex 90–135 | Nm 130–160 | 4.0–5.0 mm | Oversized appearance on small products |
| Lining and internal pockets | Tex 30–60 | Nm 80–100 | 2.8–3.5 mm | Thread too heavy for lightweight lining |
Thread size systems can vary between suppliers. Tex, ticket number, denier, and commercial size may describe similar products differently. The technical pack should record the supplier, product name, construction, and approved physical sample instead of relying on one number alone.
Which Thread Material Is Best?
Bonded polyester and bonded nylon are widely used for leather cosmetic bags because both offer high strength, abrasion resistance, and stable machine performance.
Bonded polyester performs well where color stability, moisture resistance, and exposure to sunlight matter. It is often selected for travel products, cosmetic cases, and items that may be used near bathrooms, hotel counters, or outdoor environments.
Bonded nylon offers high tensile strength and good abrasion resistance. It is widely used in bags, luggage, belts, and other leather goods. Nylon may provide slightly more elasticity, which can help under dynamic loading, although excessive stretch is not desirable for every seam.
Cotton-wrapped polyester can create a softer or more traditional appearance. Pure linen thread is often associated with hand saddle stitching and premium leather craft. Those options require different handling and may not suit high-speed industrial assembly.
A thread review should consider:
- Tensile strength
- Abrasion resistance
- Elongation
- Heat resistance
- Moisture behavior
- Colorfastness
- Lubrication
- Bonding quality
- Knot security
- Machine compatibility
- Surface appearance
| Thread Type | Main Strength | Main Limitation | Suitable Use |
|---|---|---|---|
| Bonded polyester | Good UV and moisture resistance | Slightly less elastic than nylon | Travel and everyday cosmetic bags |
| Bonded nylon | High strength and abrasion resistance | Color may be less stable under prolonged UV exposure | Structural bag seams |
| Cotton-wrapped polyester | Softer visual character | Lower abrasion performance than bonded synthetic thread | Fashion-led visible stitching |
| Waxed polyester | Controlled hand sewing | Not intended for standard high-speed machine use | Hand-finished details |
| Waxed linen | Traditional luxury appearance | Higher labor and care requirements | Saddle-stitched premium features |
Thread choice should also reflect the expected life of the product. A promotional pouch used for one event has different requirements from a premium travel cosmetic case expected to survive years of daily handling.
What Thread Size Should Be Used?
Thread size should be large enough to carry the seam load without appearing oversized or requiring unnecessarily large needle holes.
Fine thread creates a subtle appearance and suits lightweight lining, delicate leather, and small products. Heavy thread creates a stronger visual line and may support higher loads, but it increases hole diameter, machine tension requirements, and bulk at backtacks.
For many medium leather cosmetic bags, Tex 70–90 can provide a balanced starting range. Premium topstitching may move toward Tex 90–135 when the leather thickness and design support a bolder line. Lightweight lining may use a finer construction.
Thread size should be evaluated in relation to:
- Finished bag size
- Leather thickness
- Stitch length
- Seam type
- Needle size
- Thread color contrast
- Brand position
- Expected load
- Hardware weight
- Number of layers
Contrast thread appears visually thicker than tone-on-tone thread. A dark thread on pale leather may look heavy even when the technical size remains moderate.
A product developer should review several sewn samples rather than selecting thread from a cone. The final appearance changes after the thread passes through leather, tension is applied, and the stitch line follows a curve.
Which Needle Point Fits Leather?
Leather needles use cutting or shaped points designed to penetrate dense material cleanly. The selected point influences hole direction, stitch angle, thread position, penetration force, and leather damage.
Different point geometries can produce straight, slanted, recessed, or decorative stitch appearances. A point suitable for a visible slanted topstitch may not be ideal for a structural seam around a tight gusset.
The needle should be selected according to:
- Leather firmness
- Leather thickness
- Surface finish
- Stitch direction
- Required stitch appearance
- Seam load
- Number of layers
- Thread size
- Machine speed
A narrow cutting point may reduce penetration resistance on firm leather. A more aggressive cutting point may create a clean hole but weaken soft or thin leather. A rounder point may push fibers apart rather than cut them, but it can also create needle deflection or irregular penetration on dense hides.
Needle condition matters throughout production. A damaged, bent, burred, or heated needle can cause:
- Skipped stitches
- Thread fraying
- Uneven holes
- Surface scratches
- Material tearing
- Needle breakage
- Irregular stitch length
Needles should be inspected and replaced according to production conditions rather than waiting for visible breakage.
How Should Stitch Tension Be Set?
Stitch tension should pull the upper and bobbin threads together inside the seam stack without exposing the interlock on either surface.
Excessive tension can create:
- Leather puckering
- Sunken stitch lines
- Enlarged needle holes
- Thread breakage
- Distorted zipper edges
- Reduced flexibility
Insufficient tension can create:
- Loose loops
- Unstable seams
- Visible bobbin thread
- Poor backtacks
- Thread snagging
- Uneven stitch appearance
Tension should be checked on the full seam construction, not only on one leather strip. A setting that works on two flat layers may fail where the machine crosses piping, a folded zipper end, or a reinforcement patch.
A practical tension check includes:
- Inspecting top and bottom stitch appearance
- Pulling the seam gently across the stitch line
- Bending the seam repeatedly
- Checking for visible interlock points
- Comparing flat and multilayer areas
- Inspecting thread after high-speed sewing
- Reviewing stitch consistency around curves
Operators should not compensate for a feeding problem by tightening thread tension. Uneven feeding requires review of presser-foot pressure, feed mechanism, skiving, adhesive, guides, and layer preparation.
Do Thread and Leather Colors Matter?
Thread color influences appearance, quality perception, and inspection difficulty.
Tone-on-tone thread creates a clean, restrained finish. Small variations in stitch placement are less visible, making it suitable for understated luxury and soft leather constructions.
Contrast thread creates a stronger visual identity. It can emphasize panel shape, zipper frames, edge construction, and craftsmanship. It also exposes every defect. Uneven spacing, tension changes, misaligned corners, and backtack overlap become easier to see.
Color selection should account for:
- Leather shade
- Edge paint color
- Zipper tape
- Lining color
- Hardware finish
- Logo color
- Packaging design
- Intended brand position
Thread color should be approved under controlled lighting. Black thread may appear brown or blue under certain light sources. White and pale threads can become contaminated by oil, dust, leather dye, or handling during production.
For repeat orders, a physical thread card or approved production sample is more reliable than a screen image. Digital color references do not show thread sheen, twist, or interaction with leather texture.
How Are Stress Areas Reinforced?
Stress areas should be reinforced by spreading force across a wider section of leather rather than concentrating more stitches into a small point. Zipper ends, gusset corners, strap tabs, handle bases, side loops, and pocket openings may require reinforcement tape, leather backing, nonwoven material, webbing, wider seam allowance, box stitching, bar tacks, or added panel layers.
Reinforcement should be planned before pattern cutting. Adding a patch after the sample fails may change thickness, seam appearance, stitch position, and turning difficulty. A hidden reinforcement layer often produces a cleaner result than adding dense visible stitching after assembly.
Stress concentration occurs when force enters a narrow area. A 20 mm wrist-strap tab may carry the full weight of a cosmetic bag filled with glass bottles. A zipper pull may repeatedly strike the same end stop. A gusset corner bends every time the bag is packed flat.
The reinforcement needs to achieve three goals:
- Increase the area carrying the load
- Prevent leather from stretching around holes
- Keep the seam stable without creating excessive bulk
Common reinforcement materials include:
- Split leather
- Full-grain leather patches
- Woven reinforcement tape
- Polyester webbing
- Nonwoven backing
- High-density fabric
- Thin structural board
- Thermoplastic reinforcement
- Adhesive support tape
The selected material should match the flexibility of the bag. A rigid patch inside a soft pouch can create a visible hard spot. A reinforcement that is too soft may not prevent stretching.
| Stress Area | Main Force | Common Reinforcement | Main Inspection Point |
|---|---|---|---|
| Zipper ends | Concentrated pulling | End tabs, back patches, controlled bar tack | No tearing or slider obstruction |
| Gusset corners | Bending and outward pressure | Wider seam allowance, curved reinforcement | No puckering or perforation tearing |
| Wrist-strap tab | Full bag weight | Internal patch, webbing extension, box stitch | Load spreads beyond tab edge |
| Handle base | Repeated lifting | Reinforcement panel and multiple stitch lines | No panel distortion |
| Side loop | Localized pull | Hidden backing and larger attachment area | Loop remains aligned |
| Pocket opening | Repeated insertion | Top-edge reinforcement and lock-off | No opening stretch |
| Bottom seam | Product weight and impact | Wider allowance or reinforced base | No leakage or seam opening |
Reinforcement strength should be evaluated after filling the bag with realistic contents. Empty-bag inspection cannot reveal how glass containers and compact cases push against seams.
How Should Zippers Be Stitched?
Zipper attachment must keep the opening straight, prevent leather from entering the slider path, and resist repeated pulling at both ends.
A zipper seam may include:
- Exterior leather
- Folded leather edge
- Zipper tape
- Reinforcement tape
- Lining
- End tab
- Adhesive
The stack should remain flat enough for smooth slider movement. Uneven feeding can shorten one side of the opening and create a twisted zipper.
Important controls include:
- Equal zipper opening length on both sides
- Consistent distance between teeth and stitch line
- Smooth slider movement
- No loose lining near the teeth
- Secure zipper-end tabs
- Clean backtacks
- No skipped stitches over the end stop
- No leather waves along the opening
A common mistake is placing the stitch line too close to the zipper teeth. The leather may rub against the slider and wear prematurely. Moving too far away can create a loose fold that lifts during use.
The zipper ends often require additional reinforcement because pulling force stops abruptly at those points. A leather end tab, backing patch, or short controlled bar tack can help, but excessive stitch density may damage thin leather.
A zipper should be opened and closed repeatedly during sample review with the bag both empty and filled.
How Are Corners and Gussets Reinforced?
Corners and gussets experience combined bending, compression, outward pressure, and abrasion. Their durability depends on pattern radius, seam allowance, stitch length, skiving, reinforcement, and operator control.
A sharp 90-degree corner concentrates holes in a small area. A wider curve distributes the seam across a longer path and is easier to sew consistently. The correct radius depends on leather thickness and the number of layers.
Corner development should review:
- Minimum curve radius
- Stitch shortening on curves
- Seam allowance clipping
- Skiving width
- Piping thickness
- Lining fit
- Turning pressure
- Surface wrinkling
- Final bag shape
Small relief cuts may help a seam allowance turn, but cuts should never reach too close to the stitch line. Excess clipping can weaken the corner.
For structured cosmetic cases, reinforcement may be added between the leather and lining. For soft pouches, a wider seam allowance and careful curve shape may provide enough strength without a stiff insert.
After sewing, corners should be checked for:
- Puckering
- Flattened piping
- Uneven radius
- Exposed holes
- Thread abrasion
- Leather cracking
- Unequal side height
A filled-shape inspection is essential because an empty bag can hide poor gusset balance.
Do Bar Tacks Improve Durability?
Bar tacks can improve durability when used on narrow, high-load areas such as zipper ends, webbing tabs, pocket openings, and small attachment points.
A bar tack places many stitches in a short area. The density helps resist pulling, but it also creates concentrated perforation. Thin leather may tear around the tack if the needle is too large, the stitch count is excessive, or the reinforcement beneath is insufficient.
Bar tacks work best when:
- A reinforcement layer sits beneath the leather
- The tack crosses a webbing or tab rather than unsupported leather
- The width matches the attachment area
- The stitch density is tested
- Start and stop points do not overlap excessively
- Thread tension remains balanced
For visible premium leather, a box stitch or short parallel rows may look cleaner than a dense industrial bar tack. The design team should balance mechanical strength with visual expectations.
A reinforcement test should compare the complete attachment, not only the tack. If the tack remains intact but the surrounding leather tears, the attachment has still failed.
How Should Tabs and Straps Be Attached?
Tabs and straps should transfer force into a broad section of the body panel.
A weak attachment often occurs when a narrow folded tab is stitched directly onto one leather layer. The entire bag weight then pulls against a short stitch line. A better construction extends the tab into the seam or adds an internal reinforcement patch.
Attachment methods may include:
- Tab captured inside the side seam
- Tab extended under a panel
- Internal leather backing
- Webbing reinforcement
- Box stitch
- Box-X stitch
- Parallel stitch rows
- Rivet plus stitching
- Hidden reinforcement plate
Rivets can support the construction, but they should not be treated as a replacement for a sound load path. A rivet hole can also become a stress point if positioned too close to the edge.
For wrist straps, evaluate:
- Strap width
- Folded thickness
- Hardware weight
- Tab insertion depth
- Stitch area
- Reinforcement area
- Pull direction
- Finished bag weight
If a packed cosmetic bag weighs 1.5 kg, lifting and swinging can create forces higher than the static weight. Sampling should therefore include repeated pulling rather than one gentle load.
How Does Lining Affect Seam Strength?
The lining protects the leather interior, hides construction, supports pockets, and helps manage spills. It can also affect seam durability.
A lining that is too tight may pull against the zipper and side seams. A lining that is too loose can bunch, catch in the zipper, or shift under the weight of bottles. The pattern should allow the lining to sit naturally inside the leather shell without carrying excessive structural load.
Common lining materials include:
- Polyester twill
- Nylon
- Cotton
- Microfiber
- Coated fabric
- Water-resistant woven fabric
- Easy-clean synthetic lining
Cosmetic bags often benefit from stain-resistant or wipe-clean linings. However, coated materials may be less flexible and can crack at repeated folds if the specification is unsuitable.
Lining seam allowances should be wide enough to resist fraying and pullout. Pocket openings may need reinforcement because brushes, bottles, and tools repeatedly drag against the edge.
Lining quality checks should cover:
- Seam allowance
- Fraying control
- Pocket strength
- Zipper clearance
- Wrinkle level
- Bag fit
- Cleaning performance
- Color transfer
- Odor
- Coating stability
The lining should support the product without hiding poor exterior construction. A durable cosmetic bag needs both the leather shell and the internal structure to work together.
For SzoneierLeather projects, thread, needle, reinforcement, zipper construction, gusset shape, strap attachment, and lining should be approved as one complete system. The factory can evaluate material stacks during sampling, record sewing specifications, and use the approved physical sample as the standard for bulk production.
How Is Stitching Quality Controlled?
Stitching quality control should verify appearance, seam construction, thread performance, dimensional accuracy, reinforcement, and resistance to repeated use. Inspection must cover the full cosmetic bag rather than isolated flat seams. Zipper ends, curved gussets, folded corners, strap tabs, lining pockets, piping joints, and thick layer transitions deserve closer attention because defects concentrate in those areas.
A leather cosmetic bag can pass a quick visual check and still fail in use. Straight topstitching does not prove that the seam allowance is wide enough. Strong thread does not prove that the leather between holes will resist tearing. A smooth zipper on an empty sample does not prove that the opening remains stable after the bag is filled with bottles and brushes.
Quality control should therefore combine four types of evaluation:
- Visual inspection
- Dimensional inspection
- Construction inspection
- Performance testing
Visual inspection checks stitch lines, thread condition, surface marks, symmetry, and finishing. Dimensional inspection confirms finished size, zipper opening, gusset depth, tab position, and stitch distance. Construction inspection reviews hidden reinforcement, seam allowance, skiving, thread, needle-hole appearance, and lining attachment. Performance testing checks whether the bag survives loading, pulling, opening, closing, bending, and abrasion.
A useful inspection plan separates defects into critical, major, and minor categories.
| Defect Level | Meaning | Examples |
|---|---|---|
| Critical | Creates a safety, legal, or serious functional risk | Sharp broken needle fragment, detached metal part, severe contamination |
| Major | Affects use, durability, structure, or customer acceptance | Broken seam, failed zipper, detached tab, severe crooked stitching |
| Minor | Does not stop normal use but lowers appearance quality | Slight thread tail, small stitch variation, light removable mark |
The inspection standard should be agreed before production. A premium full-grain leather cosmetic bag with contrast stitching may require tighter visible tolerances than a promotional pouch with tone-on-tone thread.
What Stitching Defects Should Be Checked?
Stitching inspection should identify both visible defects and hidden structural risks.
Visible defects include:
- Skipped stitches
- Broken thread
- Loose loops
- Uneven stitch length
- Crooked topstitching
- Irregular edge distance
- Overlapping backtacks
- Exposed bobbin thread
- Frayed thread
- Thread contamination
- Needle scratches
- Presser-foot marks
- Untrimmed thread ends
- Uneven corner turning
- Misaligned double rows
Hidden risks require closer checking. A seam may look clean while the allowance measures only 3 mm where 8 mm was approved. A strap tab may be straight but lack the required internal reinforcement. A zipper edge may appear flat while the lining sits close enough to enter the slider path.
A practical line inspection should check at least the following zones on every cosmetic bag:
| Inspection Zone | Main Defects |
|---|---|
| Zipper opening | Waves, rubbing, unequal sides, loose lining |
| Zipper ends | Weak lock-off, torn leather, displaced tab |
| Front and back panels | Crooked topstitching, surface marks |
| Gusset curves | Puckering, skipped stitches, uneven radius |
| Bottom corners | Excess bulk, cracking, open seam |
| Strap or handle tabs | Misalignment, weak reinforcement, loose hardware |
| Lining | Open seams, fraying, poor fit, trapped folds |
| Internal pockets | Weak openings, crooked edges |
| Logo patch | Uneven placement, needle damage |
| Piping joints | Flattening, misalignment, exposed cord |
Inspectors should compare the product with the approved sample under consistent lighting. Differences in leather grain are natural, but stitch position, structural dimensions, reinforcement, and function should remain controlled.
How Is Seam Strength Tested?
Seam-strength testing should reproduce the type of force the cosmetic bag will face in normal use.
A basic seam pull test places force across the sewn joint. The test can be performed manually during development or with a tensile-testing machine for measured results. The purpose is to identify whether failure begins in the thread, leather, seam allowance, reinforcement, or attachment area.
For product development, sample tests may include:
- Static loading
- Repeated zipper cycling
- Strap pull testing
- Seam pull testing
- Drop testing
- Compression testing
- Corner flexing
- Lining-pocket pulling
- Thread abrasion review
A practical loaded-bag trial can use realistic contents rather than soft filler alone. Glass bottles, compact cases, brushes, and hard plastic containers create concentrated pressure against seams.
| Test | Example Development Method | Main Observation |
|---|---|---|
| Static load | Fill bag to 1.5–2 times planned use weight for 24 hours | Seam opening, panel distortion |
| Strap pull | Apply repeated vertical pulls to tab or handle | Leather tearing or stitch movement |
| Zipper cycling | Open and close 500–1,000 cycles during development | Slider resistance and end-seam failure |
| Seam pull | Pull panels apart at controlled force | Thread break or leather perforation |
| Drop test | Drop filled bag from 60–100 cm several times | Corner and hardware damage |
| Compression | Pack under realistic luggage pressure | Shape recovery and seam stability |
| Pocket test | Insert and remove tools repeatedly | Pocket opening stretch |
| Bend test | Fold gusset and corners repeatedly | Cracking and stitch-hole enlargement |
Final requirements should match product position and intended use. A soft cosmetic pouch for light items may not need the same loading standard as a structured travel case carrying glass bottles.
Test results should record:
- Sample identification
- Leather batch
- Thread and needle specification
- Stitch length
- Seam type
- Reinforcement
- Applied load
- Number of cycles
- Failure location
- Corrective action
- Retest result
The most valuable result is not simply “passed” or “failed.” The team needs to understand which component reached its limit first.
How Is Stitch Consistency Measured?
Stitch consistency can be measured through stitch count, edge distance, row spacing, alignment, tension, and position.
For a target stitch length of 4.0 mm, a short section should not shift repeatedly between visibly dense and widely spaced stitches. Minor changes may occur at curves and thick transitions, but the appearance should remain controlled.
Key measurable items include:
- Stitches per 25 mm
- Distance from stitch line to folded edge
- Distance between double rows
- Start and stop position
- Backtack length
- Zipper-to-stitch distance
- Tab placement
- Corner radius
- Stitch-line symmetry
Example production tolerances may include:
| Control Item | Example Target | Example Tolerance |
|---|---|---|
| Topstitch edge distance | 2.5 mm | ±0.5 mm |
| Double-row spacing | 4.0 mm | ±0.5 mm |
| Structural stitch length | 3.8 mm | ±0.3 mm |
| Zipper stitch distance | 4.0 mm from teeth | ±0.5 mm |
| Strap-tab position | Approved center point | ±1.5 mm |
| Finished bag width | 220 mm | ±3 mm |
| Gusset depth | 80 mm | ±2 mm |
| Zipper opening length | 190 mm | ±2 mm |
Those values should be adjusted according to product size, leather behavior, and brand requirements. A small 120 mm cosmetic pouch may need tighter positional control than a large travel case.
Inspectors can use:
- Transparent rulers
- Stitch gauges
- Metal templates
- Positioning jigs
- Measurement cards
- Approved limit samples
- Digital calipers
- Printed overlay guides
Measurement should support visual judgment rather than replace it. A stitch line may remain within numerical tolerance yet still look uneven when viewed across the full zipper opening.
What Should a Sample Approval Include?
Sample approval should cover appearance, construction, measurements, materials, sewing details, function, packaging, and testing requirements.
Approving a sample only through photographs creates risk. Images may not show leather hand feel, filling structure, hidden reinforcement, zipper resistance, edge thickness, lining fit, thread tension, or surface marking.
A complete approval package should include:
- Signed physical sample
- Front, back, side, top, and interior photos
- Finished measurement chart
- Leather type and thickness
- Lining material
- Thread supplier and size
- Needle size and point
- Stitch length
- Seam allowance
- Edge distance
- Reinforcement materials
- Zipper specification
- Hardware finish
- Strap-tab construction
- Logo position
- Packaging method
- Carton quantity
- Required tests
- Approved color references
The sample review should answer practical questions:
- Does the zipper move smoothly when the bag is full?
- Does the lining remain away from the teeth?
- Do corners recover after compression?
- Is the wrist strap attachment strong enough?
- Does the bag stand or collapse as intended?
- Are visible stitches straight from normal viewing distance?
- Does the thread color suit the leather under daylight?
- Does the product fit the approved packaging without deformation?
Revisions should be listed in measurable language.
Weak instruction: “Improve the zipper stitching.”
Clear instruction: “Move the stitch line 1 mm farther from the zipper teeth, keep the edge distance at 3 mm, reduce puckering on the right end, and shorten the backtack to three stitches.”
Each approved change should enter the production record. Verbal approval alone is difficult to reproduce across departments and repeat orders.
How Does Bulk Production Match the Sample?
Bulk consistency depends on controlling materials, machine settings, cutting, operator methods, reinforcement, inline inspection, and final inspection.
The approved sample establishes the target, but production conditions introduce variation. Leather is a natural material. Grain, softness, thickness, stretch, shade, and surface character can vary across hides and within one hide. The factory must sort material and decide which areas are suitable for visible panels, gussets, tabs, folds, and reinforcement.
Bulk control should begin before sewing:
- Check leather thickness by location.
- Separate loose and firm leather sections.
- Confirm color range.
- Inspect surface defects.
- Confirm lining and reinforcement lots.
- Approve thread and zipper batches.
- Verify cutting dies and patterns.
- Prepare sewing guides and templates.
- Confirm machine settings.
The first production pieces should receive a full review before the line continues. Early checks can detect incorrect stitch length, misplaced tabs, excessive tension, poor curve feeding, or missing reinforcement before hundreds of units are assembled.
A useful control process may include:
| Production Stage | Main Check |
|---|---|
| Incoming material | Color, thickness, defects, stretch |
| Cutting | Grain direction, pattern accuracy |
| Skiving | Width, depth, consistency |
| Preparation | Reinforcement and adhesive placement |
| Sewing start-up | Thread, needle, tension, stitch length |
| Inline inspection | Zipper, gusset, tabs, topstitching |
| Assembly | Shape, lining fit, hardware |
| Final inspection | Appearance, function, measurement |
| Packing | Cleanliness, shape, accessories, labels |
Bulk matching should not mean forcing every natural leather panel to look artificially identical. It means controlling unacceptable variation while preserving the material’s natural character.
How Are Defects Corrected During Production?
Defects should be corrected at the earliest stage where the cause can still be controlled.
A crooked stitch found immediately may allow the operator to stop before completing the panel. A zipper-opening wave found after full assembly may require dismantling the bag and can leave permanent needle holes.
Common corrective actions include:
- Rebalancing thread tension
- Replacing a damaged needle
- Changing needle size or point
- Adjusting stitch length
- Reducing presser-foot pressure
- Improving skiving
- Adding a feeding guide
- Repositioning reinforcement
- Revising adhesive application
- Retraining the operator
- Separating unsuitable leather sections
- Replacing a worn machine part
Leather repairs need stricter judgment than fabric repairs. Removing a stitch leaves holes. Repeated sewing can create a visible perforation path or weaken the panel. Premium visible sections may need replacement rather than repair.
A defect record should include:
- Defect type
- Quantity affected
- Production stage
- Root cause
- Corrective action
- Person responsible
- Retest result
- Prevention for later units
Repeated defects are a process problem, not an inspection problem. Final inspectors cannot create quality after production; they can only identify what the process failed to control.
How Are Finished Bags Inspected Before Packing?
Final inspection should confirm cleanliness, appearance, function, construction, measurements, and packing readiness.
Each bag should be opened and closed several times. Inspectors should check whether the zipper slider catches the lining, whether tabs remain secure, and whether the bag returns to the intended shape.
A final inspection may include:
- Stitching appearance
- Thread ends
- Surface scratches
- Oil marks
- Glue residue
- Leather shade
- Edge finishing
- Zipper operation
- Hardware function
- Lining cleanliness
- Pocket construction
- Strap strength
- Logo position
- Finished dimensions
- Product shape
- Label accuracy
- Packaging completeness
Leather bags should not be packed while compressed in an unintended shape. Tissue, inserts, or controlled stuffing may be used when necessary to support structure. Hardware can be wrapped to prevent scratching. Light-colored leather may require protective materials that do not transfer color.
Before carton sealing, confirm:
- Correct product and color
- Correct quantity
- Required dust bag or inner bag
- Hangtag and care card
- Barcode
- Protective wrapping
- Desiccant where appropriate
- Carton markings
- Carton dimensions
- Gross and net weight
Good packing protects the stitching work already completed. A bag sewn correctly can still reach the customer with distorted gussets, crushed piping, or zipper pressure marks when packaging is poorly planned.
How Can SzoneierLeather Support Custom Cosmetic Bag Projects?
SzoneierLeather supports leather product development from material selection through design, sampling, production, packaging, and final inspection. More than 18 years of experience across leather bags, wallets, belts, straps, accessories, and leather boxes allows the team to review both appearance and manufacturing risk before bulk production begins.
The factory can help brands and custom wholesale customers translate a product concept into a production-ready construction.
SzoneierLeather can prepare material and construction recommendations before sampling. During sample development, the team can review stitch length, thread size, needle choice, skiving, seam allowance, zipper structure, reinforcement, lining fit, and packaging compatibility.
A durable leather cosmetic bag is not created by one strong seam. Durability comes from hundreds of connected decisions: leather selection, pattern shape, hole spacing, thread strength, zipper alignment, reinforcement area, corner radius, operator control, inspection, and packing.
When those decisions are recorded and controlled, the product can maintain a cleaner appearance, smoother zipper operation, stronger attachments, and more consistent quality across repeat orders.
Send SzoneierLeather your design, dimensions, quantity, leather preference, logo details, and target market for a custom material review, sample plan, and manufacturing quotation.