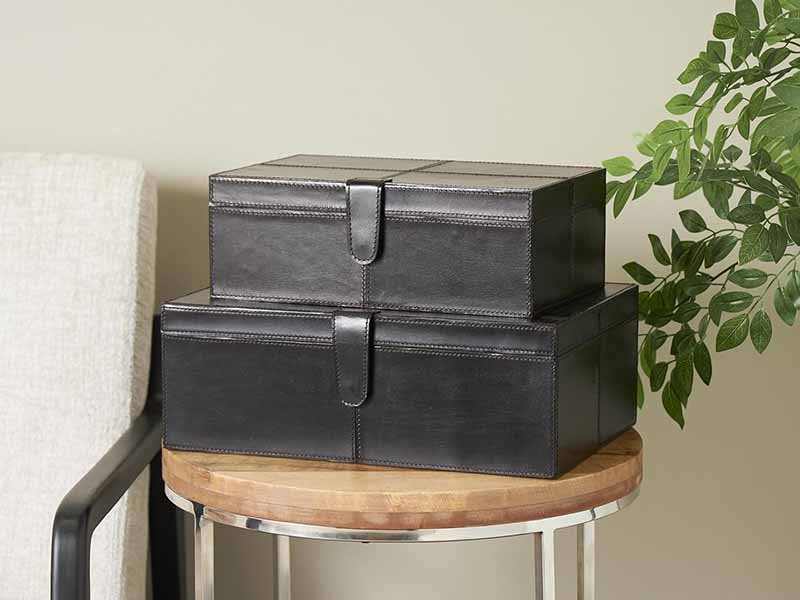
Ensuring the quality of leather boxes is crucial for maintaining brand reputation and customer satisfaction. Whether it’s a luxury item or a custom-made product, each box must meet high standards for functionality, durability, and aesthetic appeal. Quality control (QC) helps brands achieve consistent results across every unit produced, focusing on critical aspects like fit, gap, alignment, surface quality, and packaging. These elements are crucial for both the product’s usability and its visual appeal, which can impact consumer experience and product longevity.
Quality control for leather boxes covers essential factors such as fit, gap measurements, alignment, surface finish, and packaging. Ensuring each of these elements meets the required standard guarantees that the final product is functional, durable, and visually appealing.
Imagine receiving a premium leather box as a gift or for professional use, only to find the lid doesn’t fit properly or the surface has visible marks. Small imperfections like these can lead to customer dissatisfaction and returns, which can harm a brand’s reputation. To prevent such issues, this guide will walk you through the critical QC checks that must be confirmed for every leather box produced. By focusing on key areas, brands can ensure they deliver only the highest-quality products.
What Is Quality Control for Leather Boxes?
Quality control (QC) for leather boxes is the process of systematically ensuring that each box produced meets the required standards for fit, function, durability, and aesthetics. This process is vital for leather goods manufacturers because even small defects can result in customer dissatisfaction, returns, and harm to the brand’s reputation. QC checks at various stages of production help maintain consistency and ensure the product meets both the designer’s vision and the customer’s expectations.
In leather box manufacturing, QC covers the inspection of the materials, measurements, stitching, surface finish, and packaging. These checks are crucial for maintaining a high standard, especially as leather is a natural material that can have inherent inconsistencies.
Implementing robust QC practices ensures leather boxes are durable, functional, and visually appealing, which ultimately leads to higher customer satisfaction and fewer defects in production.
What Does QC Include?
Quality control in leather box manufacturing involves a series of tests and inspections that verify whether each aspect of the production process meets the brand’s standards. These include:
- Fit and Assembly: This includes ensuring that all parts of the leather box fit together properly, from the base and sides to the lid. A well-assembled box ensures that all components are properly aligned, and the box can function as intended.
- Gap and Alignment: QC checks for consistent gaps between the lid and base, as well as checking the alignment of panels and stitching. Proper alignment is necessary for both aesthetics and functionality, ensuring that the box opens and closes smoothly and doesn’t suffer from structural defects.
- Surface and Material Quality: This includes inspecting the leather for any surface imperfections, discoloration, wrinkles, or inconsistencies. It also ensures that the texture and grain of the leather are consistent with the design specifications.
- Stitching and Seams: Every stitch must be uniform in length, placement, and tension. QC checks whether the stitching holds the components of the box together securely and whether it is visually appealing.
- Packaging: The final inspection ensures that the leather box is packaged properly to avoid damage during shipping. This includes checking that the box is protected from moisture and pressure, and that it is securely sealed and labeled for transportation.
Why QC Matters for Brand Reputation?
Quality control is critical for maintaining a brand’s reputation, especially in industries where craftsmanship and attention to detail are paramount. Leather boxes, in particular, are products that often reflect the values and quality standards of the brand, as they are typically used for high-end goods, gifts, or collectibles. Therefore, any defects that slip through the cracks during production can have serious consequences.
- Customer Trust: Consumers expect high-quality products, especially in premium markets. If a leather box is defective—whether due to poor stitching, misalignment, or surface imperfections—customers may lose trust in the brand. Regular QC ensures that products meet expectations every time.
- Brand Image: A brand known for its meticulous QC and high standards gains a reputation for quality craftsmanship. Conversely, brands with frequent product defects are often associated with low quality, which can harm long-term sales and customer loyalty.
- Reducing Returns and Complaints: QC helps reduce the likelihood of returns and customer complaints. By catching defects early, companies prevent costly returns and replacements, saving time and resources while maintaining customer satisfaction.
- Consistency Across Batches: When scaling production, maintaining consistent quality becomes more challenging. Regular QC inspections ensure that the brand’s standards are upheld across all production runs, ensuring that every box produced is of the same high quality.
What Common Defects Occur in Leather Boxes?
Despite best efforts in design and pattern-making, defects may still occur during the production of leather boxes. Understanding these defects is key to addressing them during the QC process. Here are some of the most common issues found in leather box production:
- Stitching Issues: One of the most common defects in leather boxes is uneven or loose stitching. This can affect the box’s durability and its aesthetic appeal. Poor stitching can cause the box to fall apart or lose shape, especially in high-stress areas like the edges or seams.
- Surface Imperfections: Leather, being a natural material, may have minor imperfections such as scars, wrinkles, or inconsistencies in color. While some of these marks are expected, they must be evaluated to ensure they do not impact the visual appeal or structural integrity of the box.
- Misalignment of Panels: During assembly, the panels of the leather box (front, back, sides, and bottom) must be aligned perfectly. Misalignment can cause uneven seams, gaps, and an overall lopsided appearance. Misaligned components can also affect the functionality of the box.
- Incorrect Fit: If the internal compartments or the lid do not fit correctly, it can compromise the box’s functionality. For example, if the lid does not close properly, or if internal dividers are too tight or too loose, it may affect how well the box functions or how securely it holds its contents.
- Packaging Defects: Packaging defects, such as improper sealing or inadequate protective material, can lead to damage during shipping. Leather boxes, especially premium ones, should be well-protected from moisture, dust, and physical damage during transport to ensure they arrive in perfect condition.
| Defect | Description | Potential Impact |
|---|---|---|
| Stitching Issues | Uneven or loose stitching along seams and edges. | Can cause the box to fall apart or lose shape over time. |
| Surface Imperfections | Leather marks, discoloration, or uneven texture. | Can detract from the overall appearance of the box. |
| Misalignment | Panels or components not fitting together properly. | Affects the box’s structure, symmetry, and functionality. |
| Incorrect Fit | Lid, internal dividers, or compartments not fitting correctly. | Reduces the box’s usability and may compromise its intended purpose. |
| Packaging Defects | Insufficient protective packaging leading to damage. | Can lead to product damage during shipping, resulting in returns. |
Which Fit & Gap Standards Should Be Checked?
Fit and gap standards are crucial in ensuring that the components of the leather box work together seamlessly. The gap between parts, such as the lid and base, affects how the box operates. A lid that doesn’t fit properly can make the box difficult to close or compromise its functionality.
Key Fit & Gap Considerations:
- Lid Fit: The lid should fit snugly against the body of the box. There should be minimal space around the edges to prevent it from wobbling or being difficult to close.
- Internal Compartments: The fit of internal sections, whether for storage or as part of the design, needs to be accurate to ensure functionality.
- Gap Tolerances: Gaps between panels or around the lid must stay within the specified tolerance to maintain both function and aesthetic.
Fit and gap checks ensure the box closes properly, compartments are accessible, and the product meets design specifications.
Which Fit Checks Internal Dimensions?
The internal dimensions of the leather box should be precisely measured to ensure that compartments, dividers, or the lid fit perfectly with the internal structure. For example, if the box is designed for storing specific items (e.g., jewelry, watches, or tech accessories), the internal dimensions should be adjusted to securely hold those items without excessive space that might cause damage or shifting.
- Measuring Internal Compartment Fit: Use precise measurement tools like calipers or digital rulers to verify that internal compartments match the dimensions needed for the items they are intended to hold.
- Depth of the Box: For larger boxes, ensuring the depth is accurate is important to avoid a box that’s too shallow (causing things to overflow) or too deep (which could make the box cumbersome and inefficient).
| Internal Component | Measurement | Why It Matters |
|---|---|---|
| Compartment Width | Measure the width of internal sections for storage. | Ensures items fit securely without extra space. |
| Compartment Height | Measure the height of internal sections (e.g., dividers). | Prevents damage to items from overcrowding or shifting. |
| Internal Depth | Measure the depth to ensure proper storage capacity. | Avoids boxes that are too shallow or overly bulky. |
Which Gap Tolerances Are Acceptable?
The gap between various parts of the leather box, such as between the lid and base or between panels, must be carefully controlled. Too large a gap can cause issues with alignment and can affect the box’s visual appeal. On the other hand, too small a gap could prevent the box from functioning correctly, especially if the lid is too tight or the box is difficult to open or close.
Key Gap Tolerance Considerations:
- Lid-to-Box Gap: There should be a minimal gap between the lid and the body of the box to ensure a smooth, clean closure. A gap of 1-2mm is often acceptable depending on the design.
- Internal Dividers: Gaps between dividers should also be considered to ensure they don’t impact the functionality of the box or make it difficult to store items.
| Gap Type | Measurement Tolerance | Why It Matters |
|---|---|---|
| Lid Gap | 1-2mm gap around the lid | Ensures a proper seal and smooth closing action. |
| Internal Divider Gap | 2-3mm between dividers for easy access to compartments | Ensures items can be easily stored without being cramped. |
| Edge Gap | 0-1mm tolerance for the edges of panels | Prevents gaps that affect alignment and overall design. |
How Do You Check Alignment & Symmetry?
Alignment and symmetry are crucial in leather box production as they directly affect both the functionality and the visual appeal of the final product. Misalignment or lack of symmetry can make the box look unprofessional, impact its durability, and result in customer dissatisfaction. Checking for alignment and symmetry at every stage of the manufacturing process helps prevent defects that could compromise the box’s overall quality.
Proper alignment ensures that the box functions smoothly, fits together well, and has a professional finish. Checking for symmetry ensures that the final product is balanced and aesthetically pleasing.
How to Verify Panel Alignment?
Panel alignment refers to ensuring that all the sides, top, and bottom panels of the leather box are correctly aligned and attached during the assembly process. Misalignment of panels can lead to uneven edges, gaps, or an unevenly shaped box. Here’s how to verify panel alignment:
- Check Edge Alignment: When assembling the leather box, start by aligning the edges of the front, back, and side panels. The edges should meet neatly without any visible gaps. Use a ruler or measuring tape to ensure the panels are correctly aligned along the edges. This is especially important for larger panels or boxes with intricate designs.
- Use Jigs or Guides: A jig or guide can help maintain the correct alignment during assembly, especially when working with multiple panels. These tools are designed to hold the panels in place while you stitch or glue them together, ensuring that everything lines up properly.
- Measure at Multiple Points: To ensure alignment, measure the distance from the edge of one panel to another at multiple points along the seams. This helps identify any inconsistencies in the alignment and allows for adjustments before the panels are permanently stitched.
- Verify Symmetry: After assembling the panels, check the overall symmetry of the box. The shape of the box should be consistent and balanced on all sides. An easy way to check this is by measuring diagonally from corner to corner to ensure they are the same length.
| Panel Type | Alignment Check | Why It Matters |
|---|---|---|
| Side Panels | Measure the edges to ensure they align with the front and back panels. | Prevents uneven seams and misalignment during the production process. |
| Corners | Check the corner alignment to make sure they form right angles (or the intended angle). | Misaligned corners can ruin the symmetry and shape of the box. |
| Base Panel | Ensure the base panel is aligned with the side panels. | An off-center base causes instability and uneven weight distribution. |
How to Check Edges and Seams?
Edges and seams are key to both the durability and aesthetic appeal of the leather box. Proper edge finishing ensures a smooth, professional look and prevents the leather from fraying or becoming damaged over time. Seams must also be checked for consistency in stitching, tension, and placement. Here’s how to inspect edges and seams effectively:
- Edge Inspection: The edges of the leather should be smooth and finished, without visible rough spots or fraying. Use a magnifying glass to closely inspect each edge for inconsistencies or imperfections. If the edges are not finished, they can be treated by edge painting, burnishing, or using heat to seal the edges to prevent fraying.
- Seam Checking: Examine the stitching along the seams. The stitches should be evenly spaced and consistent in length. Uneven stitching can cause structural weakness and may look unprofessional. Use a ruler or stitch gauge to measure the stitch length and ensure uniformity.
- Thread Inspection: Check the thread used for stitching to ensure it is of the correct thickness and strength for the leather being used. Thicker leather requires a stronger, thicker thread, while thinner leather can use a finer thread. Ensure that the stitching is tight enough to hold the panels securely but not too tight that it causes the leather to bunch up or pucker.
- Stitch Placement: The stitching should be placed at a consistent distance from the edge of the leather. The standard distance from the edge is typically 3-4mm, but this may vary depending on the design. Make sure that all stitching is straight and that no stitching is too close to the edge, which could cause the leather to tear.
How to Record Alignment Data?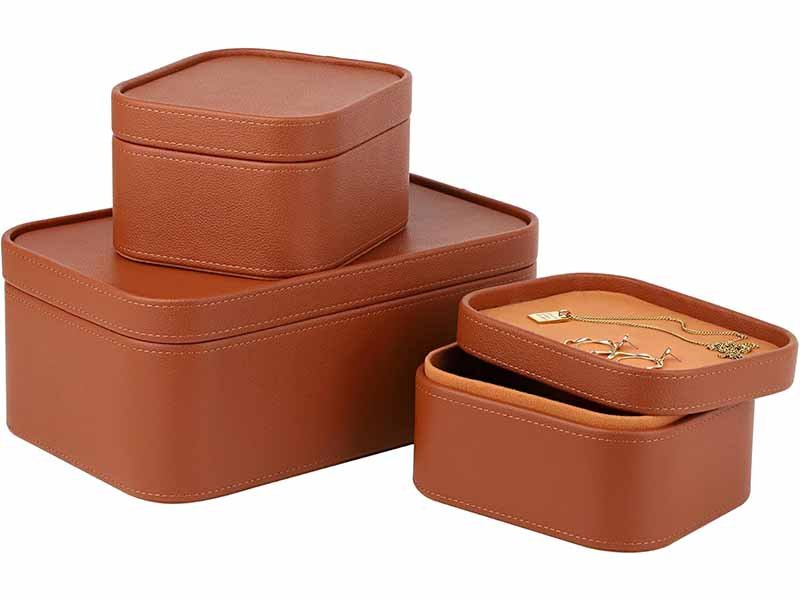
Recording alignment data is essential for maintaining consistency and ensuring that any deviations from the ideal alignment are addressed in future production runs. This data helps identify potential recurring issues that could be corrected to improve quality control.
- Create a QC Checklist: Develop a checklist that includes specific measurements for alignment, gaps, edge placements, and seam distances. Include columns for checking each element (e.g., fit, alignment, symmetry) and space for documenting any deviations.
- Use Measurement Tools: To collect precise data, use tools like calipers, rulers, and digital measuring devices. These tools will help ensure accurate measurements and help record the findings.
- Document Defects and Corrections: If any alignment issues are detected, document them in the QC checklist and note the corrective action taken. For example, if the panels were misaligned during assembly, note whether adjustments were made in the pattern or if a tool was used to aid alignment.
- Track Production Batch Information: Record the batch number, date, and other relevant production information. This allows for easy tracking of specific issues and ensures that any necessary adjustments can be made for future batches.
Sample Alignment Data Tracking
| QC Area | Measurement | Deviations Noted | Corrective Action Taken |
|---|---|---|---|
| Panel Alignment | Distance from edge (mm) | 2mm misalignment in side panel | Re-aligned panels and adjusted pattern. |
| Stitching | Stitch length (mm) | Uneven stitching on left side of lid | Re-stiched with correct stitch gauge. |
| Edge Alignment | Distance from panel edge | 1mm gap at bottom of front panel | Trimmed edges for precise fit. |
Are Surface & Material Quality Tested?
Surface quality is essential in leather box production, as it affects both the product’s visual appeal and its durability. Leather, being a natural material, may have unique features such as grain variations, texture differences, or natural markings. Ensuring that these features meet quality standards and do not interfere with the box’s appearance or function is key to maintaining high product standards.
Surface quality tests help to ensure that the leather’s texture, finish, and overall appearance meet the standards for a flawless, premium look. This includes checking for blemishes, creases, and color consistency in the material.
Are Leather Texture and Grain Consistent?
Leather texture and grain can vary depending on the animal hide, the tanning process, and the finishing methods used. When creating leather boxes, it’s crucial to inspect the texture and grain of the leather to ensure it meets the intended aesthetic standards. This includes checking for:
- Grain Consistency: Leather should have a uniform grain pattern, especially if the design requires a particular visual effect (e.g., a smooth, polished look). Any irregularities, such as scars or wrinkles, can affect the leather’s appearance and must be addressed.
- Leather Texture: The surface texture should match the intended style. For example, if the box is designed to have a soft, smooth finish, any raised texture or rough spots could be problematic.
- Color Consistency: Leather should maintain a consistent color throughout the entire piece. Color inconsistencies can result from improper dyeing, and any noticeable variation can affect the overall quality of the product.
Surface Quality – Texture and Grain Checks
| Check | What to Look For | Why It Matters |
|---|---|---|
| Grain Consistency | Ensure a uniform grain pattern without scars or wrinkles. | Uneven grain affects both the appearance and quality of the leather box. |
| Texture | Check for any rough or uneven texture. | A smooth texture is necessary for premium leather boxes. |
| Color Consistency | Inspect the entire surface for uniform coloring. | Color inconsistencies can make the leather box look unprofessional. |
Are Surface Blemishes Acceptable?
Leather is a natural material, and minor surface blemishes may occur. However, for high-end leather boxes, it’s essential to assess whether these imperfections are acceptable for the product’s intended use and price point. Blemishes like scratches, stretch marks, or inconsistent coloring might not be acceptable for premium leather boxes but could be acceptable for more affordable versions, depending on the brand’s standards.
- Surface Imperfections: Surface imperfections like scratches or scuffs can occur naturally during the tanning and processing of leather. However, these should be inspected and removed if they affect the product’s appearance or integrity.
- Natural Marks: Some leather, especially full-grain leather, may retain natural marks from the animal. These are sometimes embraced for their natural look but should be evaluated for their impact on the product’s design.
- Finish and Coating: The final finish applied to the leather must be checked for evenness and quality. This includes checking for glossiness, matte finishes, or special treatments like waterproof coatings, depending on the product design.
Surface Blemish Assessment
| Blemish Type | Acceptance Criteria | Why It Matters |
|---|---|---|
| Scratches | Minor scratches are acceptable in certain designs. | Scratches can affect the product’s aesthetic appeal. |
| Stretch Marks | Can be acceptable in premium products for a unique look. | Adds character but needs to be evaluated based on product type. |
| Scuff Marks | Not acceptable for high-end products. | Scuffs compromise the look and feel of the leather. |
What Packaging Checks Are Essential?
Packaging plays a vital role in ensuring that leather boxes reach the customer in pristine condition. Effective packaging not only protects the product during transport but also enhances the unboxing experience, which can be a critical factor for high-end leather goods. Packaging checks involve verifying that the box is packed securely and that it meets all the necessary standards for safe shipping.
Proper packaging ensures that the leather box arrives undamaged and maintains its premium quality. It also enhances the customer’s experience, making the product feel even more luxurious.
What Internal Protection Requirements Exist?
Leather boxes are often delicate, so internal protection is critical during shipping. To ensure the product isn’t damaged, padding and structural support should be used inside the box. The following internal packaging materials should be considered:
- Foam Inserts: Use foam inserts to prevent the leather box from shifting or being compressed during shipping. Foam is often used to provide cushion and prevent damage to the surface.
- Protective Wraps: Wrapping the leather box in soft tissue paper or plastic wraps can protect it from surface abrasions and moisture. This is especially important for high-end products that need to retain their pristine finish.
- Dividers for Multiple Boxes: If shipping multiple leather boxes together, ensure that each box is separated by dividers to prevent contact between them. This prevents scratching and ensures the boxes retain their shape.
Internal Protection Packaging
| Packaging Type | Description | Why It Matters |
|---|---|---|
| Foam Inserts | Use foam pieces to protect the box from impact. | Prevents compression and maintains the box’s shape. |
| Protective Wraps | Wrap leather boxes in soft tissue or plastic. | Prevents surface scuffs and protects the finish. |
| Dividers | Separate multiple boxes with dividers in larger shipments. | Protects against scratches and ensures safe transport. |
What External Packaging Standards Matter?
External packaging is just as important as internal protection. The external packaging ensures that the leather boxes are securely delivered to customers without damage during transit. Key aspects to consider include:
- Box Strength: The shipping box should be durable enough to handle the weight and pressure of the leather box inside. Double-walled corrugated cardboard is a common choice for sturdiness.
- Sealing: Ensure that the shipping box is properly sealed to avoid accidental openings during transit. Use high-quality packing tape that can withstand handling.
- Branding on Packaging: For premium leather boxes, custom-branded packaging adds to the luxury feel. Consider including your company logo or branding elements on the exterior box to reinforce brand identity.
How to Document & Report QC Results?
Effective documentation and reporting of quality control (QC) results are crucial in maintaining high production standards, identifying issues early, and ensuring consistent quality over time. Accurate record-keeping not only helps in tracking performance but also provides valuable insights for continuous improvement. Here’s how to document and report QC results effectively:
Properly documenting QC results allows manufacturers to track issues, make informed decisions for improvements, and ensure that quality standards are met consistently in every production batch.
How to Fill QC Check Forms?
QC check forms are an essential tool for recording inspection results during the production process. Filling out these forms ensures that every quality control test is documented and can be reviewed for quality assurance purposes.
- Use Clear and Structured Formats: Create a structured form that covers all aspects of the leather box QC process—fit, gap, alignment, surface quality, stitching, and packaging. Each section should include fields for specific measurements, conditions, and the status of the inspection (e.g., pass, fail, or needs adjustment).
- Include Product Identification Information: Every QC check form should include important details like the product batch number, production date, and the inspector’s name. This information ensures that any issues can be traced back to a specific production run and personnel.
- Define Measurement Criteria: Clearly define the acceptable measurement ranges for each QC check. For example, if the gap between panels should be within 1-2mm, ensure that this is specified on the form, along with acceptable tolerances for deviations.
- Document Issues and Defects: If the leather box fails any of the QC checks, document the specific defect in detail. This includes describing the issue, its severity, and the exact location. For example, if there is a seam that is uneven, specify which seam (e.g., bottom left corner) and how much the stitching deviates from the standard.
- Provide Actionable Feedback: After documenting defects, provide a space for the inspector to suggest corrective actions. For example, if the stitching is uneven, the corrective action could be “Rework stitching with a 3mm stitch length gauge.”
Sample QC Check Form
| QC Area | Measurement Criteria | Inspection Result | Defect Noted | Corrective Action |
|---|---|---|---|---|
| Fit | Gap: 1-2mm between lid and base | Pass/Fail | N/A | N/A |
| Gap | Gap tolerance: 2mm | Pass/Fail | 1mm gap on right side | Adjust lid hinge placement |
| Stitching | Stitch length: 3mm | Pass/Fail | Uneven stitching on bottom | Rework stitching with gauge |
| Surface Quality | No visible scratches or discoloration | Pass/Fail | Small scratch on front panel | Replace affected panel |
| Packaging | Box sealed with tape, padded inserts | Pass/Fail | N/A | N/A |
How to Use QC Data for Improvement?
QC data isn’t just about passing or failing an inspection; it provides valuable insights that help identify trends, recurring issues, and opportunities for process improvement. Here’s how to leverage QC data for continuous improvement:
- Track Defects Across Batches: By consistently recording the types of defects found in each batch (e.g., stitching issues, surface blemishes, misalignment), manufacturers can track recurring issues and identify root causes. For instance, if seam alignment issues are frequently noted in a particular production run, it could point to a problem with the stitching machine calibration.
- Analyze Defect Patterns: After gathering QC data over several production runs, analyze the patterns in the types and frequency of defects. If defects are occurring at the same point in the process (e.g., during assembly), this could indicate that a particular stage of production needs improvement.
- Adjust Production Processes: Use the QC data to refine production methods. If the data indicates that specific materials (e.g., leather) tend to have color inconsistencies or surface defects, the manufacturing team may need to work with suppliers to improve material quality or adjust production techniques.
- Implement Corrective Actions: Use the QC findings to implement corrective actions and adjustments to production. For instance, if surface defects are commonly found in leather during the finishing process, the finishing team can adjust techniques or tools to reduce the likelihood of those defects occurring.
- Monitor Improvement Over Time: Continuously monitor the effectiveness of implemented improvements by comparing future QC data to previous results. If defects decrease over time, this indicates that the changes made were successful. However, if defects remain consistent or increase, further adjustments are needed.
Using QC Data for Improvement
| Defect Type | Frequency | Root Cause Identified | Corrective Action | Impact on Production |
|---|---|---|---|---|
| Stitching Issues | 10% of the units in batch | Stitching machine needs calibration | Recalibrate stitching machine | Reduced defect rate by 25% |
| Surface Imperfections | 5% of the units in batch | Inconsistent leather batch received | Request a different batch of leather from supplier | Improved surface quality in next batch |
| Misalignment | 7% of the units in batch | Manual alignment error during assembly | Train workers on proper alignment | Reduced misalignment by 15% |
| Gap Issues | 3% of the units in batch | Inaccurate measurements for lid and base | Adjust pattern design and re-test | Improved fit in next batch |
How to Communicate QC Feedback to Production?
Effective communication of QC feedback to the production team is crucial for ensuring that identified issues are addressed and resolved promptly. Here’s how to streamline the feedback process:
- Provide Clear and Actionable Feedback: When communicating defects, make sure the feedback is clear, specific, and actionable. Avoid vague statements like “poor stitching” and provide concrete details, such as “stitching length inconsistent across seams” or “stitches too tight on the left panel.”
- Use Visual Aids: Sometimes words aren’t enough to communicate the issue effectively. Include photos, diagrams, or even video clips to demonstrate the defects. This will help the production team understand exactly where and what the issue is, making it easier to resolve.
- Create a Feedback Loop: Establish a system where production teams receive immediate feedback on issues found during QC inspections. This ensures that problems are addressed in real time and that adjustments can be made before the next production batch.
- Track Corrective Actions and Outcomes: Maintain a record of the corrective actions taken based on QC feedback. For instance, if stitching issues were identified, track whether the changes made have led to an improvement in subsequent batches.
- Hold Regular Meetings: Conduct regular meetings between the QC and production teams to discuss recurring issues, share solutions, and review corrective actions. This helps maintain alignment across departments and fosters a culture of continuous improvement.
Communication Process for QC Feedback
| Stage | Action | Why It Matters |
|---|---|---|
| Provide Feedback | Use specific, clear language and include visual aids. | Ensures that the issue is understood and can be resolved quickly. |
| Feedback Loop | Communicate issues immediately to production. | Prevents defects from persisting into the next production batch. |
| Track Corrective Actions | Document corrective actions and monitor results. | Helps track improvements and measure success over time. |
| Regular Meetings | Hold regular meetings between QC and production teams. | Ensures continuous communication and proactive issue resolution. |
Conclusion:
High-quality leather boxes require thorough attention to detail during the production process. By focusing on key quality control areas such as fit, gap, alignment, surface quality, and packaging, brands can ensure their leather boxes meet the highest standards of craftsmanship and functionality. If you are looking to ensure your leather boxes meet these standards, Szoneier Leather offers expert manufacturing services and quality control support. Contact us today for custom solutions and a quote!