 Skip to content
 How to Make a Leather Box: The Ultimate Guide
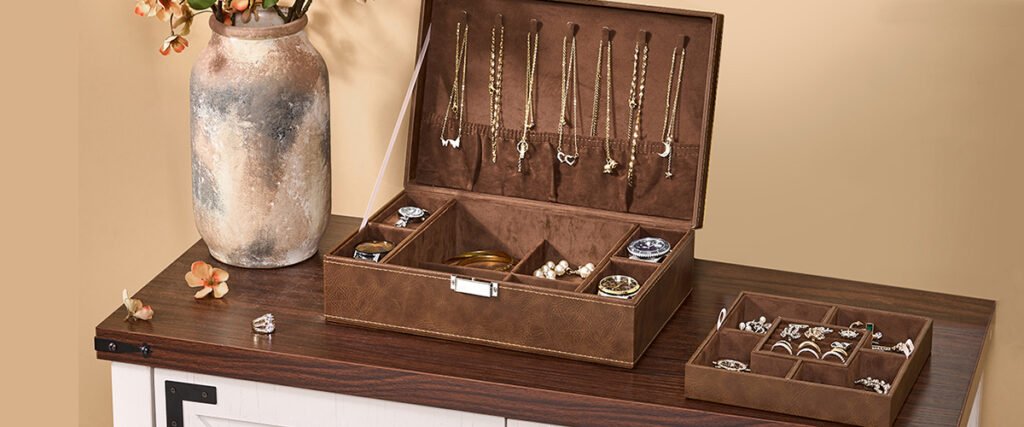
Leather boxes are functional art,perfect for storing keepsakes, organizing desks, or gifting a handcrafted treasure. But crafting one from scratch can seem daunting. With the right materials, tools, and techniques, you can create a box that’s not only sturdy and beautiful but also uniquely yours.
To make a leather box, select a firm yet workable leather (full-grain or top-grain), draft precise pattern pieces for panels and lid, cut and bevel edges, reinforce with stiffener or board, glue and stitch panels together, line the interior, apply dyes or finishes, and burnish edges for a polished look.
Ready to tell your own leather-box story? Let’s dive in.
What Materials and Leathers Are Best for Crafting a Box?
Choose vegetable-tanned full-grain (2–3 mm) for maximum stiffness or top-grain (1.5–2 mm) for smoother finish. Use leatherboard (1 mm) or balsa wood (2–3 mm) inserts for structure, contact cement, and suede/Alcantara for a luxe lining.
Leather Grades & Thickness
| Grade | Thickness | Rigidity | Cost ($/ft²) |
|---|---|---|---|
| Full-Grain | 2–3 mm | Very High | 20–30 |
| Top-Grain | 1.5–2 mm | High | 15–25 |
| Genuine/Corrected | 1–1.5 mm | Medium | 8–12 |
Core Materials for Structure
- Leatherboard: Compressed fibers, 1–2 mm; bonds easily.
- Balsa Wood or MDF: Provides stiffness; heavier—ideal for larger boxes.
- Chipboard: Budget option; laminate leather on both sides to hide grey core.
Adhesives & Finishes
- Leather Cement: Fast-grab, flexible bond for panels.
- Contact Cement: Strong permanent bond—apply to both surfaces, let tack, then press.
- Edge Dye & Burnishing Gum: For coloring and sealing edges.
Lining Fabrics
| Lining | Feel | Thickness | Use Case |
|---|---|---|---|
| Suede | Soft, plush | 0.5–1 mm | Jewelry & keepsakes |
| Alcantara | Smooth, durable | 0.8 mm | High-end presentation |
| Microfiber Felt | Budget-friendly | 1 mm | Desk organizers |
Which Tools and Supplies Do You Need to Build a Leather Box?
Essential tools include a straight knife or rotary cutter, metal ruler, cutting mat, edge beveler, groover, stitching awl, mallet, brass rivets or Chicago screws, and burnishing tools for clean, professional edges.
Cutting & Marking Tools
| Tool | Purpose |
|---|---|
| Rotary Cutter | Precise straight cuts |
| Self-Healing Mat | Protects work surface |
| Scratch Awl | Mark fold and stitch lines |
Shaping & Edge Finishing
- Edge Beveler: Rounds leather edges for smooth burnishing.
- Groover: Cuts consistent stitch grooves,keeps thread sunk below surface.
- Burnisher/Rubber Mallet: Polishes edges with gum or wax.
Assembly & Stitching
| Tool | Use |
|---|---|
| Stitching Awl | Punches holes for hand-stitching |
| Wing Divider | Marks equal distance from edge |
| Beeswaxed Thread | Lubricated for smooth stitching |
Hardware Installation
- Chicago Screws & Brass Rivets: For removable or decorative joinery.
- Mallet & Setter: Secure hardware without deforming leather.
Workspace Essentials
- Sturdy Table: Resist mallet blows.
- Good Lighting: Spot imperfections early.
- Storage Bins: Organize small parts and tools.
How Do You Design and Dimension Your Leather Box Pattern?
Draft panels—base (W×D), front/back (W×H), sides (D×H), lid (W×D + overlap). Add 3–5 mm seam allowances and fold lines. For accuracy, use CAD software or create a kraft paper prototype to fine-tune dimensions before cutting leather.
Pattern Breakdown
| Panel | Dimensions | Notes |
|---|---|---|
| Base | Width × Depth | + seam allowance |
| Front/Back | Width × Height | Height includes lid overlap |
| Sides | Depth × Height | Mirror front/back height |
| Lid | Width × Depth + 5–10 mm lip | Lip ensures snug closure |
Seam & Fold Allowances
- Seam Allowance: 3 mm typical; 5 mm for heavy glues.
- Fold Lines: Mark with awl before applying adhesive to prevent misalignment.
Prototyping
- Paper Mock-Up: Use kraft paper to simulate panels.
- Adjust for Thickness: Account for panel thickness in final dimensions—e.g., a 2 mm leather adds 4 mm total width.
Digital Enhancement
- CAD Tools: AutoCAD or Illustrator—export DXF for laser/CNC.
- Plotter Output: Eliminates taping errors; ideal for precision factory prototyping.
Insight
- Pattern complexity: Simple rectangular boxes are faster; consider curved lids for advanced crafters.
- Factory service: Szoneier’s pattern department offers nesting optimization, reducing leather waste by up to 18%.
How Is Leather Cut and Prepared for Box Construction?
Condition hides (clean and flatten), align grain, transfer pattern with scratch awl or pen, cut panels with a sharp blade on a cutting mat, bevel edges, and apply edge-sealer or gum before assembly.
Hide Preparation
- Flattening: Place hides under weight for 24 h to ease cutting.
- Cleaning: Wipe surface with damp cloth to remove dust.
Grain Alignment & Layout
| Method | Waste % | Consistency |
|---|---|---|
| Manual Layout | 20–25% | High |
| CNC Nesting | 5–10% | Very High |
Cutting Techniques
- Straight Knife vs. Rotary Cutter: Knife for thick leather; rotary for thinner hides.
- Consistent Pressure: Prevents jagged edges; use a guide bar for straight cuts.
Edge Beveling & Sealing
- Beveler Size: 2–3 mm for box edges.
- Edge Gum Application: Light coat, let tack, then burnish with wood slicker.
Quality Inspection
- Compare cut pieces to pattern; check for distortion.
- Ensure consistent bevel depth and clean edges.
How Do You Assemble and Glue the Leather Pieces into a Box Form?
Apply contact cement to adjoining edges, allow tack development (~10 min), press panels together, use jigs or clamps to maintain 90° corners, reinforce key seams with stitching or rivets once bonded.
Adhesive Choice & Application
- Contact Cement: Brush or spray both surfaces, wait until tacky (no transfer), then bond with firm pressure.
- PVA Leather Glue: For interior liners—dries flexible, but slower set.
Assembly Sequence
| Step | Action |
|---|---|
| Base to Sides | Align base panel, clamp at corners |
| Front/Back | Bond to base and side panels |
| Lid Lip | Attach lid inner lip last |
Corner Jigs & Clamps
- 3D Blocks: Custom wood jigs hold 90° angles during glue set.
- F-Clamps: Even pressure across edges—avoid denting leather.
Reinforcement Options
- Stitching: Saddle stitch along inside seams adds security.
- Rivets/Screws: Decorative and functional for removable lids.
What Stitching or Edge-Finishing Techniques Enhance Durability?
Use saddle stitching with waxed thread through grooved channels, reinforce corners with bar-tacks, bind seams with edge piping, and burnish edges with multiple passes of gum and a slicker for a sealed, professional finish.
Saddle Stitching
- Groove Depth: 1 mm below surface to sink thread.
- Thread Size: 0.8–1.0 mm waxed linen or polyester.
- Stitch Length: 2.5–3 mm for strength and aesthetics.
Bar-Tacks & Reinforcements
- Corner Bar-Tacks: 5 mm long zigzag tack at stress points.
- Rivet Backing: Leather washer on interior spreads load.
Edge Binding & Piping
- Bias Tape: Encases raw edges; hand-stitch for neatness.
- Leather Piping: 2 mm cord cased in leather for accent and edge protection.
Edge Burnishing
- Gum Application: 3–4 coats of gum, burnish dry between passes.
- Tools: Wooden slickers or canvas-wrapped thumbs.
How Do You Line and Reinforce the Interior for Structure?
Glue or stitch thin suede or Alcantara panels inside, backed by cardboard or leatherboard inserts, then stitch or rivet in place. Add interior pockets with sewn seams and binding for both function and box integrity.
Lining Material Selection
- Suede: Soft, hides scratches; 0.5–0.8 mm thickness.
- Alcantara: Luxurious, durable; 1 mm thickness.
- Microfiber Felt: Budget-friendly, 1–2 mm.
Insert Types & Placement
| Insert Material | Location | Purpose |
|---|---|---|
| Leatherboard (1 mm) | Base & Sides | Prevent sag, maintain shape |
| Cardboard (2 mm) | Base | Easy to replace if damaged |
| MDF (3 mm) | Large boxes | Maximum rigidity—heavier |
Pocket Integration
- Slip Pockets: Glue around edges, stitch bottom seam.
- Zippered Pockets: Sew lining panel first, then attach to interior.
Securing Liners
- Stitch & Cement: Bond liner edges under top lip, then stitch for strength.
- Hidden Rivets: Decorative brass rivets anchor liner in utility boxes.
What Surface Treatments, Dyeing, and Finishes Are Used?
Apply aniline or semi-aniline dyes for rich color, seal with lace dye or edge dye, finish edges with burnishing gum, and protect surfaces with leather balm or wax. Emboss or laser-etch for custom branding.
Dye Types & Methods
| Dye Type | Penetration | Surface Look |
|---|---|---|
| Aniline | Deep | Natural grain |
| Semi-Aniline | Moderate + finish | Slight sheen |
| Pigmented | Surface only | Uniform color |
Edge Dye & Burnishing
- Edge Dye: Alcohol-based or water-based dyes applied in thin coats.
- Burnishing: 3–5 passes with gum and slicker until edges are glassy.
Protective Topcoats
- Leather Balm: Beeswax and oils nourish surface.
- Wax Polish: Adds water resistance and shine.
Branding Techniques
- Embossing: Hot-foil stamping with metal dies for logos.
- Laser Etching: Precise graphics and text on leather surface.
How Do You Maintain and Care for Your Finished Leather Box?
Dust regularly, wipe with damp cloth, condition with neutral leather balm every 6–12 months, keep away from direct sunlight and humidity extremes, and repair scratches with touch-up dyes. Store with silica packets to control moisture.
Cleaning & Dusting
- Frequency: Weekly dusting with soft microfiber.
- Spot Cleaning: Lightly moistened cloth; avoid harsh chemicals.
Conditioning Schedule
| Interval | Product | Purpose |
|---|---|---|
| 6 months | Neutral leather balm | Maintain suppleness |
| Annually | Deep-conditioning wax | Restore oils, fill minor scratches |
Environmental Control
- Avoid UV Light: Prevents fading and drying.
- Humidity: 40–60% ideal; silica packets prevent mold.
Scratch & Scuff Repair
- Touch-Up Dye Pens: Match original color for small marks.
- Leather Cream: Buffs out light scuffs and restores sheen.
Why Choose Szoneier Leather as Your Trusted Customizable Leather Boxes Manufacturer?
Choosing Szoneier Leather means partnering with a factory that truly understands every step of the leather-box journey—from raw-material innovation to precision manufacturing. Here’s why brands and designers trust us:
End-to-End Expertise
Over 18 years of R&D in hides, finishes, pattern engineering, prototyping, and full-scale production ensures your vision is executed flawlessly.
Premium, Consistent Materials
We source and custom‐tan full-grain and top-grain leathers, backed by leatherboard and eco-friendly cores, delivering rigidity and longevity in every box.
Customization at Low MOQ
Start with as few as 50 pieces, choosing your leather grade, lining (suede, Alcantara, felt), hardware finishes, embossing, and edge colors—without massive upfront investments.
Rapid Sampling & Production
Receive your prototype in 5–7 days, then scale to bulk runs with guaranteed on-time delivery, thanks to our streamlined workflows and in-house pattern and cutting studios.
Consistent Quality Assurance
Every box undergoes 100% pre-shipment inspection, including dimensional checks (±0.5 mm), adhesive pull tests (≥15 N/mm²), stitch-tension audits, and finish uniformity reviews.
Sustainability & Traceability
Our vegetable-tanned leathers and certified leatherboard reduce waste; full supply-chain transparency (LWG-rated tanneries) means you can confidently communicate your eco-credentials.
Collaborative Partnership
From free design support to post-delivery care kits, we act as an extension of your team—ensuring you deliver a product your customers will cherish for years.
What Can I Do For You?
Here, developing your OEM/ODM private label leather goods collection is no longer a challenge,it’s an excellent opportunity to bring your creative vision to life.
Make A Sample First?
If you have your own tech packs, logo design artwork, or just an idea,please provide details about your project requirements, including preferred fabric, color, and customization options,we’re excited to assist you in bringing your leather goods designs to life through our sample production process.