Most leather bag sampling problems don’t come from “bad craftsmanship.” They come from unconfirmed measurements—the quiet 3–5 mm errors that turn into crooked zippers, wavy top lines, stressed corners, or a bag that looks smaller (or bulkier) than the design intended. Leather behaves differently from fabric: it has thickness, memory, and resistance. That means pattern measurements must account for construction method, skiving, edge finishing, reinforcement, and hardware—not just the finished size you want on the product page.
Leather bag pattern making works best when brands lock six measurement groups before sampling: finished dimensions (W×H×D), panel cutting sizes, seam and turn-in allowances, gusset/base geometry, thickness compensation (leather+lining+reinforcement), and all placement coordinates for zippers, handles, straps, and hardware. Confirming these early reduces sampling rounds, shortens lead time, and makes mass production consistent.
Here’s the honest reality: two factories can follow the same sketch and still deliver two very different bags—because their measurement assumptions differ. Let’s make those assumptions visible and measurable, so your first sample has a real chance of being “sellable,” not just “acceptable.”
What measurements define a leather bag pattern?
When brands talk about “pattern making,” many are actually thinking about the silhouette drawing. But in leather production, a pattern is not just a shape — it is a measurement system that controls structure, fit, cost, and repeatability.
If even one measurement group is unclear, you risk:
- Crooked zipper lines
- Uneven gussets
- Tight corners
- Distorted top openings
- Inconsistent bulk production
A leather bag pattern is defined by six core measurement groups:
- Finished dimensions
- Panel cutting sizes
- Seam and turn-in allowances
- Gusset geometry
- Thickness compensation
- Placement coordinates (zippers, handles, hardware)
Let’s break these down in practical terms — the way a factory engineer thinks about them.
1. Finished Dimensions
These are the measurements customers see and judge immediately.
Brands must clearly define:
- Width (top vs bottom?)
- Height (to top edge or to zipper?)
- Depth (base depth or filled depth?)
- Opening length
Example control table:
| Dimension | Definition | Common Tolerance |
|---|---|---|
| Top Width | Left top edge to right top edge | ±2–3 mm |
| Bottom Width | Base corner to base corner | ±2–3 mm |
| Height | Base center to top edge | ±2–3 mm |
| Base Depth | Front base to back base | ±2–3 mm |
| Opening Width | Zipper start to zipper end | ±2 mm |
Important:
In leather goods, 2–3 mm matters visually. On smaller bags (under 25 cm width), tolerance should be tighter.
If finished dimensions are not clearly defined, sampling becomes guesswork.
2. Panel Cutting Sizes
The cutting size is usually larger than the finished size.
Why?
Because leather seams “consume” material.
For example:
If your finished width = 350 mm
Seam allowance = 10 mm each side
Cutting width becomes:
350 mm + 20 mm = 370 mm
But that’s still incomplete.
You must also include:
- Thickness compensation
- Turn-in allowance (if folded edges)
- Skiving zone
A real-world example:
| Item | Measurement |
|---|---|
| Finished panel width | 350 mm |
| Seam allowance | +20 mm |
| Thickness adjustment | −2 to −4 mm |
| Turn-in (if applicable) | +12–15 mm |
| Final cutting width | 380–385 mm |
If these numbers are not documented clearly, the factory must “decide” for you.
And that’s where inconsistency begins.
3. Seam Allowance and Stitch Line Distance
Leather seam allowance depends on:
- Leather thickness
- Construction method
- Stitch type
- Edge finishing
Common seam allowances:
| Construction Type | Seam Allowance |
|---|---|
| Edge paint construction | 8–10 mm |
| Turned edge | 10–12 mm |
| Bound seam | 10–15 mm |
Brands must also define:
- Stitch distance from edge (usually 3–5 mm)
- Stitch density (4–5 stitches per cm common in premium goods)
If stitch line is too close to edge:
- Risk of tear increases
If too far:
- Bag looks bulky
Small seam changes affect overall bag width by several millimeters.
4. Gusset Geometry
The gusset is where most pattern errors happen.
To define gusset properly, you must confirm:
- Gusset depth (D)
- Gusset length (must match panel perimeter)
- Corner radius
- Base curve measurement
For U-shaped gusset bags:
Gusset length must equal:
Front panel perimeter
minus seam allowance
minus thickness compensation
Even a 3 mm mismatch causes:
- Puckering
- Corner wrinkling
- Zipper distortion
Example matching logic:
| Component | Measurement |
|---|---|
| Front panel curve perimeter | 980 mm |
| Seam allowance adjustment | −20 mm |
| Thickness compensation | −4 mm |
| Final gusset length | 956 mm |
Without this math, shape imbalance appears.
5. Thickness Compensation (Often Ignored)
Leather thickness affects shape more than most brands expect.
If leather = 1.6 mm
Two panels meet = 3.2 mm
That affects:
- Internal volume
- Zipper curve
- Corner folding
- Top opening width
Also include:
- Lining thickness (0.3–0.6 mm)
- Reinforcement thickness (0.5–1.0 mm)
- Foam padding (2–4 mm if used)
Total stack example:
| Layer | Thickness |
|---|---|
| Leather | 1.6 mm |
| Lining | 0.5 mm |
| Reinforcement | 0.8 mm |
| Total single panel | 2.9 mm |
When folded or stitched, this multiplies.
Brands should confirm:
- Final effective panel thickness
- Skived thickness after reduction
- Tolerance (±0.1–0.2 mm typical)
Thickness changes are the main reason zipper lines wave.
6. Hardware and Placement Coordinates
Hardware placement must use absolute reference measurements.
Not “approximately centered.”
Define:
- Distance from side seam
- Distance from top edge
- Hole spacing
- Strap anchor distance
Example control table:
| Hardware | Horizontal Position | Vertical Position |
|---|---|---|
| D-ring | 40 mm from side seam | 35 mm from top edge |
| Magnet | Centered | 50 mm from top edge |
| Logo plate | Centered | 80 mm from top edge |
| Rivets | 15 mm from stitch line | Defined by template |
A 5 mm shift is visible.
Professional factories use positioning templates during bulk.
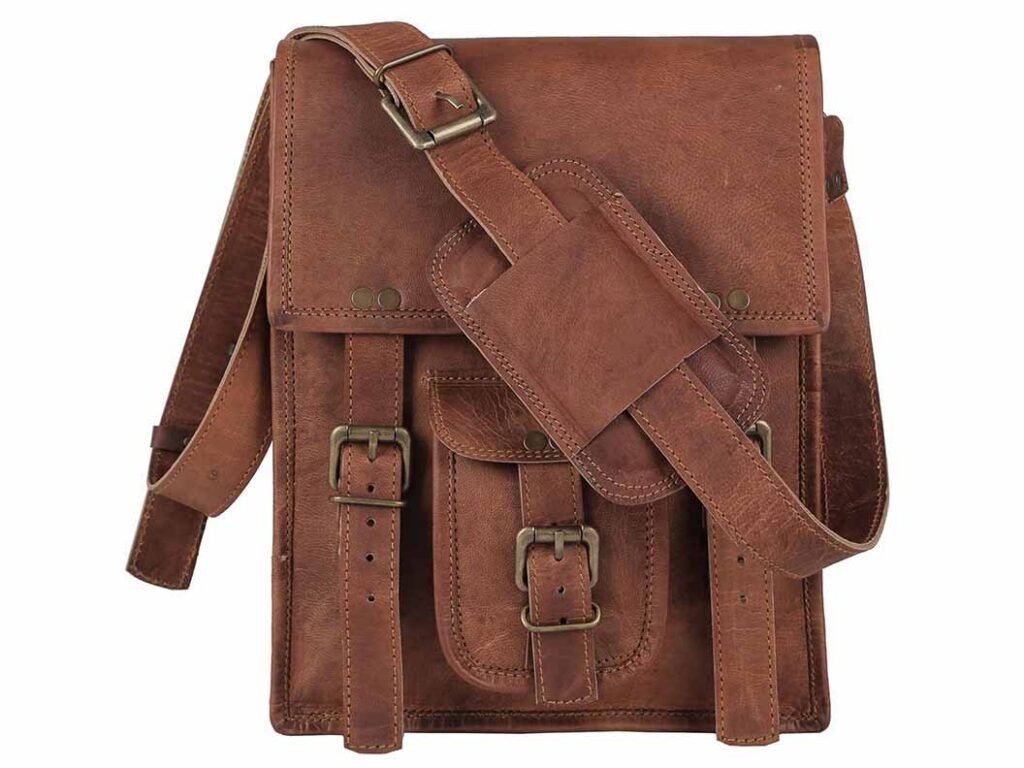
7. Strap & Handle Measurements
These directly affect comfort.
Brands must confirm:
- Total handle length
- Handle drop (vertical distance)
- Strap adjustable range
- Hole spacing (20–25 mm common)
Handle drop guidelines:
| Bag Type | Common Drop |
|---|---|
| Small handbag | 15–18 cm |
| Shoulder bag | 20–24 cm |
| Tote | 22–28 cm |
Too short = uncomfortable
Too long = poor balance
Adjustable strap must include buckle wrap allowance (60–80 mm extra leather).
8. Measurement Tolerance Planning
Even perfect measurements must include tolerances.
Suggested tolerances:
| Area | Tolerance |
|---|---|
| Visible bag width | ±2–3 mm |
| Hardware placement | ±2 mm |
| Strap length | ±5 mm |
| Internal pocket | ±3–5 mm |
Without tolerance standards, bulk production drifts.
Which gusset and base sizes matter?
Gusset depth, gusset length, base width, and corner radius are the measurements that most strongly control shape, capacity, and stability. If gusset math is wrong, the bag will twist, wrinkle at corners, or pull the top line out of shape—especially on zipper openings.
Gusset geometry is where bags get “expensive” fast
Leather is unforgiving at corners. A gusset that is even slightly too long will force the front panel to stretch (visually) or buckle (physically). A gusset that is slightly short will create tension, causing stitch pucker, zipper wave, or corner stress.
To control this, brands should confirm:
- Depth (D): the visual thickness of the bag
- Gusset length: must match the panel perimeter it attaches to
- Corner radius (R): affects wrinkle risk and assembly ease
- Base width: affects how the bag stands and how “premium” it feels
Which gusset depth is right?
Gusset depth should reflect what customers carry and how the bag is marketed (compact vs roomy). Practical depth ranges:
| Bag Type | Common Gusset Depth | What It Feels Like |
|---|---|---|
| Mini crossbody | 50–70 mm | slim, light carry |
| Daily shoulder bag | 70–100 mm | balanced capacity |
| Medium tote | 100–140 mm | laptop + essentials |
| Work tote | 140–180 mm | heavier carry, more structure |
Customer-focused tip: If your product photos show a “flat” silhouette, keep depth conservative. If your reviews emphasize capacity, increase depth but reinforce the base to avoid sagging.
Also confirm whether the depth is measured:
- at the base, or
- at the widest point when filled
Those can be very different in soft constructions.
Which base width works best?
Base width decides if the bag stands nicely and whether it feels stable when set down. A simple proportional check helps:
- For structured totes, base depth often looks best at 35–45% of bag height.
- For softer totes, 30–40% is more natural.
Example rule check:
| Height (H) | Suggested Base Depth (D) | Notes |
|---|---|---|
| 240 mm | 80–105 mm | compact tote |
| 280 mm | 95–125 mm | daily tote |
| 320 mm | 110–145 mm | work tote |
If base is too narrow, the tote tips easily and looks “thin.”
If base is too wide, the tote looks bulky and the leather consumption rises fast.
Cost reality (why brands should care): Increasing base depth by 20 mm can increase leather usage materially—especially on larger totes. Ask your factory for a material yield check when changing base dimensions.
How to mark notches & match points?
Notches are the “assembly language” between pattern and production. Brands should require match points on:
- Center top, center bottom
- Quarter points on curved areas
- Gusset-to-panel start/end points
- Zipper midpoint
- Hardware centerline (D-ring, buckle, magnet)
A clean match-point plan reduces production defects and keeps symmetry consistent across batches.
Here is a simple factory-friendly spec:
| Area | Match Points to Mark | Why It Matters |
|---|---|---|
| Gusset | 0%, 25%, 50%, 75%, 100% | prevents twisting, keeps curves smooth |
| Front/Back panel | center + quarter points | aligns gusset evenly |
| Zipper | midpoint + end stops | prevents zipper wave |
| Top edge | left/right symmetry marks | keeps opening level |
Customer-focused tip: Misaligned gussets don’t just look bad—they cause uneven stress and shorten product life. Match points reduce returns caused by “crooked” appearance.
How do leather thickness and construction change the pattern?
Leather thickness must be calculated into every pattern measurement because leather does not collapse like fabric. A 1.8 mm leather folded over creates 3.6 mm of thickness build-up, which directly changes zipper alignment, panel curvature, and gusset length. If thickness compensation is not included in pattern math, the bag will distort during assembly.
Why thickness is not “just a material detail”
In leather goods, thickness affects:
- Internal volume
- Seam stacking bulk
- Zipper wave formation
- Corner wrinkling
- Edge paint durability
Common leather thickness ranges:
| Leather Type | Thickness Range |
|---|---|
| Soft lambskin | 0.8–1.2 mm |
| Cowhide (fashion) | 1.2–1.6 mm |
| Structured tote leather | 1.6–2.2 mm |
| Reinforcement leather | 2.0–3.0 mm |
Now consider this scenario:
If your tote front panel is 1.8 mm thick and you attach a gusset with 1.8 mm leather on both sides, the internal curve increases by approximately 3–4 mm due to stacking. If that extra space is not subtracted from the zipper length, the zipper will ripple.
How do you calculate thickness compensation?
A practical formula many factories use:
Adjusted panel perimeter = Desired finished perimeter – (Leather thickness × number of fold layers)
Example:
- Leather thickness = 1.6 mm
- Turned edge fold = 2 layers
- Compensation needed ≈ 3.2 mm
If the gusset perimeter measures 980 mm on paper, and you ignore thickness, the assembled perimeter may become 983–986 mm — enough to cause visible distortion.
Brands should confirm in tech pack:
- Leather thickness tolerance (±0.1–0.2 mm)
- Skiving thickness after reduction
- Whether thickness compensation is already built into pattern
How does skiving change measurements?
Skiving reduces leather thickness along edges.
If you skive from 1.8 mm down to 0.8 mm on a 12 mm edge:
- Fold bulk reduces
- Corner sharpness improves
- Stitch consistency increases
But skiving also slightly changes edge length under fold tension.
If skive zones are not consistent across panels, seam alignment will shift.
Brands should confirm:
- Skive width (typically 10–20 mm)
- Target skived thickness (0.6–1.0 mm common)
- Whether skiving is manual or machine
Uniform skiving = uniform shape.
How do lining and reinforcement affect measurement?
Lining fabric, reinforcement board, foam padding, and interlining add hidden thickness that changes internal dimensions and seam tension. Many brands confirm only outer leather size and forget internal construction.
Common internal materials:
| Material | Thickness Range |
|---|---|
| Polyester lining | 0.2–0.5 mm |
| Cotton lining | 0.3–0.6 mm |
| Non-woven reinforcement | 0.5–1.0 mm |
| Foam padding | 2–4 mm |
| PE board bottom | 1.5–2.0 mm |
Now consider stacking:
- 1.6 mm leather
- 0.5 mm lining
- 0.8 mm reinforcement
Total structural thickness = ~2.9 mm
If two sides meet, effective thickness doubles at seams.
This directly affects:
- Internal pocket width
- Zipper placement
- Magnet alignment
- Edge folding allowance
How do reinforcements change panel math?
Reinforcements increase stiffness — but also reduce flexibility.
If you reinforce entire front panel:
- Bag stands more upright
- But curve matching becomes stricter
If you reinforce only top edge:
- Opening remains stable
- Body stays flexible
Brands should specify:
- Reinforcement coverage area
- Reinforcement thickness
- Whether reinforcement is bonded before or after cutting
Small reinforcement changes can require panel resizing.
What zipper measurements must brands confirm?
Zipper length must match the actual opening curve after thickness compensation, not just the flat pattern width. Many sampling problems come from zipper miscalculation.
Zipper measurement checklist:
- Finished opening length (after fold)
- Zipper tape width
- Zipper stop position
- Allowance for zipper bend (on curved tops)
Example:
If top opening flat width = 360 mm
After thickness and fold compensation = 354 mm
Correct zipper chain length should match 354 mm, not 360 mm.
Common zipper misalignment causes:
- Wavy zipper line
- Excessive puckering
- Zipper too tight to close
Zipper control table
| Item | Recommended Confirmation |
|---|---|
| Zipper type | #5 nylon / #8 metal etc. |
| Finished zipper length | mm exact |
| Tape width | mm |
| Distance from top edge | 5–10 mm typical |
| End stop distance | measured from panel edge |
Clear numbers eliminate guesswork.
Which hardware placement measurements must be locked?
Hardware misplacement by even 5 mm can make a bag look asymmetrical or unbalanced. Brands should specify hardware coordinates relative to fixed reference points.
Confirm:
- D-ring center distance from side seam
- Magnet position from top edge
- Logo plate center alignment
- Rivet spacing
- Buckle placement
Example hardware positioning table:
| Hardware | Horizontal Position | Vertical Position |
|---|---|---|
| D-ring | 40 mm from side seam | 35 mm from top edge |
| Magnet center | centered | 50 mm from top edge |
| Logo plate | centered | 80 mm from top edge |
| Bottom studs | 30 mm from corners | aligned with base |
Using absolute coordinates prevents “looks slightly off” problems.
How do strap and handle measurements affect comfort?
Handle drop and strap length directly affect user comfort and perceived value. Incorrect drop length is one of the most common customer complaints.
What handle drop should you confirm?
Handle drop = vertical distance from top edge to highest handle point.
Common ranges:
| Bag Type | Handle Drop |
|---|---|
| Small tote | 18–22 cm |
| Medium tote | 22–26 cm |
| Large tote | 25–30 cm |
Too short:
- Difficult shoulder carry
Too long:
- Bag hits hip awkwardly
Also confirm:
- Handle width (18–25 mm common)
- Handle reinforcement thickness
- Stitch reinforcement area
How do adjustable straps change pattern?
Adjustable straps must include:
- Minimum length
- Maximum length
- Hole spacing (usually 20–25 mm apart)
- Number of holes (5–7 standard)
Example:
If target adjustable range = 100–120 cm
Hole spacing = 25 mm
Minimum strap cut length must include buckle wrap allowance (~60–80 mm extra)
Brands often forget buckle wrap allowance, resulting in shorter strap than expected.
Measurement Risk Checklist Before Approving Sample
Before approving your first leather bag sample, confirm:
- Finished size tolerance defined
- Thickness compensation calculated
- Skiving plan confirmed
- Reinforcement area mapped
- Zipper length adjusted for curve
- Hardware coordinates documented
- Handle drop measured physically
These controls reduce re-sampling rounds and improve bulk consistency.
How Do Pattern Tolerances Affect Mass Production?
Pattern tolerances define how much size variation is acceptable in bulk production. Without clear tolerance control, even correct patterns can produce inconsistent bags.
Leather is a natural material. Thickness varies. Grain tension varies. Humidity affects expansion. That means patterns must include controlled tolerance ranges.
Why tolerance matters more than perfect measurement
Let’s say your finished tote width is 360 mm.
If no tolerance is defined:
- Factory A may deliver 357 mm
- Factory B may deliver 364 mm
- Production batches may fluctuate
To a consumer, 7 mm difference is visible.
Professional tolerance control typically follows:
| Measurement Area | Recommended Tolerance |
|---|---|
| Visible external dimensions | ±2–3 mm |
| Internal pocket size | ±3–5 mm |
| Handle drop | ±3 mm |
| Hardware placement | ±2 mm |
| Strap length | ±5 mm |
Luxury brands often tighten tolerances further.
How does leather variation affect tolerances?
Leather thickness variation example:
If spec = 1.6 mm ±0.2 mm
Actual production range = 1.4–1.8 mm
When stacked across seams:
- Thickness difference may create 1–2 mm dimensional shift
- Zipper curvature may slightly change
- Edge folding may vary
Factories with strong raw material control reduce this risk by grading leather thickness before cutting.
Brands should confirm:
- Thickness grading standard
- Moisture conditioning process
- Pre-production measurement checks
Why Do Samples Pass but Bulk Production Fails?
This is a common brand frustration.
The sample looks perfect.
Bulk looks different.
Why?
1. Thickness consistency changes
Sample may use selected hides with uniform thickness.
Bulk uses larger volume with slight natural variation.
If pattern did not account for tolerance, bulk appears slightly off.
2. Manual assembly differences
Sample often made by senior craftsman.
Bulk made by team production.
If match points and seam guides are not clear, small errors multiply.
3. Hardware alignment shifts
In sampling, hardware is placed carefully.
In bulk, without measurement templates, placement drifts 2–5 mm.
Professional factories use positioning molds to avoid this.
4. Reinforcement material inconsistency
If reinforcement thickness changes even 0.3 mm, panel curvature changes.
Brands should confirm reinforcement supplier and thickness tolerance.
How Do You Calculate Load Stress in Leather Bags?
If your bag carries weight, pattern must support it.
Let’s break down stress logic.
Assume:
- Tote bag load = 15 kg
- Two handles share load
- Each handle bears 7.5 kg
Force calculation:
15 kg ≈ 147 Newtons total
Each handle ≈ 73.5 Newtons
But stress concentrates at stitch area.
If stitch box is 30 mm × 25 mm:
Stress distribution must consider leather tear strength and stitch strength.
Average leather tear strength (1.6 mm cowhide):
45–65 N per tear line
Therefore:
- Stitch reinforcement (X-box + bartack) is required
- Reinforcement patch under handle recommended
- Stitch density 4–5 stitches per cm ideal
Load test recommendation:
| Test | Requirement |
|---|---|
| Static load | 15 kg for 24 hours |
| Dynamic lift | 5 kg × 1000 cycles |
| Handle stretch | <5% elongation |
| Stitch failure | None allowed |
Professional factories perform hanging tests before bulk.
How Do Measurement Decisions Affect Cost?
Pattern decisions directly influence material consumption and labor time.
Example 1: Increasing Base Depth by 20 mm
If bag width = 360 mm
Base depth increase = 20 mm
Extra leather usage per bag ≈ 0.007–0.012 m²
At leather cost $25/m²:
Extra cost ≈ $0.18–0.30 per bag
For 5,000 units:
Cost increase ≈ $900–$1,500
Small measurement change, big impact.
Example 2: Adding Turned Edge Instead of Edge Paint
Turned edge requires:
- 10–15 mm extra material
- Skiving labor
- Glue + fold process
Adds:
- 8–15% labor cost
- 3–5% material cost
But increases retail perception significantly.
Measurement choices define margin.
Why Work with SzoneierLeather for Leather Bags Pattern Making?
Whether you are developing:
- Structured luxury totes
- Minimalist crossbody bags
- Premium leather backpacks
- Custom belts and straps
- Leather boxes and accessories
We help you confirm every key measurement before sampling begins.
Ready to Develop Your Leather Bag Collection?
If you are a brand owner or product developer looking for a professional factory partner, send us:
- Target retail price
- Target market
- Desired finished size
- Leather type preference
- Quantity estimate
Our engineering team will:
- Review pattern measurements
- Optimize thickness compensation
- Adjust gusset geometry
- Improve handle comfort
- Control production tolerances
- Provide structured cost analysis
Precision in pattern making protects your brand reputation.
Contact SzoneierLeather today to request custom development and sampling support.