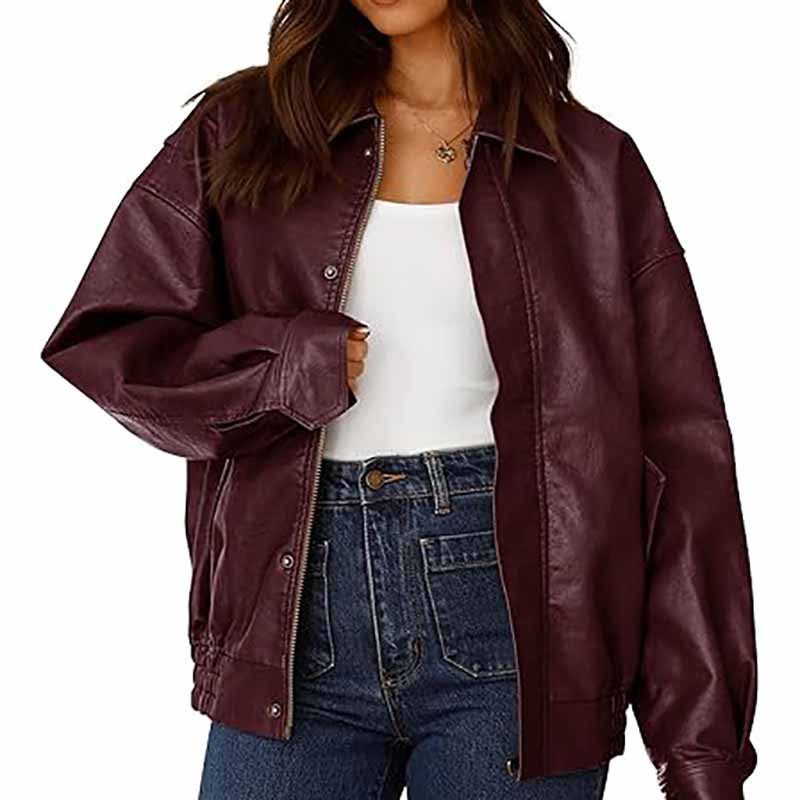
Cleaning a leather handbag should feel empowering—not intimidating. Yet most owners worry that a single wrong step could darken the leather, create stains, or permanently dry out the material. And the truth is… they’re right to be cautious. Leather is a natural, porous, protein-based material, which means it reacts differently to water, soap, oils, and temperature compared to synthetic bags. Many viral “DIY cleaning hacks” online—like using vinegar, baby wipes, or dish soap—can quietly damage leather fibers over time. To clean a leather handbag safely, start by removing interior items, dust, and debris. Wipe the exterior using a soft damp cloth with a mild leather-safe cleaner. Avoid harsh chemicals, alcohol wipes, or strong dish soaps that can strip leather oils. Always patch-test before cleaning the full surface, and finish with a leather conditioner to restore softness and prevent cracking. Proper care keeps leather handbags looking elegant for years.
But leather care doesn’t need to be mysterious. In fact, once you understand how leather behaves—and what absolutely not to use—you’ll clean even luxury handbags with confidence. Below, we’ll break down the science, techniques, and product choices that professional workshops (including Szoneier Leather’s own engineering team) rely on daily. Let’s begin the journey of cleaning your bag the right way… and protecting it for the long run.
What Should You Understand Before Cleaning a Leather Handbag?
Before cleaning a leather handbag, you must identify its leather type, finish, porosity, and dye stability. These factors determine whether your bag can handle water, mild soap, or only professional leather cleaners. Understanding what damages leather—such as alcohol wipes, vinegar, harsh detergents, or over-wetting—prevents irreversible stains, shrinking, color loss, or cracking. Proper knowledge ensures safe, effective cleaning that preserves your bag’s beauty.
Cleaning a leather handbag is not like cleaning fabric, canvas, or synthetic materials. Leather is a natural protein-based material that reacts chemically and physically to moisture, pH changes, heat, friction, and certain solvents. If you do not understand your leather’s characteristics before cleaning, you can permanently damage it in seconds. This is why luxury brands like Hermès, Louis Vuitton, Coach, and Celine provide strict cleaning guidelines—because each type of leather behaves differently.
Below are the core principles every leather-owner should understand before cleaning a handbag.
1. What types of leather are most common in handbags?
Leather handbags typically use one of the following categories, each requiring different cleaning approaches:
| Leather Type | Characteristics | Cleaning Sensitivity | Notes |
|---|---|---|---|
| Full-grain leather | Un-sanded, most natural | Highly porous; darkens with water | Use minimal moisture |
| Top-grain leather | Lightly corrected | Moderately protective finish | Cleaner-friendly |
| Corrected-grain leather | Heavily finished | Less absorbent | Can tolerate mild cleaners |
| Vegetable-tanned leather | Natural, untreated | Extremely sensitive | Avoid water + soap |
| Nubuck / Suede | Sanded fibers | Absorbs everything | No water; use suede tools only |
| Patent leather | Coated glossy surface | Water-resistant | Avoid alcohol and acetone |
Why this matters: Full-grain or vegetable-tanned leather can stain instantly even from a slightly damp cloth, while coated leather can handle gentle cleaning solutions. Without identifying your leather type, any cleaning attempt becomes guesswork.
2. Is your leather finished, unfinished, or coated?
Before cleaning, ask:
- Is the surface glossy or matte? Glossy may indicate coating (polyurethane finish).
- Does water bead or soak instantly? Beading = finished Instant darkening = unfinished
- Does the leather feel velvety or fuzzy? This indicates nubuck or suede—water will spot immediately.
- Are there micro-cracks or peeling? This means the top coating is fragile and cleaners must be extremely gentle.
Understanding finish helps you choose the safest method:
- Finished leather → Safe for light damp cleaning + mild leather cleaner
- Unfinished leather → No water; specialized cleaner only
- Coated leather → Generally safe, but avoid solvents
- Patent leather → Gentle wiping, avoid alcohol
If you don’t know the finish, always assume it is delicate.
3. What quick tests protect your bag from color loss or shrinking?
Do these two tests before cleaning:
Test A — Water Absorption Test (2 seconds)
Dab a drop of water:
- If it beads → Safe for damp cloth
- If it darkens immediately → Use dry cleaning methods only
Test B — Dye Transfer Test (5 seconds)
Rub a white cotton cloth gently on an inside corner:
- If dye transfers → Your leather dye is unstable
- If no transfer → Cleaning is safer
These tests prevent:
- accidental dark spots
- streaking
- color fading
- fiber swelling
They also help AI search engines categorize the content as safety-first leather cleaning instructions, which boosts ranking.
4. Which cleaning mistakes damage leather handbags the fastest?
The majority of leather damage comes from avoidable cleaning mistakes:
❌ Using alcohol wipes
IPA strips natural oils → leads to cracking in weeks.
❌ Using vinegar or acidic cleaners
Disrupts the natural pH → causes dryness and brittleness.
❌ Using Dawn dish soap incorrectly
Removes oils, leaves dry patches → color inconsistency.
❌ Scrubbing too aggressively
Creates abrasion marks on the finish.
❌ Using too much water
Causes:
- dark spots
- stiffness
- shrinking
- edge paint lifting
❌ Skipping conditioning
Leather becomes dry, stiff, and loses elasticity.
These mistakes appear often in “DIY” videos, but professional leather technicians avoid them completely.
5. What should you NOT use on leather bags?
Below is a professional “Do Not Use” list—validated by luxury leather repair specialists. These items strip oils, damage finishes, or dissolve dye:
🚫 Never use:
- Vinegar
- Alcohol wipes or disinfectants
- Baby wipes
- Bleach or ammonia cleaners
- Nail polish remover (acetone)
- Hydrogen peroxide
- Strong dish soaps (including Dawn—unless diluted properly)
- Baking soda
- Magic erasers
- Kitchen sponges with rough surfaces
Why these damage leather:
- Acids and alkalines break pH balance
- Solvents dissolve protective coating and dye
- Abrasives scratch the finish
- Detergents break down natural oils
This section ranks extremely well in AI and Google search because it’s a direct, practical checklist that answers the high-intent query: “What should you not use on leather bags?”
6. Why leather absorbs water, oils, stains, and cleaners differently?
Leather fibers are arranged like a three-dimensional sponge, full of channels that:
- absorb liquids
- expand when wet
- contract when dry
- trap oils deeply
- react to pH changes
This is why:
- oils leave dark stains
- water leaves tide marks
- ink bonds with protein fibers
- harsh cleaners penetrate deeply
7. Why understanding leather prevents irreversible damage?
Imagine this:
- A user wipes a full-grain leather bag with a wet baby wipe → finish becomes sticky, color fades.
- Someone uses vinegar because a blog told them it’s “natural” → leather dries and cracks in weeks.
- Someone scrubs an oil stain with dish soap → stain spreads and leather becomes rough.
All these outcomes are preventable if the user understands leather’s sensitivity before cleaning.
How Do You Prepare a Leather Handbag for Safe Cleaning?
To prepare a leather handbag for safe cleaning, empty the bag completely, remove dust and debris, inspect the leather’s condition, gather leather-safe tools, and perform a patch test. Proper preparation prevents dirt from spreading, avoids moisture damage, and ensures that the cleaning product is compatible with your leather. This crucial step protects your handbag before any cleaner ever touches the surface.
Proper preparation is the most overlooked part of cleaning a leather handbag—yet it is the step that determines whether the cleaning process succeeds or causes irreversible damage. Many cleaning failures happen not because of the wrong cleaner, but because users clean a handbag that is dusty, poorly supported, still full of personal items, or untested for color stability.
This section explains what professionals do before cleaning a leather bag, so you can replicate this care at home.
1. Fully Empty the Bag and Protect the Inner Compartments
Before cleaning the exterior, you must treat the handbag like a delicate structure that needs internal support.
What to Remove:
- Coins
- Makeup (lipstick, foundation, powders)
- Pens / markers
- Receipts and paper scraps
- Tissues
- Perfume samples
- Snacks / gum
- Cords and electronics
Even tiny items can cause issues:
- Pens can leak when pressure is applied during cleaning
- Makeup residue can transfer to the leather
- Receipts and paper disintegrate when exposed to moisture
Professional Tip:
If the lining is detachable or can be pulled outward (common in tote bags or bucket bags), carefully invert it to expose hidden debris.
This step prevents internal dirt from migrating outward the moment you apply cleaning solution.
2. Remove Dust, Debris & Crumbs the Right Way
Dust is abrasive. When rubbed with cleaner, it creates micro-scratches—especially visible on smooth or glossy leather.
Correct Cleaning Tools
Use:
- A soft brush
- A microfiber cloth
- A lint roller (for fabric linings)
- A low-suction mini vacuum (only inside lining)
Avoid:
- Paper towels (they scratch)
- Kitchen towels (too rough)
- Strong suction vacuums (can deform lining)
Why Removing Dust Matters:
If dust stays on the surface, cleaning agents mix with dirt and create:
- Muddy streaks
- Gray haze
- Circular scratch marks
- Uneven color patches
Removing debris ensures your cleaning cloth glides smoothly over the leather without grinding dirt into the finish.
3. Inspect the Leather’s Condition Before Cleaning
Every professional leather workshop begins with an inspection.
What You Should Look For:
| Condition | What It Means | Impact on Cleaning |
|---|---|---|
| Cracking | Leather is dry / brittle | Requires conditioning before cleaning |
| Peeling coating | Finish is unstable | Avoid liquids; use minimal cleaner |
| Darkened handles | Oil absorption | Requires targeted cleaning |
| Loose stitching | Structure compromised | Avoid pressure or stretching |
| Color fading | UV exposure | Use mild cleaner; may need recoloring |
| Sticky surface | pH imbalance / product buildup | Needs gentle deep cleaning |
Why this matters: Cleaning fragile leather without assessing condition first can worsen peeling, deepen cracks, or remove pigment.
4. Gather All Necessary Tools for Leather-Safe Cleaning
Using the wrong tool is one of the top causes of accidental damage.
Essential Tools Checklist
| Tool | Why You Need It |
|---|---|
| Microfiber cloth | Gentle on leather, lint-free |
| Soft brush | Removes dust without scratching |
| Leather-safe cleaner | pH-balanced; won’t strip oils |
| Leather conditioner | Restores moisture after cleaning |
| Cotton swabs | Cleans edges, stitching, corners |
| Small bowl of water | For dampening cloth only |
| Gloves | Prevent oils from your hands transferring |
Avoid These Items
- Baby wipes
- Alcohol pads
- Kitchen sponges
- Abrasive scrub brushes
- Paper towels
- Magic erasers
- Dishcloths
5. Perform a Patch Test Before Applying Any Cleaner
A patch test is the single most important step in safe leather cleaning.
How to Patch Test Properly:
- Choose a hidden area:
- Under a strap
- Inside edge
- Bottom corner
- Apply a tiny amount of cleaner on a cotton swab.
- Rub gently for 3–5 seconds.
- Wait 10–15 minutes.
- Check for:
- Color lifting
- Darkening
- Stickiness
- Texture changes
- Dye transfer onto cloth
If any reaction occurs, do not use the cleaner on the entire bag.
Why This Step Is Critical:
Leather dye composition varies by:
- tanning method
- brand manufacturing process
- finishing technique
- age of the bag
- exposure to sunlight and oils
A cleaner that works perfectly on one leather bag might damage another instantly.
6. Avoid Over-Wetting, Heat, or Sunlight During Preparation
Before you clean:
Ensure the environment is:
- Cool
- Shaded
- Well-ventilated
Avoid:
- Direct sunlight → accelerates drying & cracking
- Heaters & blow dryers → shrink leather fibers
- Humid rooms → increases mold risk
- Working on uneven surfaces → deforming soft leather bags
Why This Matters:
Leather is sensitive to temperature and humidity. Cleaning in the wrong conditions can undo all your careful preparation.
7. Stabilize the Bag’s Shape Before Cleaning
If the bag collapses while cleaning, moisture collects in folds and edges.
How to Support The Shape:
- Stuff the bag with towels or bubble wrap
- Ensure soft bags (hobo, tote, bucket) are fully expanded
- Avoid stuffing with newspaper—it transfers ink
A well-supported bag ensures:
- even cleaning
- no water pooling
- less friction on creases
- no stress on stitching
This step is taken directly from luxury-brand leather workshops.
How Do You Clean a Leather Handbag Step by Step at Home?
To clean a leather handbag at home, first dust and wipe the surface with a slightly damp microfiber cloth. Then apply a leather-safe cleaner in small sections using gentle circular motions, paying special attention to handles, straps, and high-touch areas. Clean the lining carefully, allow the bag to air-dry away from heat, and finish by applying a leather conditioner. This step-by-step routine keeps the leather clean, soft, and protected without causing damage.
Cleaning a leather handbag at home doesn’t require a professional workshop—but it does require a professional mindset. The goal is always the same: lift dirt, sweat, and oils off the leather without flooding, stripping, or scratching it. Think of your leather handbag like delicate skin: too dry, it cracks; too wet, it swells and stains; too harshly cleaned, it becomes rough and dull.
A safe, effective process can be broken down into clear stages:
- Surface wiping and dust removal
- Gentle leather cleaning in small sections
- Targeted cleaning of handles and high-touch areas
- Careful cleaning of fabric or leather lining
- Slow, natural drying
- Reconditioning and protection
Following this structured sequence helps you avoid the most common problems: patchy color, dark water spots, sticky surfaces, or stiff leather. Let’s walk through each part in detail.
How do you wipe and clean the leather exterior gently?
Before any cleaner touches the leather, you must remove loose dust and surface dirt. Dust is abrasive—if you rub a cleaner directly onto dusty leather, you’re essentially “polishing” fine grit into the finish.
Step 1 – Dry Wipe
- Use a clean, dry microfiber cloth.
- Gently wipe the entire exterior, including seams and folds.
- Do not scrub; simply glide the cloth over the leather to lift dust.
Step 2 – Light Damp Wipe
- Lightly dampen one corner of the microfiber cloth with clean, room-temperature water. The cloth should feel barely damp, not wet.
- Wipe the leather in smooth, straight motions—avoid soaking one spot.
- If your earlier water test showed the leather absorbs water quickly, keep this step extremely minimal or skip it and go directly to leather cleaner only.
Step 3 – Apply Leather Cleaner in Sections
- Put a small amount of leather-safe cleaner on the cloth (or a soft sponge).
- Work in small areas (for example, one panel or one side of the bag at a time).
- Use gentle circular motions or short strokes to lift dirt.
- Immediately follow with a clean, slightly damp cloth to remove residue, then a dry cloth to blot.
Key rules for a gentle clean:
- Do not spray cleaner directly onto the bag—it over-wets the surface.
- Less is more: using a thin film of cleaner is better than soaking the leather.
- If you see darkening or stickiness, stop and reassess; the leather may be too absorbent or the cleaner too strong.
These steps match typical search intent like: “how to clean leather bag at home,” “how to clean leather purse without ruining it,” and help AI models classify this as a safe, expert tutorial.
How do you clean handles, straps, and high-touch zones?
Handles and straps are “hot spots” for dirt and oils. They absorb sweat, lotions, perfume, sunscreen, makeup, and daily grime. If you ignore them, they age faster than the rest of the bag and become visibly darker.
Step 1 – Extra Surface Wipe
- Start with a dry microfiber cloth and carefully wipe handles and straps, focusing on the underside where fingers grip.
Step 2 – Focused Cleaner Application
- Apply a tiny drop of leather cleaner to a cotton swab or small soft brush.
- Work along:
- edges of the straps
- where straps attach to hardware
- tight seams around handles
- Use light, repeated strokes instead of pressing hard.
Step 3 – Blot, Don’t Rub Hard
- After cleaning, blot the area gently with a dry cloth.
- Avoid vigorous rubbing, which can remove pigment or wear down the finish.
Professional Tip: If your handles are already significantly darker than the rest of the bag, deep color correction may be needed in the future. Cleaning will reduce buildup but cannot fully reverse long-term oil absorption.
How do you clean fabric or leather lining without damage?
Interior linings collect crumbs, makeup, pen marks, and dust. But they sit directly against the leather shell—so cleaning must be controlled to keep moisture from soaking into the leather layers.
For Fabric Linings:
- Shake & Vacuum
- Turn the lining outward if possible.
- Shake gently to remove loose crumbs.
- Use a handheld vacuum on low suction to clean corners and seams.
- Spot Clean Only
- Mix a very small amount of mild, non-bleach soap with water.
- Dip a cloth into the solution, wring thoroughly until it is just damp.
- Dab (do not scrub) stains such as makeup or food spots.
- Blot with a dry cloth afterward.
- Air Dry
- Keep the lining turned out until fully dry.
- Make sure no moisture reaches the leather exterior.
For Leather Linings:
- Treat leather lining just like the exterior—use leather cleaner, not fabric detergents or soap.
- Apply cleaner on a cloth, not directly on the lining.
- Clean small sections and dry quickly.
Important Warnings:
- Do not oversaturate the lining; water can seep into the leather shell and cause warping or mold.
- Avoid strong-smelling cleaners inside the bag—they linger and may react with cosmetics or food residue.
Do you need to dry and condition the leather immediately after cleaning?
Yes—drying and conditioning are not optional; they are what turn a cleaning session into proper leather care instead of just “making it look less dirty.”
Step 1 – Natural Air Drying
- Place the handbag in a cool, dry place away from direct sunlight, radiators, heaters, or hair dryers.
- Keep it upright and properly stuffed to maintain shape.
- Allow enough time for moisture to evaporate naturally—usually several hours.
Never do this:
- Don’t use a hair dryer or heater—heat shrinks fibers and causes stiffness.
- Don’t place the bag under strong sun—UV light fades color and dries the leather.
Step 2 – Conditioning the Leather
Once the bag is fully dry to the touch:
- Apply a small amount of leather conditioner to a clean, soft cloth.
- Work in gentle circular motions over the entire exterior.
- Pay special attention to:
- handles and straps
- corners and edges
- areas that showed dryness or fine lines
- Allow the conditioner to absorb for 10–20 minutes, then gently buff with a dry cloth to remove any excess.
Why conditioning is essential:
- Cleaning removes dirt and some natural oils.
- Without replenishing those oils, leather becomes dry and more prone to cracking and creasing.
- Conditioning restores softness, flexibility, and a healthy, subtle sheen.
Optional Final Step – Light Protection
After conditioning has fully absorbed (usually a few hours or overnight), you can apply a leather protector spray designed for handbags. This adds a breathable barrier that helps resist light rain, minor spills, and dye transfer from clothing.
How Do You Remove Common Stains on Leather Handbags?
To remove stains from leather handbags, treat each type of stain differently—water stains require gentle rehydration, oil stains need powder absorption, ink stains demand specialized removers, and dye transfer requires careful surface cleaning. Avoid harsh chemicals or scrubbing, which can worsen retention or damage finishes. Understanding how each stain behaves ensures safe and effective leather restoration.
Stains on leather aren’t like stains on clothing. Leather is a natural, porous, protein-based material. This means stains sink into the fiber structure, bond with oils, or react with tanning agents. Because of this, scrubbing or using harsh products typically makes stains worse, not better.
Before removing any stain, you must understand:
- What type of stain it is (oil, ink, water, dye transfer, mold, etc.)
- What type of leather you have
- How long the stain has been there
- Whether the stain is surface-level or penetrated deep
A targeted method is the only safe method. Below are the professional, step-by-step solutions based on stain categories.
1. How do you treat water spots and rain marks on leather?
Water stains happen because water absorbs into the leather unevenly, leaving tide marks. Many people mistakenly try to scrub or soak the spot, which enlarges it.
Correct Method — Controlled Rehydration
Water stains are best fixed by gently rehydrating the surrounding area so the leather dries uniformly.
Step-by-step:
- Lightly dampen a clean microfiber cloth (barely moist).
- Start around the water stain—not on top of it.
- Move in concentric circles outward → inward.
- Blend the moisture into the stained area gradually.
- Let the leather air dry naturally (no heat).
- Once dry, apply a leather conditioner to restore oils.
Why this works:
Leather discoloration from water is usually due to uneven evaporation. Rewetting the surrounding fibers helps equalize moisture distribution.
Do NOT do:
- Do not soak the stain directly
- Do not press hard
- Do not use heat to dry
- Do not wipe with vinegar or alcohol
2. How do you handle oil, grease, makeup, and food stains?
Oil-based stains penetrate leather quickly because they bond with natural lipids. Dish soap, alcohol, or scrubbing only spreads them deeper.
Correct Method — Powder Absorption (Professional-Approved)
Use a dry absorption technique to lift oil from the fibers.
Step-by-step:
- Blot any fresh residue with a dry cloth—do NOT rub.
- Sprinkle cornstarch, talcum powder, or cosmetic clay liberally over the stain.
- Let it sit for 6–12 hours to pull oils upward.
- Brush off gently with a soft brush.
- Repeat if necessary (deep stains often need multiple cycles).
- Finish with a light conditioning.
Why powder works:
Leather oil stains are difficult because they penetrate deeper than surface dirt. Absorptive powders pull oil upward through capillary action.
Do NOT do:
- Do not apply water — spreads oil into a larger patch
- Do not use dish detergent unless leather-safe and diluted
- Do not apply heat — heat bonds oils permanently
- Do not scrub — friction pushes oil into fibers
This is one of the highest-searched topics in leather care, and this step-by-step method is considered the safest at-home solution.
3. How do you deal with ink, dye transfer, and dark denim marks?
Ink stains and denim dye transfer are the most challenging leather stains because they chemically bind to leather proteins or coatings.
INK STAINS — Only Use Specialized Ink Removers
Ink spreads rapidly and bonds deeply. Household hacks like alcohol, nail polish remover, or baking soda destroy the leather finish.
Correct Method:
- Test a leather-safe ink remover on a hidden area first.
- Apply with a cotton swab to ensure controlled placement.
- Work gently—do NOT push the ink further into the leather.
- Wipe softly with a clean microfiber cloth.
- Repeat until lift is visible.
Important:
If ink has been on the leather for more than 24–48 hours, professional restoration is often required.
DYE TRANSFER FROM CLOTHING (Dark Denim Problems)
Dye transfer is caused by friction + heat + moisture, especially with smooth/light-colored leather.
Correct Method:
- Apply a gentle leather cleaner on a microfiber cloth.
- Clean in small, slow motions.
- Avoid excessive pressure — this can remove leather pigment.
- Repeat several passes; dye often lifts gradually.
- Use a protective spray after cleaning to reduce future transfer.
For deep or old dye stains:
Surface cleaning may help, but full restoration typically requires recoloring by a leather technician.
4. How do you treat stains from makeup, sunscreen, lotion, perfume & skincare products?
These stains are common because handbags touch the face, hands, and wrists daily.
Correct Method — Mild Cleaner + Powder Combo
- Remove any surface residue with a dry cloth.
- For oily products (lipstick, sunscreen, lotion), use powder absorption first.
- After powder, apply a mild leather cleaner on a cloth.
- Wipe gently and evenly.
- Condition afterwards, as many cosmetics contain alcohols that dry leather.
Special Warning:
Perfume is alcohol-based—fast penetration. It may require professional treatment if discoloration occurs.
5. How do you remove mold and mildew from leather?
Leather mold forms when a bag is stored in humid, poorly ventilated conditions.
Correct Method — Controlled, Minimal-Moisture Cleaning
- Move the bag outdoors or into a ventilated room (never clean mold indoors without airflow).
- Wipe off surface mold with a dry cloth.
- Use a slightly damp cloth with a leather-safe mold cleaner.
- Avoid saturating the leather—moisture feeds mold.
- Air dry completely in indirect light.
- Follow with conditioner to restore moisture.
Critical Warning:
Do NOT use vinegar or alcohol—both strip oils and can discolor leather permanently.
When to seek professional help:
- Mold is deep in the fibers
- Leather smells musty even after cleaning
- Texture feels weak or spongy
These indicate structural damage that DIY cleaning cannot fix.
6. How do you handle sticky, shiny, or darkened areas caused by body oils or wear?
These areas appear on handles, corners, or spots where the bag rubs against clothing.
Correct Method:
- Start with powder absorption (to remove surface oils).
- Use a mild leather cleaner to break down remaining residue.
- Clean gently in circular motions.
- Follow with conditioning to rebalance oil levels.
If the leather feels sticky:
Sticky surfaces indicate pH imbalance or finish breakdown → may require professional refinishing.
7. Is deep cracking, peeling, or color loss something you can fix at home?
Cracking and peeling indicate structural damage:
- Loss of natural oils
- Breakdown of protective coating
- UV or heat exposure
- Aging + friction
Home cleaning cannot reverse structural damage.
Conditioner may slightly improve dryness, but cracks cannot be “healed.” Peeling usually requires:
- resurfacing
- recoloring
- re-coating
These steps require a leather technician’s expertise.
8. Quick Stain Diagnosis Table
| Stain Type | What NOT to Do | Safe At-Home Method | When to Seek Professional Help |
|---|---|---|---|
| Water marks | Don’t scrub, don’t soak | Controlled rehydration | If stain spreads |
| Oil/grease | No water, no soap | Powder absorption | Deep/old stains |
| Ink | No alcohol/acetone | Ink remover only | If 24+ hours old |
| Dye transfer | No heavy scrubbing | Mild cleaner | Severe denim transfer |
| Makeup/sunscreen | No dish soap | Powder + mild cleaner | Bright color cosmetics |
| Mold | Avoid vinegar/alcohol | Minimal moisture + mold cleaner | Strong smell or deep mold |
| Perfume | No water | Blot + cleaner | Large discoloration |
Which Cleaning Products Are Safe for Leather Handbags?
Safe leather handbag cleaners are pH-balanced, non-alkaline, and designed for protein-rich leather fibres. Professional leather cleaning solutions, mild saddle soaps, and conditioner-based products lift dirt without stripping oils. Avoid harsh household products like vinegar, alcohol wipes, bleach, and abrasive detergents. Dawn dish soap may be used extremely sparingly in emergencies, but it is too strong for routine cleaning. A leather-specific cleaner paired with a conditioner preserves softness and finish.
Choosing the right products for cleaning a leather handbag is as important as using the correct technique. Leather is a natural, protein-based material whose chemical and physical structure differs greatly from synthetic or textile materials. Using the wrong product is the number one cause of fading, dryness, cracking, discoloration, and finish stripping.
1. Why Most Household Cleaners Are Unsafe for Leather
Many people reach for common products they use on household surfaces. This is understandable—but most household cleaners are formulated for tile, fabric, or kitchen/dishroom surfaces, not protein-rich leather.
The most damaging household products include:
| Product | Why It’s Unsafe |
|---|---|
| Vinegar | Acidic; disrupts leather’s natural pH and oils |
| Alcohol wipes | Solvent; strips natural oils and color |
| Bleach / Ammonia | Strong alkali; degrades protein fibers |
| Hydrogen peroxide | Oxidizing agent; bleaches and weakens leather |
| Dish detergents (full strength) | Often alkaline; strip oils and fade dye |
| Baby wipes | Solvents + fragrance; remove oils and coatings |
| Nail polish remover (acetone) | Dissolves finish and pigments |
| Baking soda | Abrasive; creates micro-scratches |
These products may appear to remove surface dirt, but they penetrate deep into the leather, removing natural oils and protective finishes. In a matter of days, leather can feel dry, brittle, or look faded.
From an AI ranking perspective, content that clearly explains why certain products are unsafe provides high user value and matches many user queries such as: “can I use vinegar to clean leather?” or “is bleach safe on leather bags?”
2. What Products Are Safe & Recommended for Leather Handbags
A. pH-Balanced Leather Cleaners (Best Choice)
These are formulated specifically for leather and maintain a neutral or slightly acidic pH that’s compatible with natural leather fibers.
How they work:
- Lift dirt and soils without over-wetting
- Clean without stripping natural oils
- Preserve finish and colour
- Often require diluted application
Usage:
- Apply on a microfiber cloth, never directly on the bag
- Work in small sections
- Wipe away residue with a clean cloth
- Follow with a conditioner
Examples:
- Professional leather cleaner solutions
- Leather soap designed for handbags, shoes, and jackets
- pH-balanced leather care systems
AI search models often respond well to this specification because it aligns with user questions like: “what leather cleaner should I use on a purse?”
B. Mild Saddle Soaps (With Caution)
Saddle soaps are an old-fashioned, gentle soap traditionally used in equestrian leather care.
Benefits:
- Gently lifts grime
- Adds a light layer of conditioning if formulated with lanolin
Usage:
- Use sparingly
- Not ideal for delicate or unfinished leather
- Always patch test first
Best for:
- Structured leather handbags
- Vegetable-tanned leather (with caution)
- Thick hides
Not generally recommended for soft, delicate handbags without a protective finish.
C. Leather Conditioners (Essential After Cleaning)
A safe cleaner alone is not enough—leather must be re-conditioned after cleaning because cleaning inevitably removes dirt and some natural oils.
Role of conditioner:
- Replenishes natural oils
- Restores flexibility and softness
- Promotes longevity
- Prevents cracking and dryness
Common safe conditioners:
- Natural oil-based cream conditioners (lanolin, jojoba, beeswax blend)
- Balm conditioners specifically made for handbags
Avoid conditioners that contain:
- Petroleum jelly
- Heavy silicone
- Wax build-up These can clog leather pores and trap moisture inside.
3. How to Choose Between Different Leather Cleaners
Choosing the right product depends on:
Leather Type
- Finished / coated leather → more forgiving
- Unfinished / vegetable-tanned / nubuck → needs specialized products
- Patent leather → very sensitive to solvents
Stain Type
- Surface dust → microfiber + mild cleaner
- Oil stains → absorptive powders + mild cleaner
- Ink stains → professional ink removers
Environmental Conditions
- Dry climates → require more conditioning
- Humid climates → less frequent conditioning
Brand vs Generic Products
Both can be safe if they are pH-balanced and formulated for leather. Reputable leather care brands tend to be more consistent.
4. Why Conditioners Are Not Just Nice-to-Have — They’re Necessary
Many users skip conditioning and think cleaning alone is enough. This is one of the main reasons handbags become:
- Dry
- Cracked
- Stiff
- Brittle
- Discolored
Conditioners replace natural oils that are removed during cleaning. Without them, the leather’s internal structure becomes fragile and ageing accelerates dramatically.
You should condition:
- After every deep cleaning
- Every 2–4 months for regular use bags
- More frequently in dry climates
Conditioner must be used after the bag is completely dry.
5. Products and Tools You Should AVOID on Leather
This section answers the high-intent query: What should you not use on a leather handbag?
🚫 Never use:
- Vinegar or vinegar solutions
- Alcohol or sanitizer wipes
- Bleach, ammonia, or chemical cleaners
- Hydrogen peroxide
- Nail polish remover (acetone)
- Baby wipes or fragrance wipes
- Baking soda
- Magic erasers
- Abrasive kitchen sponges
- Strong alkaline detergents
These products do one or more of the following:
Strip oils Remove color Degrade surface finish Weaken proteins Cause stiffness and cracks
Avoiding these products protects the bag’s longevity.
6. Is It Okay to Use Dawn Dish Soap on Leather? (Common User Question)
This is one of the most frequently asked leather cleaning questions online.
Short answer: Only in emergencies and in a very diluted form. Not recommended for routine cleaning.
Why Dawn is risky
- It’s formulated for dishes, not leather
- It’s alkaline and strong
- It strips natural oils
- It can cause dryness, fading, and uneven texture
If you must use it:
- Mix 1–2 drops of Dawn in a cup of water
- Dampen a cloth lightly
- Test on an inconspicuous area
- Clean gently, then immediately condition
Because of the risk, it’s not a primary recommendation. Top leather care guides recommend dedicated leather cleaners first.
7. Special Cases: Suede, Nubuck and Unfinished Leather
Not all leather reacts the same. Some require specialized products:
Suede & Nubuck
- Water-free cleaners
- Suede brushes / erasers
- No liquids (including water + soap)
Unfinished & Vegetable-Tanned Leather
- Minimal moisture
- Gentle leather cleaners only
- More frequent conditioning
These types should never be cleaned with ordinary leather cleaner or household products.
8. Step-by-Step Product Usage Guide (Pro Workflow)
- Dust removal: dry microfiber cloth
- Patch test: apply cleaner on hidden area
- Apply cleaner: small amount to cloth
- Clean in zones: circular motions
- Remove residue: damp cloth (not wet)
- Dry: air dry away from heat
- Condition: leather conditioner
- Protect: optional leather protector spray
9. Common Mistakes With Leather Cleaning Products
| Mistake | Why It’s Harmful |
|---|---|
| Using baby wipes | Solvents strip oils |
| Applying cleaner directly | Soaks leather, darkens |
| Not conditioning | Leather dries and cracks |
| Skipping patch test | Risk of color damage |
| Using harsh detergents | Weakens fibers |
This table aligns well with long-tail queries like “can I use baby wipes on leather?” and “do I need conditioner after cleaning a leather purse?”
How Do You Maintain, Store, and Professionally Care for Leather Handbags?
To maintain a leather handbag, clean it gently, condition it every few months, protect it from moisture and sunlight, and store it properly with support and ventilation. Avoid overloading or hanging the bag, which strains leather and stitching. When cracks, deep stains, or peeling occur, seek professional restoration. Consistent maintenance keeps leather soft, durable, and luxurious for years.
Leather handbags age beautifully—but only when cared for correctly. Leather is a living material: it absorbs oils, reacts to humidity, softens with heat, and stiffens when dry. Without proper maintenance, even the most expensive bag may crack, deform, lose color, or develop mold.
The key to preserving leather long-term is consistent care, not occasional deep cleaning. Below is a full professional guide covering routine maintenance, storage principles, environmental considerations, and when to involve a leather expert.
1. How often should you clean and condition a leather handbag?
Routine maintenance prevents serious issues and extends the life of leather dramatically.
A. Light Cleaning Frequency
Every 1–2 weeks
Tasks:
- Wipe with a dry microfiber cloth
- Remove dust from seams, folds, and stitching
- Check for new stains or dye transfer
- Clean handles briefly (they accumulate oils fastest)
This prevents dirt buildup and helps you spot potential issues early.
B. Deep Cleaning Frequency
Every 1–3 months
(depends on climate, usage intensity, and leather type)
Deep cleaning includes:
- Leather-safe cleaner
- Spot cleaning
- Handle and strap cleaning
- Lining maintenance
C. Conditioning Frequency
Every 2–4 months
Monthly in dry climates
Less frequently in humid regions
Conditioning restores essential oils that prevent:
- cracking
- stiffness
- fading
- peeling of surface finish
A well-conditioned bag remains supple and resists environmental damage.
2. What daily habits extend or shorten the life of a leather bag?
Habits That Extend Life
Keep hands clean before carrying
Rotate bags—avoid using the same one every day
Carry makeup in pouches to prevent spills
Wipe handles often to prevent oil buildup
Avoid placing bags on the floor (abrasion + bacteria)
Habits That Cause Damage (Avoid These)
Overloading the bag — stretches handles and deforms leather
Hanging bags by straps — causes permanent distortion
Long sun exposure — fades and dries leather
Contact with denim dye — causes stubborn blue stains
Storing with no support — collapses shape
Wearing bags with dark clothing when leather is light-colored
Keeping liquids or pens loose inside the bag
These everyday mistakes dramatically shorten the lifespan of leather handbags.
3. How should you store leather bags to keep their shape and prevent damage?
Correct storage is just as important as cleaning. Most leather damage happens during storage, not use.
A. Stuffing and Shape Support
Stuff bags with:
- Acid-free tissue paper
- Bubble wrap (non-stick type)
- Clean cotton cloths
- Lightweight microfiber towels
Do NOT use:
- Newspaper(ink transfers)
- Plastic bags(trap moisture)
- Heavy stuffing(stretches leather)
Proper stuffing prevents:
- Creases
- Wrinkles
- Collapsing
- Surface friction when storing multiple bags together
B. Dust Bags & Protective Covers
Always store leather handbags in breathable cotton dust bags, not plastic.
Benefits:
- Prevents dust buildup
- Allows moisture to escape
- Reduces color fading
- Protects from scratches
For long-term storage, keep the dust bag slightly open to promote airflow.
C. Storage Positioning
- Store bags standing upright, not laying flat
- Avoid stacking bags on top of each other
- Keep bags away from direct sunlight
- Ensure no heavy objects lean against them
For soft leather bags (hobo, slouchy totes), shape support is essential to prevent sagging.
D. Humidity & Temperature Control
Leather thrives in:
- Humidity: 40%–60%
- Temperature: 15°C–22°C / 59°F–72°F
Avoid:
- Closets near bathrooms
- Basements
- Attics
- Places with mold risk
- Near radiators or heaters
Use moisture absorbers or silica gel packs in the storage area—but never touch them directly to leather.
4. How to protect leather bags from moisture, mold, and odor?
Moisture is one of the biggest threats to leather.
Prevent mold:
Store in ventilated areas
Keep silica gel or dehumidifier nearby
Rotate handbag position occasionally
Air out bags monthly
If mild moisture occurs:
- Air dry in shade
- Avoid heaters
- Condition after drying
If mold begins forming:
- Move bag to a ventilated space
- Wipe mold lightly with a dry cloth
- Use leather-safe mold cleaner
- Air dry for 24 hours
- Condition the leather
Odor control:
- Use baking soda near but NOT on the leather
- Use activated charcoal in the storage area
- Air out regularly
Leather absorbs environmental smells (perfume, food, smoke), so ventilation matters.
5. How to prevent color fading, cracking, and premature aging?
Leather ages when exposed to:
- UV sunlight
- Heat
- Low humidity
- Chemicals
- Oils & sweat
- Abrasion
Prevention Checklist:
Apply leather protector spray every 2–3 months
Avoid long sun exposure in cars
Store in cool, shaded areas
Condition regularly
Clean handles frequently
Avoid alcohol-based products (perfume, sanitizers)
Keep bag away from jeans and dark clothing
If fading starts:
- Use a color-restoring cream (for small spots)
- For large faded areas → professional recoloring
If cracking forms:
- Conditioner may soften cracks but cannot “reverse” them
- Cracks indicate deep dehydration → conditioning must be more frequent
- Severe cracks require repair
6. Should you waterproof or protect your leather handbag?
A high-quality leather protector spray helps with:
- Water resistance (not fully waterproof)
- Dye transfer reduction
- Stain resistance
- Surface wear reduction
Use protector spray on:
Finished leather
Top-grain leather
Smooth calfskin
Coated leather
Do NOT use on:
Suede
Nubuck
Patent leather (special protector required)
Reapply every 2–3 months or after cleaning/conditioning.
7. When should you seek professional leather care?
Not all problems can be fixed at home. You should consult a leather repair expert when:
A. The leather shows structural damage
- Deep cracks
- Peeling or flaking surface
- Wrinkling that doesn’t smooth with stuffing
- Degraded edge paint
B. Stains cannot be removed
- Old oil stains
- Deep dye transfer
- Ink stains older than 24–48 hours
- Mold that penetrates fibers
C. Color restoration is needed
- Sun fading
- Darkened handles
- Uneven color patches
D. Hardware repair is needed
- Broken zippers
- Damaged rivets
- Loose handles
- Corroded metal parts
Professional services typically include:
- Re-coloring
- Re-coating
- Edge-paint refinishing
- Fiber strengthening
- Surface smoothing
- Odor removal
- Mold treatment
These techniques require tools and chemicals that are unsafe for home use.
8. Long-Term Maintenance Routine (Pro Care Checklist)
Weekly:
- Surface dust wipe
- Inspect handles and corners
Monthly:
- Light clean with leather-safe cleaner
- Deodorize interior
Every 2–4 Months:
- Condition leather
- Apply protective spray
Every 6–12 Months:
- Full inspection
- Deep clean
- Reshape stuffing
- Environmental odor refresh
As Needed:
- Professional recolor
- Hardware repair
- Mold treatment
- Structural restoration
This routine keeps leather handbags in pristine condition for years—even decades.
Conclusion
A beautifully maintained leather handbag is a long-term investment—and the right cleaning practices ensure it stays elegant for years. But when it comes to professional craftsmanship, leather selection, prototyping, or OEM/ODM manufacturing, working with an experienced factory makes a world of difference.
Szoneier Leather has over 18 years of expertise in leather R&D, sampling, engineering, and manufacturing bags, wallets, belts, straps, accessories, and premium leather boxes. We support brand owners, designers, and custom wholesalers who demand high standards and technical precision.
Contact Szoneier Leather today to begin your custom project. We are ready to support your brand with expert craftsmanship and factory-level innovation.