How Do You Glue Leather:A Professional Guide to Adhesives, Prep, and Long-Lasting Bonds
If stitching is the soul of leathercraft, adhesive is the skeleton. Glue decides whether a strap delaminates, an edge lifts, or a bag keeps its clean, crisp lines after years of grab-and-go. Yet most failures aren’t because “glue is bad”—they happen because the wrong adhesive met the wrong leather under the wrong conditions. The good news: with the right chemistry, surface prep, and process control, leather bonds can be clean, flexible, and ridiculously strong.
To glue leather well, match adhesive to leather type, prep the surface (deglaze, roughen, dust-free), control open/tack time, and apply firm uniform pressure until fully cured. Contact cements give instant high tack, PU adhesives add flexible strength and heat resistance, and water-based systems lower VOCs. For structural seams, combine glue with stitching. Correct prep and pressure—not just the brand of glue—determine long-term bond integrity.
A small story: a boutique brand once blamed a “bad batch” of glue for handles peeling on a hot summer launch. The real culprit? Coated splits, no deglazing, and a factory floor at 33 °C with 80% humidity. We rebuilt the process—primer, proper open time, a calibrated roller, and a 24-hour cure at 23 °C—and the returns disappeared. Below is the exact playbook we use at Szoneier Leather to make bonds that last.
What Adhesives Work Best on Leather?
For most leather-to-leather seams, solvent contact cement delivers fast, high tack; water-based contact lowers VOCs with slightly longer dry times; PU (polyurethane) adhesives excel in heat, flex, and multi-material bonds; epoxy is niche (rigid parts, hardware set). Cyanoacrylate (super glue) and hot-melt are spot fixes—not primary structural bonds. Choose by leather type, flexibility needs, temperature exposure, and production speed.
Adhesive Chemistries at a Glance
| Adhesive Type | Best For | Flexibility | Heat Resistance | Tack/Speed | VOC/Safety | Typical Use Cases |
|---|---|---|---|---|---|---|
| Solvent Contact Cement (polychloroprene) | Leather–leather | High | Medium (to ~70–80 °C) | Very fast; instant grab after tack | Higher VOC; ventilation needed | Edge folds, panel lamination, straps |
| Water-Based Contact Cement | Leather–leather | High | Medium | Moderate; longer dry to tack | Low VOC | Clean rooms, children’s goods, indoor lines |
| PU (Polyurethane) One- or Two-Part | Leather–leather/plastics/fabric/rubber | Very High | High (90–120 °C once cured) | Medium | Moderate VOC (varies) | Hot climates, footwear-grade seams, mixed substrates |
| Epoxy (2-part) | Leather–metal inserts | Low (rigid) | Very High | Medium | Moderate; exotherm | Hardware seats, nameplates |
| Cyanoacrylate (CA) | Tiny fixes | Low–Medium | Medium | Ultra fast | Low–moderate; fume irritation | Edge chips, quick tacks before stitching |
| Hot-Melt EVA | Temporary holds | Low | Low | Very fast | Low | Jigs, positioning before real glue |
Which is stronger—Contact, PU, or Epoxy?
“Strength” depends on mode. Leather fails by peel and flex, not static shear alone. PU often wins in fatigue + heat. Contact cement wins in speed + peel for leather-to-leather. Epoxy is overkill—and too rigid—for most seams but great for metal anchors.
Are water-based as durable as solvent-based?
Modern water-based contacts can match peel strength if you dry to proper tack, apply enough pressure, and allow a full cure. They are more sensitive to humidity and require tighter process control.
Do CA and hot-melt have a place?
Yes,for micro repairs, edge chips, or temporary positioning. Don’t rely on them as your primary structural bond in flexible leather goods.
Which Leather Types and Surfaces Influence Glue Choice?
Leather chemistry, finish, and the counter-surface dictate adhesive choice. Open, absorbent leathers (veg-tan, aniline full-grain) bond well with contact cements; oily/pull-up and waxed hides need de-oiling plus primer or PU adhesive. Coated splits, patent, and PU/PVC “faux” leathers favor PU (often with primer). Suede/nubuck require pre-compression and higher solids. For mixed substrates—foam, fabric, plastics, metal—use PU or epoxy as appropriate. Surface prep (deglaze, scuff, dust control) is as critical as glue chemistry.
Start with the leather itself: grain, tannage, and finish
A. Full-grain, aniline veg-tan (open, absorbent)
- Behavior: Wets easily; fibers drink adhesive and lock mechanically.
- Prep: Light scuff (320–400 grit), dust off.
- Adhesive: Solvent or water-based contact cement excels; 35–45 g/m² per side.
- Notes: Water-based contact is great here if RH is controlled (≤60%).
B. Top-grain, semi-aniline or pigmented chrome-tan (finished)
- Behavior: Finish layer lowers surface energy; glue “floats” if not keyed.
- Prep: Gentle deglaze (IPA or dedicated deglazer), very light scuff to break surface glaze, dust off.
- Adhesive: Contact cement is fine; for heavy finishes, step up to PU (1K/2K) for better wet-out.
- Notes: Avoid over-scuffing through the finish; it can print through on show faces.
C. Suede / Nubuck (fuzzy nap)
- Behavior: High absorbency; nap wicks glue and can starve the joint.
- Prep: Pre-compress nap with a roller; optionally back-size with a thinned first coat, let dry, then bond.
- Adhesive: Contact cement (solvent or water-based) with slightly higher coat weight.
- Notes: Mask show areas; stray glue shows on nap.
D. Oiled / “pull-up” and waxed leathers
- Behavior: Migrating oils and waxes inhibit adhesion over time (edge lift weeks later).
- Prep: Wipe with n-heptane (or similar) to de-oil; full flash-off 5–10 min. Use a compatible primer.
- Adhesive: PU adhesive (1K/2K) preferred; contact cement can work only with excellent prep + primer.
- Notes: Expect periodic verification—oil migration varies batch-to-batch.
E. Coated split, patent, heavily finished fashion leathers
- Behavior: Non-porous topcoat; poor mechanical key.
- Prep: Mechanical key (220–320 grit) on the bond area only + primer.
- Adhesive: PU with primer is the most reliable stack.
- Notes: Keep heat low during cure to avoid finish distortion.
F. Exotics (ostrich, croc, lizard) & embossed plates
- Behavior: Uneven micro-topography; valleys can trap air.
- Prep: Target the bond flange—scuff flat underside only; avoid show grain.
- Adhesive: Contact for leather-to-leather; PU for mixed substrates.
- Notes: Clamp/roll thoroughly to wet-out low spots.
G. PU (faux) leather / PVC synthetics
- Behavior: Plasticizers migrate; surface energy is low.
- Prep: Solvent wipe, then plastics primer (per supplier).
- Adhesive: PU is standard; avoid CA and hot-melt for structural seams.
- Notes: Long-term tests should include heat/humidity cycles to catch plasticizer effects.
The counter-surface matters as much as the leather
| Counter-Surface | Typical Challenge | Best Practice Stack |
|---|---|---|
| EVA/PU Foam | Solvent melt, compression set | PU adhesive (foam-safe), modest pressure, full 24h cure |
| Textiles (poly/cotton) | Wicking, weak shear | Back-size fabric (thin first coat), then contact or PU |
| TPR/Rubber | Low surface energy | Halogenation/primer → PU adhesive |
| Rigid Plastics (ABS/PC/PVC) | Differential expansion | Light scuff + plastics primer → PU |
| Metal (badges, frames) | Rigid, thermal cycling | Scuff + degrease → 2-part PU or epoxy |
Rule of thumb: If one side is flexible leather and the other is plastic/foam/rubber/metal, PU wins for its flexibility and heat resistance. Only switch to epoxy for small rigid inserts (logos, screws), never for large, flexible seams.
Quick diagnostics before you commit
- Water-bead test: If water beads aggressively on the bond area, plan for deglaze + primer or PU.
- Tape pull: Apply painter’s tape to the finish, pull sharply; heavy flake → avoid aggressive scuffing (finish is fragile).
- Dyne check (if available): Target ≥38 dyn/cm for reliable wetting; primers raise surface energy on plastics.
- Mock-up peel: 25 mm strip T-peel after 24 h cure; aim for fiber tear (substrate failure) rather than adhesive failure.
Primers & promoters (when to use them)
- Oily/waxy leathers: After heptane wipe, a lean primer improves contact/PU anchoring.
- Coated splits/patent & PU/PVC synthetics: Plastics-oriented primers or isocyanate crosslinkers for the adhesive.
- Rubber/TPR: Use the rubber supplier’s halogenation/primer system, then PU adhesive.
Tip: Keep primer use surgical—only on bond flanges—and log lot numbers; over-priming can embrittle edges.
Recommended stacks by scenario (process targets included)
| Scenario | Prep | Adhesive | Coat Weight | Pressure | Cure |
|---|---|---|---|---|---|
| Full-grain ↔ full-grain panel | Scuff 320–400, dust | Solvent contact (both sides) | 35–45 g/m² | Roller 0.2–0.4 MPa | 12–24 h |
| Pull-up fold-over | Heptane wipe, primer | PU (1K/2K) | Film-thin | Clamp 2–5 min | 24 h |
| Coated split ↔ fabric liner | Scuff + primer | PU | Film-thin | Roller + edge clamp | 24 h |
| Leather ↔ EVA foam | Light scuff leather | PU (foam-safe) | Thin | Light clamp | 24 h |
| Leather ↔ metal badge | Scuff/degrease metal | 2-part PU or epoxy | Thin | Fixture 5–15 min | 12–24 h |
| Suede ↔ veg-tan | Pre-compress nap | Contact (back-size suede) | +10% solids | Roller | 24–48 h |
| PU faux ↔ PU faux | Solvent wipe + plastics primer | PU | Thin | Clamp | 24 h |
Failure modes you’ll see—and how to fix them
- Adhesive failure (clean separation): Bad wetting/open-time—improve deglaze/primer; extend open time to proper tack; increase pressure.
- Cohesive failure (glue tears within itself): Under-cure or too much glue; use thinner coats and allow full cure.
- Edge lift after weeks: Oil/plasticizer migration—switch to PU, introduce primer, add environmental cycle testing.
- Foam melt or surface print-through: Solvent too “hot” or pressure too high; move to foam-safe PU and reduce pressure/heat.
Environmental realities (why a “good glue” still fails)
- Humidity >65% RH: Water-based contact never reaches proper tack—add warm-air assist or switch to solvent/PU for that line.
- Floor temp >30 °C: Solvent flashes before wet-out—apply thinner coats, shorter open times, or cool the process area.
- Cold rooms (<15 °C): PU cure slows; plan warm post-cure (40–50 °C) to hit handling strength.
Decision tree (fast)
- Is either substrate plastic/foam/rubber/metal? → PU (primer as needed).
- Both are absorbent leathers? → Contact cement (water-based if you want low VOC).
- Oily/waxy or heavy finish? → De-oil/deglaze + primer → PU.
- Tiny rigid insert only? → Epoxy or 2K PU, not across flexible seams.
How Do You Prepare Leather for a Reliable Bond?
Deglaze and dust off the surface, lightly roughen (typically 320–400 grit), remove oils with appropriate solvent, and let dry. Control the environment (≈20–26 °C, 40–60% RH). Mark alignment, apply adhesive to both sides when required, and respect open/tack windows. Good prep converts “difficult” leathers into predictable, repeatable bonds.
1) Deglaze & De-oil
- Deglazer: Light wipes with isopropyl alcohol (IPA) or a purpose deglazer remove silicones/waxes.
- Oiled leathers: Wipe with n-heptane or hexane-based cleaner; allow full flash-off (5–10 min).
2) Mechanical Keying
- Scuff gently (320–400 grit) to raise micro-tooth without thinning the edge.
- For coated splits, increase aggressiveness (220–320 grit) but avoid cutting through to weak fibers.
3) Dust Control
- Brush and air-blast. Dust in the glue line becomes a weak plane.
4) Environmental Controls
- Target 23 °C / 50% RH. High humidity slows water-based systems; high heat flashes solvent too fast.
5) Open Time / Tack / Clamp
- Open time: Time after application before surfaces touch.
- Tack time: Moment adhesive feels dry-tacky; contact cements bond on tack, not wet.
- Clamp/pressure time: Time under pressure until initial set.
Typical Process Windows (Guide)
| Adhesive | Open Time | Tack Time | Press Time | Full Cure |
|---|---|---|---|---|
| Solvent Contact | 5–10 min | 10–20 min until dry-tack | 10–30 sec firm pressure | 12–24 h |
| Water-Based Contact | 10–20 min (depends RH) | 20–40 min | 30–60 sec | 24–48 h |
| 1-Part PU | 5–15 min | N/A (wet bond) | 2–5 min clamp | 24 h (heat accelerates) |
| 2-Part PU | 10–20 min (pot life) | N/A | 2–5 min clamp | 12–24 h |
| Epoxy (5–30 min) | N/A | N/A | 5–15 min | 8–24 h |
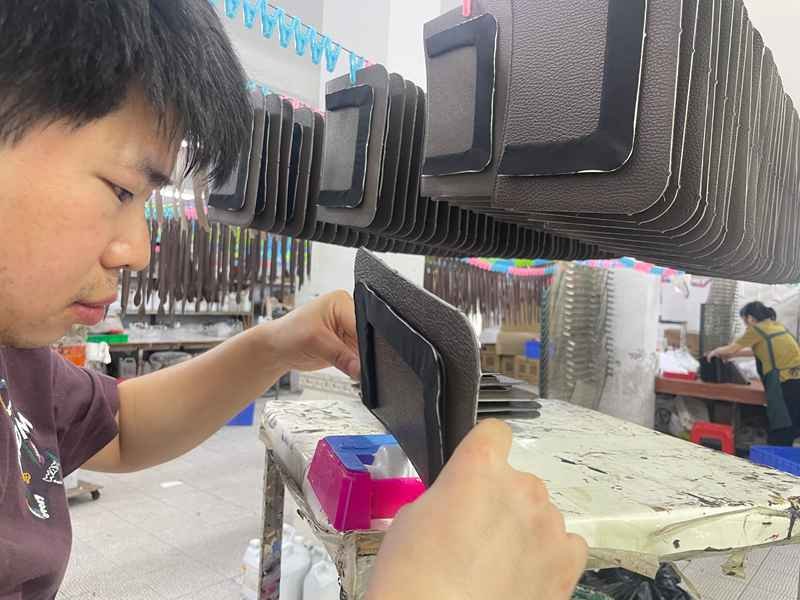
How Do You Apply, Clamp, and Cure Leather Adhesives Correctly?
Apply thin, even coats (both sides for contact cement; one or both for PU per spec). Wait to dry-tack for contact systems, then join once—no sliding. Use roller pressure (0.2–0.4 MPa) or clamping to wet-out the interface. Maintain temperature/humidity, avoid over-glue, and allow a full 12–48 h cure before stress, heat forming, or stitching.
Step by Step Guide
- Prep both surfaces (deglaze, scuff, dust-free).
- Apply thin, uniform coat to both sides (brush or spray 35–45 g/m²).
- Wait until dry-tack—no transfer to finger but still sticky.
- Align once (no slide).
- Roll with a hand roller (metal or rubber) across entire bond line with firm pressure; edges too.
- Edge clamp complex curves (10–20 min).
- Rest 12–24 h before heavy handling or stitching.
PU Adhesive—Step by Step
- 1-part PU: Apply to one or both surfaces, assemble while wet, clamp 2–5 min. Heat activation (50–60 °C) can boost early strength.
- 2-part PU: Mix per ratio (e.g., 10:1). Observe pot life. Apply, assemble within open time, clamp. Elevated cure (40–50 °C) shortens full-cure time.
Is heat or roller pressure required?
Not always, but pressure is near-universal for better wet-out. Heat helps PU crosslink and improves early handling strength; be cautious with heat near finished leather—keep under 60 °C unless specified.
Production Limits
- Keep RH under 65% for water-based contact.
- Avoid >30 °C floors for solvent contacts (flashes too fast; poor wet-out).
- Use exhaust/ventilation with solvent cements.
Do You Glue, Stitch, or Both—Which Construction Is Best?
For cosmetic laminations and edge folds, glue alone can suffice. For load-bearing seams (handles, straps, gussets), glue + stitching is best practice: adhesive prevents creep and fray during use; stitching delivers long-term mechanical security. Use skiving and edge-paint compatible glues; let adhesive fully dry before sewing to avoid gummed needles.
Why Hybrid Wins
- Peel vs. Shear: Glue resists peel at the edge and holds layers stable during sewing; stitches then carry cyclic loads.
- Dimensional Stability: Glue minimizes fabric/leather shift under the presser foot for straight seams.
Edge Folding & Skiving
- Skive fold areas to 50–70% of original thickness for neat roll-overs.
- Apply thin contact cement; burnish or edge-paint after full cure to avoid solvent reactions.
Sewing Through Glued Seams—Avoid Gumming
- Let contact cement dry/cure; don’t sew through wet.
- Choose water-based contact for sewing-heavy operations—less residue on needles.
- Wipe needles with a tiny amount of silicone-free machine oil if buildup occurs.
Relative Gains (Guideline)
| Build | Peel Resistance | Flex Fatigue | Recommended Use |
|---|---|---|---|
| Glue Only | Medium–High | Medium | Edge folds, liners, decorative panels |
| Stitch Only | Medium | High (seam dependent) | Visible seams where lamination isn’t needed |
| Glue + Stitch | High | Very High | Straps, handles, gussets, weight-bearing parts |
How Do You Test Bond Strength, Fix Mistakes, and Ensure Longevity?
Use peel (ASTM D903) and lap shear tests, plus humidity/heat cycling to validate process windows. For cleanup or rework, choose solvents compatible with the adhesive and leather finish. Control VOCs, ventilation, PPE, and keep detailed batch records. Storage, UV, and sweat exposure simulations forecast real-world performance.
1) QC & Validation
- Peel Test (T-peel): Cut 25 mm strips; measure force to peel at 300 mm/min.
- Lap Shear: Bond 25×100 mm overlaps; pull in shear until failure.
- Environmental Cycling: 24 h at 50 °C → 24 h at 5 °C; 96 h at 90% RH; UV exposure (UVA-340) to check yellowing/embrittlement.
- Sweat/SeBUM Simulation: Wipe with artificial sweat (pH ~5.5), observe edge lift over 24–72 h.
2) Failure Analysis
- Adhesive failure (glue cleanly lifts): surface prep or open time wrong.
- Cohesive failure (glue tears within itself): under-cured or overloaded.
- Substrate failure (leather delaminates): leather too weak—consider skive strategy or different adhesive.
3) Rework & Cleanup
| Issue | Fix | Solvent Notes |
|---|---|---|
| Squeeze-out on grain | Lift with wooden spatula; spot clean | IPA first; avoid acetone on aniline |
| Misaligned bond (contact) | Heat gently (60 °C) + peel back; re-tack | Use heptane for residue on pigmented leather |
| Foam melt (PU foam) | Switch to PU adhesive; avoid hot solvents | Test on scrap; minimal solvent exposure |
| Edge lift | Re-open with heat, inject PU/contact, clamp | Re-burnish after cure |
4) Safety & Compliance
- VOCs: Prefer water-based where possible; for solvent cements ensure exhaust ventilation.
- PPE: Nitrile gloves, safety glasses, organic vapor respirators in solvent zones.
- Regulatory: Maintain MSDS/technical datasheets; design for REACH/RoHS compliance where applicable.
5) Shelf Life & Storage
- Store adhesives at 10–25 °C, sealed. Avoid freeze–thaw for water-based systems. Rotate FIFO.
How Can Brands Partner with Szoneier Leather for OEM Adhesive Processes?
Szoneier offers low MOQs (from 200 pcs), rapid sampling (7–10 days), in-house material R&D, and custom adhesive lines, primers, jigs, and QC protocols. We document process windows (open/tack/press), keep MSDS/lot traceability, and deliver scalable, repeatable bonding across bags, wallets, belts, straps, accessories, and leather boxes.
End-to-End Engineering
- Material Matching: We map your leathers (full-grain, coated splits, exotics) to the right adhesive + primer stack.
- DFM (Design for Manufacturability): We suggest skive depths, seam allowances, and folding geometries that help glue wet-out and stitching alignment.
Sampling & Scale-Up
- 7–10-Day Prototypes: With real adhesives and jigs; not “mock” builds.
- Pilot to Mass: We lock SOPs with explicit open/tack windows, pressure specs (roller/clamp), and cure criteria.
QC & Documentation
- Peel and lap-shear baselines on every batch; environmental cycling where required.
- Full traceability: adhesive lot, ambient logs, operator, and tooling.
Sustainability Options
- Water-based contact systems, low-VOC rooms, and recycled liners/boards to align with your brand’s goals.
Categories We Serve
- Bags (tote/backpack/travel), Wallets, Belts & Straps, Accessories, Leather Boxes—each with tailored bonding stacks and edge programs.
Adhesive Selection Cheat Sheet
| Scenario | Recommended Stack |
|---|---|
| Full-grain to full-grain panel lamination | Solvent contact cement, thin coats both sides; 0.3 MPa roll |
| Oiled pull-up fold | Heptane wipe → primer → PU adhesive → clamp 5 min |
| Coated split to fabric liner | Roughen + primer → PU adhesive → 24 h cure |
| Leather to metal badge | Scuff metal + degrease → Epoxy or 2-part PU |
| Leather to EVA foam | PU adhesive; avoid solvent that melts foam; light pressure |
| Edge fold before edge-paint | Water-based contact; full dry; paint after 24 h |
Conclusion & Custom Inquiry
Great leather bonds aren’t mysterious—they’re process-driven. Match the chemistry to the material, prep consistently, respect open/tack/press windows, and validate with simple tests. Do that, and your edges stay crisp, your laminations lie flat, and your products look premium for years.
Want production-ready bonding without the guesswork?
Partner with Szoneier Leather—18+ years of leather R&D, prototyping, and manufacturing. We’ll specify the right adhesive system, build jigs, document SOPs, and scale your line with low MOQs and fast lead times.
What Can I Do For You?
Here, developing your OEM/ODM private label leather goods collection is no longer a challenge,it’s an excellent opportunity to bring your creative vision to life.
Make A Sample First?
If you have your own tech packs, logo design artwork, or just an idea,please provide details about your project requirements, including preferred fabric, color, and customization options,we’re excited to assist you in bringing your leather goods designs to life through our sample production process.