Bringing a leather product from a hand-drawn concept to a polished, market-ready item is as much an art as it is a science. It involves creative vision, material knowledge, technical precision, and iterative refinement—all underpinned by client collaboration.
Custom leather design and prototyping begin with detailed sketching to establish form and function, followed by material selection—choosing full-grain, top-grain, or corrected leather, linings, and hardware. Digital tools (CAD, 3D rendering) speed concept validation before hand-crafted prototypes emerge in the workshop. Rigorous testing—tensile, abrasion, finish adhesion—and client feedback loops refine the sample. Scalable production and thoughtful packaging then launch the product to shelf. Each step ensures quality, consistency, and brand alignment.
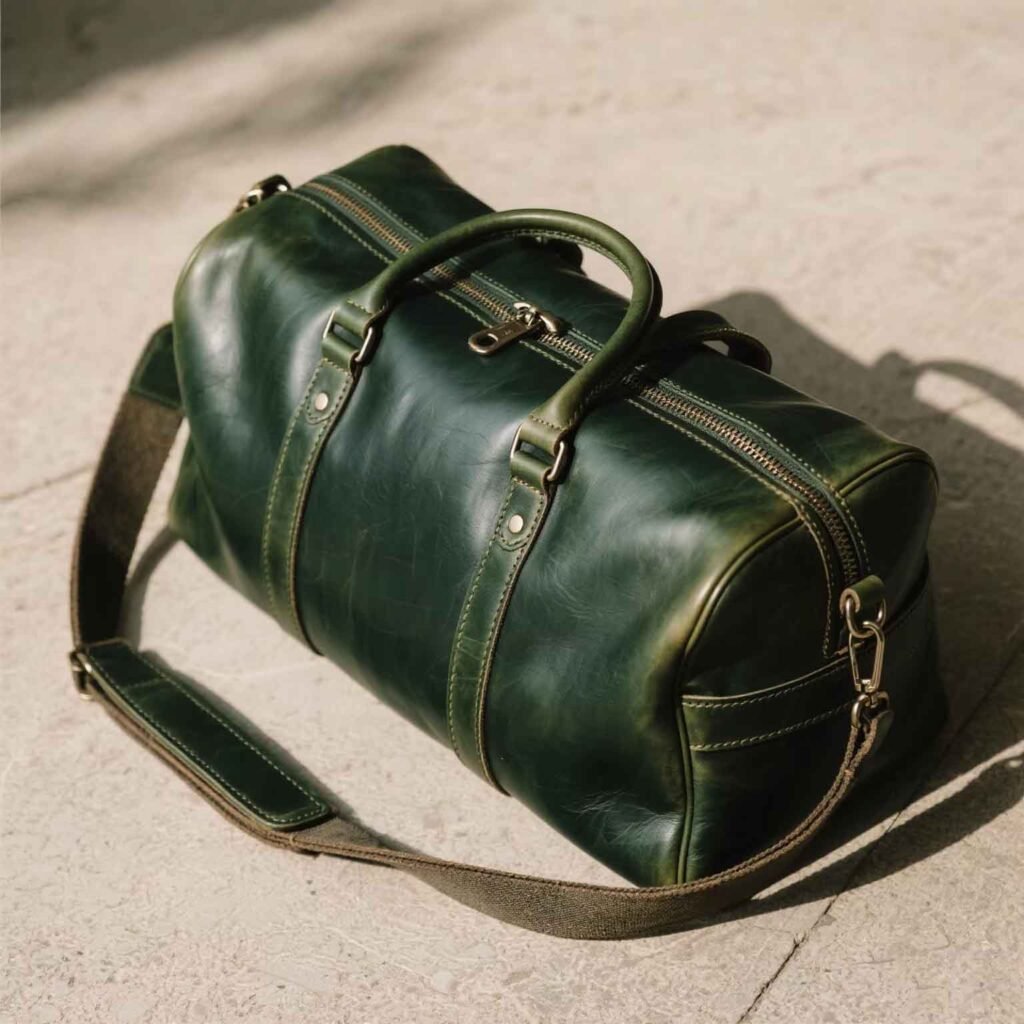
Imagine a boutique brand founder sketching a sleek leather belt bag. Within weeks, that sketch becomes a living sample—touched, tested, and tweaked—until it’s ready for mass production. Let’s explore how Szoneier’s 18+ years of expertise power this journey.
What Are the First Steps in Sketching Custom Leather Goods?
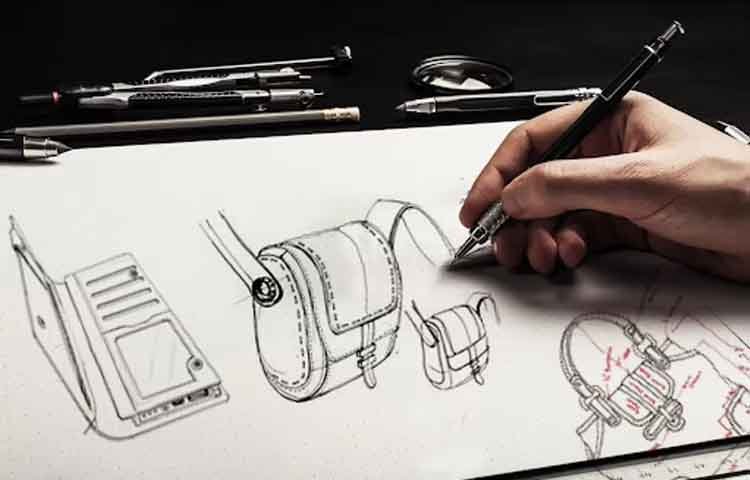
The first step is to translate your idea into clear, annotated sketches that define silhouette, dimensions, and key features—pockets, straps, closures. Start with rough freehand concepts to explore proportions, then refine into technical drawings showing seam lines, stitch types, and hardware placement. Attaching leather and lining swatches to the sketch helps align material choices. Well-detailed sketches guide both digital patterning and workshop prototyping, ensuring everyone—designer, engineer, and client—shares a unified vision.
- Gathering the Design Brief Begin by interviewing stakeholders and reviewing any brand or customer personas. Ask questions like: What problem does this leather good solve? Who will use it, and in what context? A commuter backpack, for instance, may demand quick-access phone pockets and reinforced straps, while a luxury clutch prioritizes sleek lines and delicate hardware. Clarify price point and volume goals—these influence complexity and materials.
- Freehand Concept Exploration On blank sheets, rapidly sketch 5–8 silhouette variants, focusing on overall shape rather than fine detail. Use light pencil strokes to play with form: curved vs. angular profiles, gusset depth, handle length. Annotate each sketch with bullet-point notes: “drop handle: 150 mm,” “magnetic snap closure,” or “zipper under flap.” This ideation phase encourages creativity without the constraint of perfection.
- Technical Annotation & Dimensioning Select the most promising concepts and produce cleaner orthographic drawings—front, side, and top views—complete with exact measurements (e.g., 300 × 200 × 80 mm). Mark seam allowances (usually 8–10 mm), stitch lines, edge-fold locations, and panel shapes. Indicate leather thickness zones (e.g., 1.4 mm body hide, 0.8 mm flap skiving). Note hardware specs: “25 mm matte-black D-ring,” “YKK® #5 coil zipper.”
- Integrating Material Swatches Affix small squares of your chosen leather grades and lining fabrics directly onto the sketch. Label each swatch—“full-grain chestnut,” “210 D nylon olive interior”—and draw arrows showing where they apply. Early tactile sampling helps clients and engineers understand hand feel, weight, and color interactions before moving to CAD or physical prototyping.
How Do You Select the Right Leather Types, Linings, and Hardware?
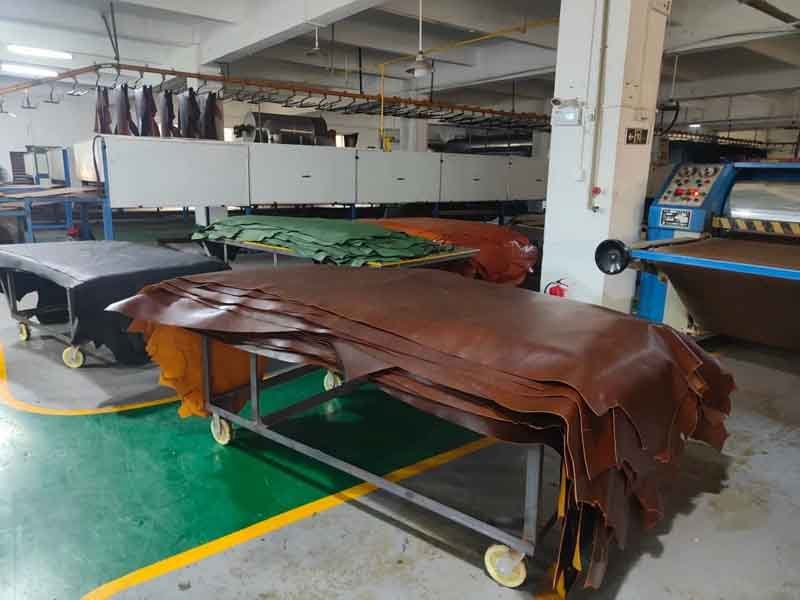
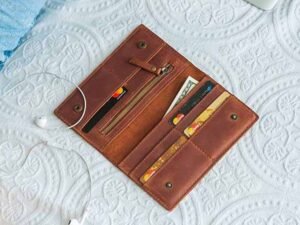
Choosing materials starts by matching product use-cases and brand positioning. Full-grain leather delivers premium durability and natural patina; top-grain offers uniformity and slightly lower cost; corrected-grain ensures consistent finish for entry-level lines. Linings—nylon for water resistance, cotton for breathability, microfiber for luxury—support function and brand story. Hardware (YKK® zippers, zinc-alloy buckles, brass rivets) should align with leather grade and usage demands. Lab tests on tensile strength, abrasion, and colorfastness validate each component before prototyping.
Aligning Leather Grade with Function and Aesthetics
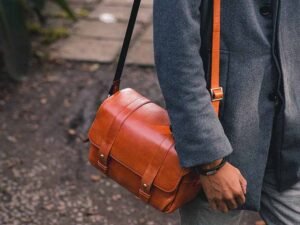
- Full-Grain Leather: Ideal for luxury goods—bags, wallets, belts—where natural grain, scars, and patina enhance character. Its superior tensile strength (≥550 N) and thickness (1.2–1.4 mm) withstand heavy use but command $12–$20 per sq ft.
- Top-Grain Leather: Sanded to remove imperfections, offering a smooth, consistent surface for uniform dye uptake. With strength around 450 N and thickness of 1.0–1.2 mm, it balances durability and cost (≈$8–$12 per sq ft), making it popular for higher-end ready-to-wear.
- Corrected-Grain Leather: Embossed to simulate grain, this affordable option ($5–$8 per sq ft) suits utility bags and accessories where color uniformity matters more than natural texture.
Selecting Linings for Performance and Feel
- Nylon (210–420 D): Lightweight, water-repellent, and abrasion-resistant—perfect for travel and outdoor gear. Its smooth surface reduces friction with contents and cleans easily with a damp cloth.
- Cotton Canvas (8–12 oz): Offers a natural, breathable interior for eco-friendly or heritage brands. While slightly heavier, it appeals to customers who value organic textiles and can be wax-treated for spill resistance.
- Microfiber Suede: Provides a plush, premium interior for luxury lines. Its soft nap protects delicate items like sunglasses or phones, though it carries a higher cost ($5–$7 per sq ft) and may trap lint.
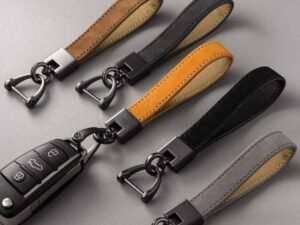
Hardware Choices That Enhance Quality and Cohesion
- Zippers: YKK® VISLON® plastic zippers resist corrosion and glide smoothly, ideal for heavier hides; coil zippers (YKK® #3–#5) work well in wallets and small pouches.
- Buckles & Adjusters: Die-cast zinc alloy offers strength and a polished finish; brass plating adds warmth and ages gracefully. Match finish (brushed vs. polished) to leather tone—matte black hardware pairs well with darker hides, while antique brass complements warm browns.
- Rivets & Snaps: Stainless steel and solid brass rivets reinforce high-stress points (strap bases, pocket corners). Snaps and magnetic closures should be load-tested (500+ open/close cycles) to ensure long-term reliability.
| Hardware | Material | Use Case | Cost/Unit (USD) |
|---|---|---|---|
| Zippers (YKK®) | Metal & coil | Main closures, pockets | 0.50–1.50 |
| Buckles & D-rings | Zinc alloy, brass | Straps, decorative accents | 0.75–2.50 |
| Rivets & snaps | Stainless steel | Reinforcement, closures | 0.10–0.50 |
Validating Through Lab Testing
Before finalizing selections, Szoneier conducts:
- Tensile Tests (ISO 3376): Verify leather strips meet strength specs for straps and stress-bearing areas.
- Abrasion Resistance (ISO 5470-1): Ensure linings and hardware-contact points exceed 30,000 Martindale cycles for everyday use.
- Colorfastness (ISO 11640/11641): Confirm dyes resist fading under UV exposure and perspiration (ΔE < 2).
By thoughtfully aligning leather grade, lining fabric, and hardware to your product’s intended function and brand narrative—and validating choices with objective tests—you set the foundation for prototypes that not only look stunning but stand up to real-world demands.
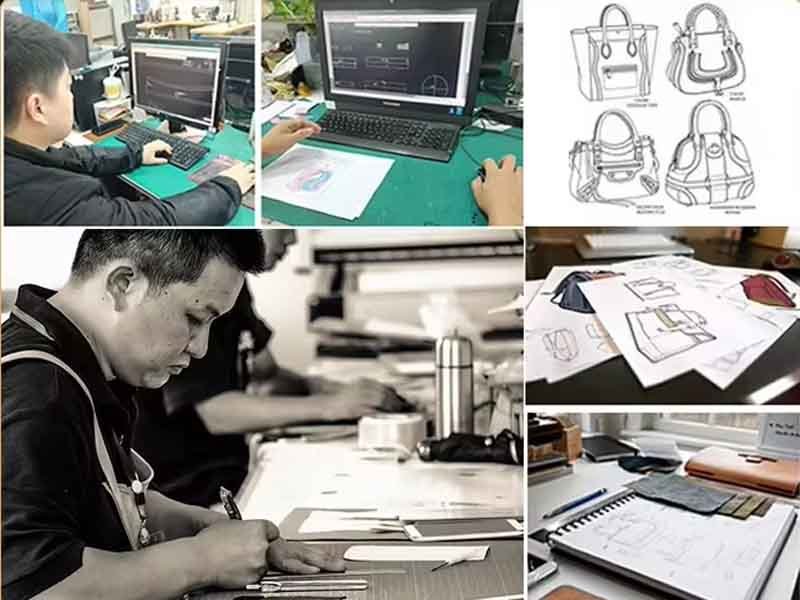
Which Digital Tools and CAD Techniques Streamline Leather Design?
Leather design benefits from CAD software like Adobe Illustrator for precise flat patterns, Rhino or AutoCAD for 3D modeling, and Clo3D for realistic drape simulations. Nesting tools (Optitex, Gerber AccuMark) optimize panel layouts, cutting leather waste by up to 15%. Integration with CAM machines (laser or clicker cutters) ensures panel accuracy within ±1 mm. Cloud-based collaboration platforms keep all stakeholders aligned on live design revisions, accelerating prototype cycles and reducing errors.
2D Pattern Development with Vector Software
- Adobe Illustrator & CorelDRAW: Designers create flat patterns with exact seam allowances and annotation layers, exportable as DXF for cutting machines. Live measurement tools ensure dimensions match technical specs (e.g., 300 mm × 200 mm panels). Illustrator’s symbols and assets libraries speed repeated elements—like pocket cutouts and stitch guides—across multiple designs.
3D Prototyping and Virtual Sampling
- Clo3D & Browzwear: These platforms let you apply real-world leather properties—thickness, stiffness, drape—and virtually assemble prototypes. You can test zipper placement ergonomics, pocket accessibility, and strap curvature without producing a single hide panel. Changes in pattern dimensions (e.g., gusset depth) are reflected instantly in the 3D model, reducing physical sample iterations by up to 40%.
Marker Making & Material Utilization
- Nesting Software (Optitex, Gerber AccuMark): Automatically nest pattern pieces to maximize yield, cutting material waste from roughly 25% down to 10–12%. This is crucial when working with high-cost full-grain hides ($12–$20 per sq ft). Marker reports predict material needs and help plan hide procurement to minimize leftover scraps.
CAM Integration for Precision Cutting
- Laser & Clicker Cutters: DXF outputs from CAD go directly to CNC clicker presses or laser tables, achieving panel-edge accuracy within ±1 mm. This consistency eliminates manual pattern tracing errors, speeds the workshop sampling pace, and ensures each prototype matches the digital blueprint exactly.
Collaborative Platforms & Version Control
- Cloud Storage (Dropbox, Google Drive) & PLM Systems: Centralize CAD files, tech packs, and revision histories so designers, engineers, and clients access the latest versions. Annotations and comments on shared files expedite decision-making—no more email chains with outdated attachments. Some clients integrate PLM (Product Lifecycle Management) for end-to-end tracking from design through production.
How Are Leather Prototypes Developed in the Workshop?
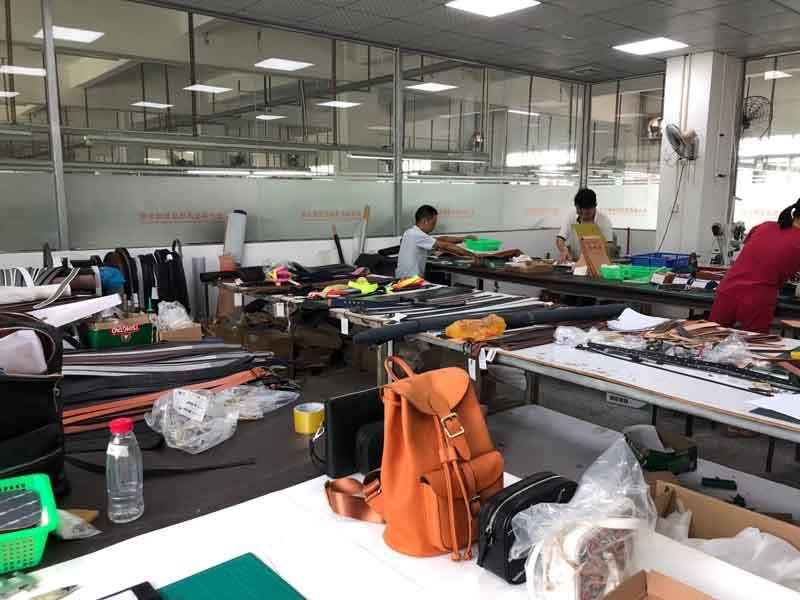
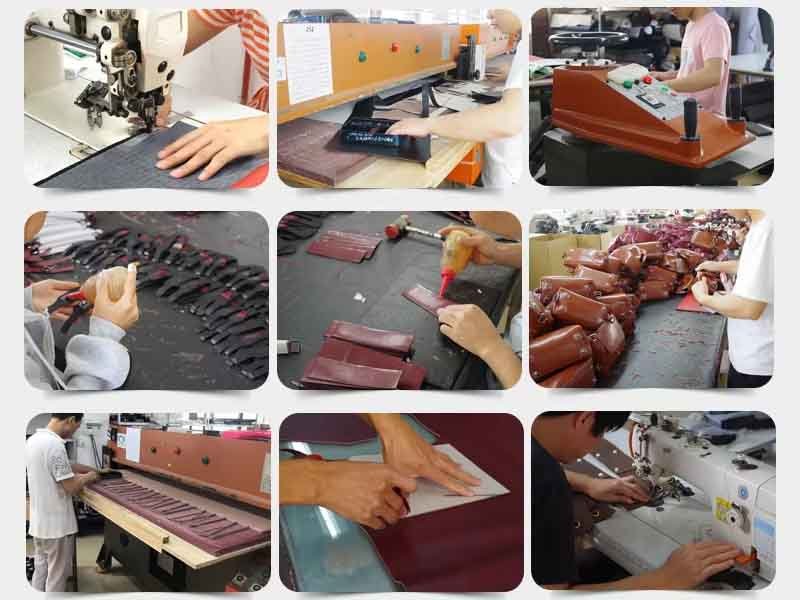
Workshop prototyping transforms digital patterns into hand-crafted samples through precise cutting, skiving, stitching, and hardware installation. Artisans use CNC clicker cutters or manual dies for panel accuracy, skive edges to reduce bulk, and employ cylinder-arm and post-bed sewing machines for seam strength. Hardware—zippers, rivets, buckles—is set using calibrated presses. Each prototype is dimension‐checked, function‐tested (load, zipper glide), and visually inspected before feedback, ensuring the sample reflects both design intent and real‐world performance.
- Precision Cutting & Skiving The prototype journey begins at the cutting table. Depending on volume and complexity, Szoneier uses either CNC clicker presses—fed DXF files from CAD—to cut each leather panel within ±1 mm tolerance, or skilled cutters with steel rule dies for small-batch runs. Once cut, panels destined for folds or seams undergo skiving: a specialized machine or hand skiving tool thins edges by 0.3–0.5 mm, ensuring smooth folds and preventing bulky seams. Precise skiving is especially critical on gussets and flap edges, where excess thickness can compromise function and aesthetics.
- Assembly & Stitching Techniques With panels prepared, prototypes move to the sewing stage. Cylinder‐arm machines tackle tubular or curved seams—like rounded bag bottoms—while post‐bed and flatbed machines handle straight seams. Stitch density is set to 8–10 stitches per inch, balancing durability with clean visual lines. Artisans select thread type (e.g., bonded nylon #69 for high abrasion areas, polyester‐wax for decorative topstitch) and adjust machine tension (typically 4.0 N) to accommodate leather thickness (1.0–1.4 mm). All stitch lines are back‐tacked at stress points—strap bases, pocket corners—to reinforce longevity.
- Hardware Installation & Functional Fit Hardware fitting follows a strict protocol: buckles and D‐rings are set with hydraulic or arbor presses calibrated to 3,000 psi, ensuring secure attachment without leather distortion. Zippers—chosen per spec (YKK® Vislon® for heavy‐use closures, coil for light pockets)—are sewn in with guiding feet to maintain parallel alignment. After assembly, prototypes undergo functional tests: weight‐load trials (e.g., 5 kg fill) to assess strap integrity, and 500 zipper open/close cycles to verify glide performance. Any snag or misalignment triggers immediate adjustment before moving forward.
- Finishing Touches & Initial Quality Checks The final workshop stage applies edge finishing—burnishing with wax and friction, then coating with acrylic edge paint for protection and color consistency. Artisans use temperature‐controlled dye baths and light sanding to achieve a uniform finish, followed by buffing for sheen. Each prototype is dimension‐checked against technical drawings (±2 mm tolerance), visually inspected under 500 lux lighting for color and stitch uniformity, and compared to material swatches for finish adherence (<ΔE 2). A 30‐point QC checklist records all findings, ensuring only fully validated samples proceed to client review.
What Testing and Quality Checks Ensure Prototype Success?
Prototypes undergo mechanical tests—tensile strength, abrasion resistance, hardware fatigue—as well as visual inspections for color consistency, stitch integrity, and edge finish. Strap load tests simulate real-world use (5,000 flex cycles), while colorfastness assessments ensure ΔE < 2 under UV and sweat exposure. A 50-point QC checklist verifies all specs before advancing to pilot production, guaranteeing each leather prototype meets functional and aesthetic benchmarks.
- Mechanical & Durability Testing Test Standard Requirement Tensile (ISO 3376) Leather strip test >350 N for corrected-grain Abrasion (ISO 5470-1) Martindale cycles >50,000 cycles at high stress Strap Fatigue 5,000 flex cycles No tears or seam gaps Hardware Pull Force 100 N Pull-off resistance >10 kg
- Aesthetic & Colorfastness
- ΔE Measurement: Color variation under light exposure and perspiration must remain under ΔE 2.
- Finish Adhesion (ASTM D3359): Cross-hatch tape test yields 4B or better.
- Functional Checks
- Closure Smoothness: Zippers and snaps cycled 1,000 times.
- Pocket Fit Tests: Standard items (smartphone, wallet) must fit without strain.
- Documentation & Traceability
- QC Reports: Detailed records logged by batch, tied to prototype ID.
- Non-Conformance Handling: Any failure triggers root-cause analysis and corrective action before re-sampling.
These rigorous checks de-risk scale-up and align prototypes with production quality.
How Do You Incorporate Client Feedback to Refine Prototypes?
Client feedback is captured through structured review sessions—either in-person or virtually—where stakeholders handle the prototype and note fit, function, and aesthetic observations. All comments feed into a centralized revision log, prioritized by impact and feasibility. Cross-functional teams (design, engineering, production) meet to assess each request, update CAD files or workshop instructions, and produce revised samples within days. This iterative loop, typically spanning 2–3 cycles, ensures the final prototype aligns precisely with client vision and performance requirements.
Structured Review Sessions
After the first workshop sample is ready, Szoneier schedules a detailed review with the client. In-person meetings allow tactile evaluation—clients can feel leather hand, test zipper smoothness, and try on straps for comfort. For remote partners, high-resolution photos, annotated 3D renders, and short video walkthroughs replicate the hands-on experience. Review checklists guide the discussion, covering silhouette accuracy, material choice, hardware operation, and stitching quality to ensure no detail is overlooked.
Centralized Revision Tracking
Every piece of feedback—whether “pocket depth should increase by 10 mm” or “zipper tape color needs to match leather”—is logged into a revision tracker. Each entry includes a unique ID, description, priority level (critical, high, medium, low), and owner (design, engineering, or workshop). This transparent system prevents requests from falling through the cracks and allows clients to monitor progress in real time, fostering trust and clarity.
Cross-Functional Alignment Meetings
Weekly sprint meetings bring together designers, pattern engineers, and production leads to review the revision log. The team evaluates the technical feasibility and cost implications of each change, consulting material experts if necessary (e.g., assessing whether a thicker lining will affect gusset flexibility). Decisions are documented, and CAD files or pattern masters are updated accordingly. This collaborative approach balances creative intent with manufacturability and budget constraints.
Rapid Iteration & Validation
Once revisions are approved, Szoneier’s workshop produces the next sample—often within 5–7 business days. This quick turnaround leverages CNC-cut panels and predefined machine setups to implement dimension changes or material swaps efficiently. Each revised prototype is then re-inspected against the original feedback points to confirm that adjustments satisfy client expectations. By limiting the process to a few focused cycles, the team avoids “feedback fatigue” and keeps the project on schedule and within cost parameters.
What Are the Best Practices for Scaling from Prototype to Full Production?
Scaling from pilot samples to mass production requires a finalized tech pack, an optimized cutting marker to reduce leather waste by 10–15%, a small pilot run (50–100 units) for process validation, and standardized SOPs for each workstation. Conduct incoming material audits, in-process inspections, and final QC on a statistically relevant sample size. Train operators on the defined workflows and freeze all design specifications before full production to ensure consistent quality, on-time delivery, and cost control.
Finalize the Tech Pack as Your Single Point of Truth
Before any large-scale order, assemble a comprehensive tech pack including:
- Flat Patterns & Grading Specs: All panel shapes with graded size breakdowns (e.g., S–XL).
- Material Allocations: Exact leather area (sq ft) per unit, lining yardage, and hardware SKUs.
- Stitch & Seam Details: Thread type, stitch density, seam allowance, edge treatments.
- Assembly Sequence: Step-by-step instructions for cutting, skiving, sewing, hardware fitting, and finishing.
This document ensures design intent, material sourcing, and production steps are fully aligned across design, sourcing, and factory teams.
Optimize Marker Making and Material Utilization
- Nesting Software: Use tools like Optitex or Gerber AccuMark to nest panels and minimize scrap leather. Achieving 85–90% yield versus typical 75–80% can save $1–$2 per unit on hides.
- Marker Report: Generate reports detailing material consumption per run, enabling precise hide procurement and budget forecasting.
| Scenario | Utilization Rate | Leather Cost Saved per 100 Units |
|---|---|---|
| Manual nesting | 75% | $300 |
| Software-optimized nest | 88% | $880 |
Pilot Production Run for Process Validation
Conduct a small-volume pilot (50–100 pieces) to:
- Validate Workflow: Verify cutting, sewing, and assembly SOPs work at speed and that cycle times meet targets.
- Identify Bottlenecks: Track where delays or defects occur—e.g., edge painting station or rivet setting.
- Gather QC Data: Inspect 10–15% of pilot units for dimensional accuracy (±2 mm), stitch integrity, and hardware performance under load tests.
Implement Rigorous Quality Control Checkpoints
- Incoming Materials: Test 10% of hides for tensile strength (ISO 3376) and color uniformity (ΔE <2).
- In-Process Inspections: At key stages—post-cut, post-sew, post-hardware—inspect 5% of units for adherence to the tech pack.
- Final Audit: Randomly sample 2–3% of full-production units, performing full functional tests (zipper cycles, load trials) before shipping.
Standardizing QC reduces defect rates—Szoneier’s goal is <0.5%—and catches issues before they propagate through large batches.
Standardize Work Instructions and Operator Training
- SOP Manuals: Create visual guides with photos for every task: skiving depths, stitch settings, edge burnishing strokes.
- Skill Certification: Test and certify operators on critical operations (e.g., buckle setting torque, edge painting consistency).
- Continuous Improvement: Implement daily or weekly “kaizen” meetings to gather operator feedback and refine processes.
Phased Production Ramp-Up and Supply Chain Coordination
- Phase 1: Pilot run and SOP freeze.
- Phase 2: Small batch (200–500 units) to stress test material logistics and packaging workflows.
- Phase 3: Full production (>1,000 units) with synchronized raw material deliveries and packaging stock to avoid line stoppages.
Coordinate with leather tanneries and hardware suppliers to lock prices and lead times, minimizing risk of material shortages or cost spikes.
How Do You Manage Packaging, Branding, and Shelf-Ready Delivery?
Delivering shelf-ready leather goods combines protective packaging—dust bags, rigid boxes with foam inserts—and cohesive branding elements—logo embossing, hangtags, care cards. Boxes are labeled with SKUs, color codes, and barcodes for retail shelving. Align shipping cartons to retailer dimensions for easy stocking. Thoughtful unboxing—tissue wrap, personalized notes—enhances customer experience and drives social media buzz.
- Protective Packaging
- Dust Bags: Custom-printed cotton or microfiber drawstring pouches to guard leather during storage and shipping.
- Retail Boxes: Rigid cartons with foam or cardboard inserts shaped to cradle the product, preventing deformation.
- Branding & Labeling
- Logo Embossing: Debossed logos on box lids and interior certificates of authenticity.
- Hangtags & Care Cards: Printed with material origin, care instructions, and brand story—enhancing perceived value.
- Shipping & Retail Prep
- Unit Packs: Boxes pre-labeled with UPC/EAN barcodes, SKU, color, and size info on side panels.
- Master Cartons: Stackable configurations (e.g., 6 units per carton) with outer labeling for quick warehouse identification.
- Unboxing Experience
- Tissue & Seals: Branded tissue paper wrapped around the product, sealed with logo stickers.
- Personalization: A thank-you note or limited-edition certificate for high-end lines encourages social sharing.
Packaging isn’t an afterthought—it’s the final brand touchpoint, cementing customer delight and loyalty.
Ready to scale your custom leather line?
Partner with Szoneier Leather for end-to-end support: detailed tech packs, nesting optimization, pilot runs, SOP development, and ISO-certified QC. Contact us today for a tailored production roadmap and transparent costing—let’s bring your prototypes to thousands of satisfied customers!